Setting Up ImpositionOutput Sequence Parameters
You have to set additional options in the ImpositionOutput sequence to have your jobs submitted to APSC.
We recommend that you edit an existing ImpositionOutput sequence and save it with a new name. In this way, you can decide later whether or not to compensate a job.
Proceed as follows to edit an ImpositionOutput sequence:
1.In Prinect Cockpit, go to "Administration > Templates > Sequence Templates > ImpositionOutput".
2.Select an existing ImpositionOutput sequence for the plate size you are using.
3.Click "Open".
The Overview of the sequence settings opens.
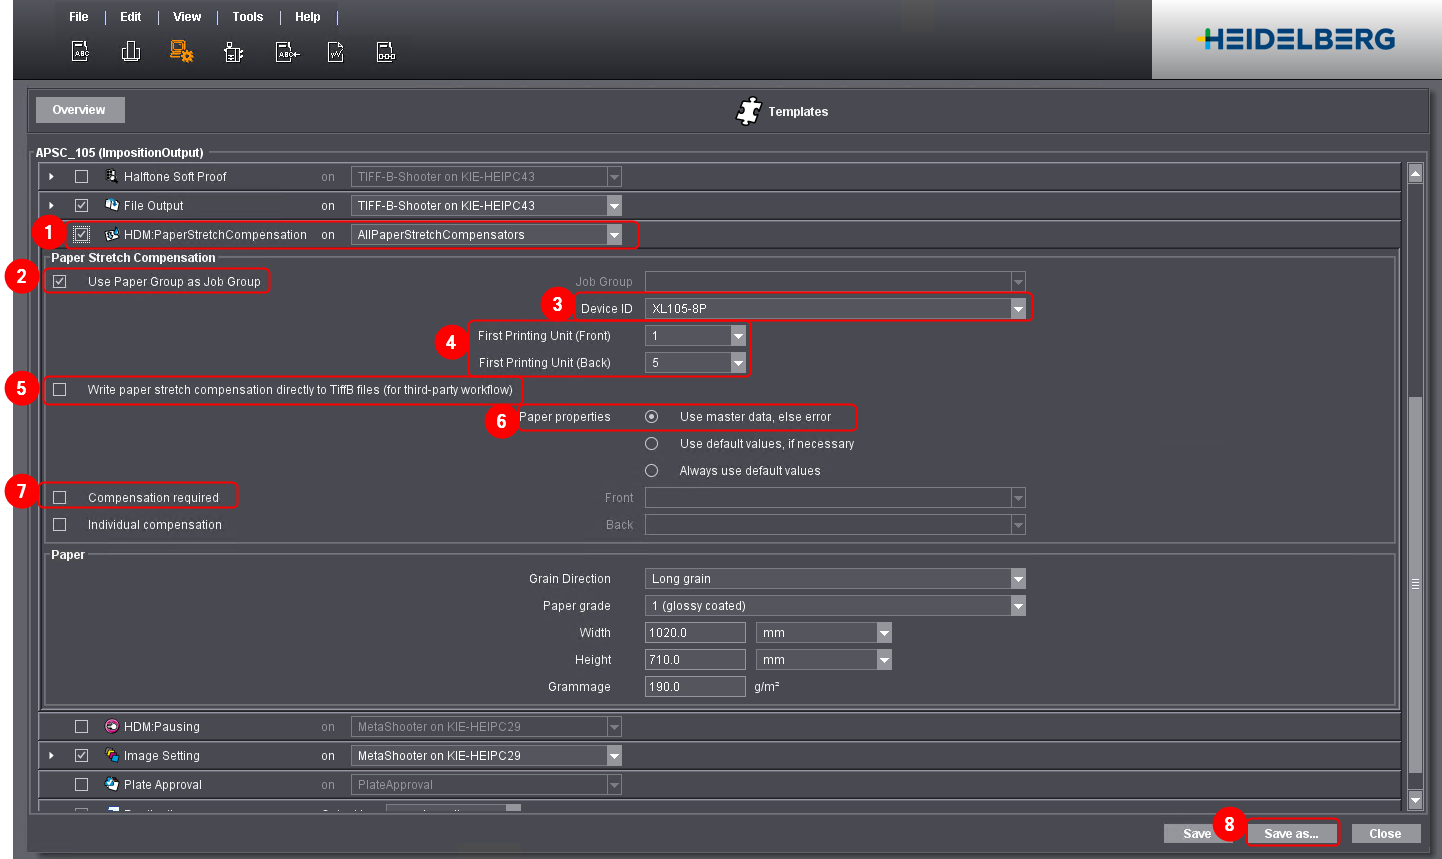
4.Activate the option "HDM:PaperStretchCompensation" (1).
5.Expand this area.
6.Enable the option "Use Paper Group as Job Group" (2).
7.In "Device ID", select the machine created in APSC (3).
8.Choose the First Printing Unit (Front) (4).
The first printing unit may run empty. Choose "2" in this case.
(9).Enable the option "Write paper stretch compensation directly to TiffB files (for third-party workflow)" if you do not operate a Heidelberg recorder.
The recorder is capable of automatically compensating the TiffB files (option must be deselected) (5).
10.In "Paper properties", enable the option "Use master data, else error" (6).
This will ensure that the MDS paper properties are used.
11.Disable the option "Compensation required" (7).
A characteristic curve is mandatory if this option is enabled. It ensures that jobs are not processed without compensation. When creating characteristic curves, it must be disabled.
12.Click "Save as...". (8).
13.Type a unique name for the new sequence (e.g. "APSC_105").
14.Click "Close".
You have completed the ImpositionOutput sequence.