Suitable measuring devices to measure test pages for calibrating and profiling
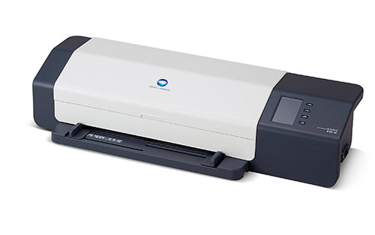
You can use the FD-9 to measure printed test charts also on thicker paper (up to 1 mm paper thickness).
The integrated image scanner makes sure that the charts are aligned automatically. The benefit is that the prints do not have to be clipped as accurately as is the case with X-Rite iSis, for example,
•1500 color patches in only 4 minutes, 2500 patches in 7 minutes
•Test charts 45-330 mm (W) x 170-1500 mm (L) x 0.05-0.45 mm (D)
•Smallest patch size 6x6 mm
•Color patches per sheet: max. 1394 (DIN A4) or 2928 (DIN A3)
•Optional automatic sheet feeder for automated feed

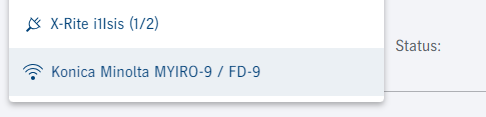
Note: You can also operate FD-9 in the network as a stand-alone device (without being connected to a PC via USB). For this purpose, enable DHCP in FD-9; FD-9 must be in the same subnet. The measurement service then displays a network icon instead of a connector icon for FD-9.
Also refer to the video tutorial Measuring a two-page "Printopen MC7 260 CMYKOGV” test chart with the Konica Minolta FD-9.

Note: The X-Rite i1 iSis 2 cannot be used to measure the test pages for inline calibration.
You can use the X-Rite i1 iSis 2 to automatically measure large A4 and A3 test charts as well as strips distributed on three charts from web presses (e.g. "IT874_Visual_iSis_1_3", "..._2_3", "..._3_3").
You have to cut A3 test charts and test chart strips to size before they are scanned. Remember the following items when cutting to size:
•Cut the test charts as straight as possible.
•Cut approx. 2 mm on the outside beside the broken lines of the test charts. The broken lines may not be cut.
Measurement with X-Rite i1 iSis 2:
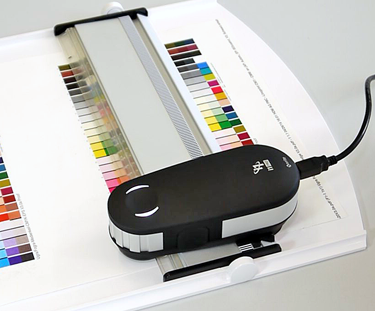
•When inserting the test chart, make sure that it abuts the left feed edge (see the arrow in the picture below).
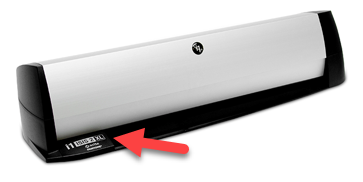
•The LED on the measuring device flashes green to indicate you can insert the test chart.
•Insert the test chart into the X-Rite according to the arrows.
•Push the test chart past the first resistance. As soon as you notice that the sheet is gripped, let go of it.
•The LED is blue when the device has pulled in the test chart and starts to measure it.

Note: With the XL version of the X-Rite i1 iSis 2, you can read in sheets up to A3+/US Tabloid without cutting them to size.
Also refer to the video tutorial Measuring test charts with X-Rite i1 iSis 2.
We recommend using the X-Rite i1 iSis 2 or the Konica Minolta MYIRO-9/FD-9 especially for profile creation, as these colorimeters also measure sheets with many color patches automatically.
If such a measuring device is not available in your company, the X-Rite i1 Pro handheld measuring device with strip reader can also be used. Special test pages are available for this purpose, which also provide good results with significantly fewer color patches by extrapolation.
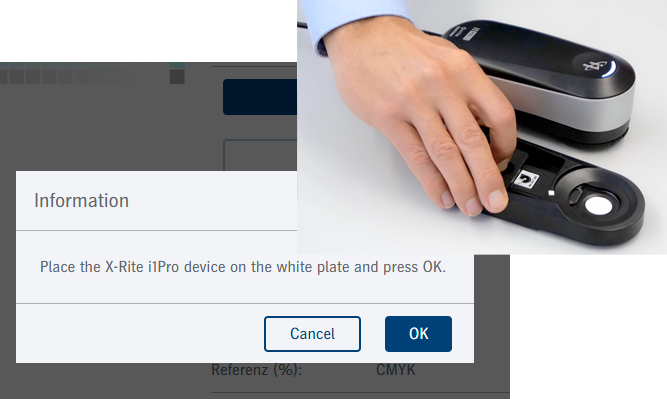
When measuring with the X-Rite i1 Pro, the measuring device must be calibrated before the measurement process. A corresponding message appears in Color Center Versafire. Set the measuring device on the white patch and confirm the message. You can then start measuring the test chart.
Profiling test pages for the X-Rite i1 Pro with a test chart patch size of 14x7 mm:
Notes X-Rite i1 Pro
The X-Rite i1Pro provides three modes of operation:
•Spot (single measurement)
•Strip/Scan(strip or scan mode)
Color Center Versafire uses the latter variant when measuring, see Measure with tray and scan ruler.
•IO (as a chart device on the measuring table)
X-Rite i1Pro 2: While M0 can measure in one run, M1 and M2 need two runs. The internal UV LED switches on during the second run. In a single measurement and with the automatic measuring table, this switching happens so fast that no significant difference in time can be noticed. On the other hand, in the scan mode two separate scans are needed to measure using M1 and M2 conditions.
The X-Rite i1Pro 3 determines all the data required in one scan run. As a result, you do not have to repeat the measurement in the opposite direction like in the predecessor versions.
Measure with tray and scan ruler
You need a tray and a scan ruler to measure with the X-Rite i1Pro in Color Center Versafire. The position sensor in conjunction with the strip on the scan ruler makes measurement of smaller patches possible.
Scanning:

Note: If necessary, you must open the base plate before calibration.
Important: When scanning, start before the first patch to be measured and finish after the last one. Make sure when measuring the test charts for inline calibration to start measuring in the white patch between the letters that identify the row to be measured and the contrast bar of the first measuring patch.

Caution: Make absolutely sure that the scan ruler is inserted the right way round into the tray because your results will be back-to-front if this is not the case.
The status LED on the device guides you through measuring. The indicators of the X-Rite i1 Pro 2 and 3 are different:
|
i1 Pro 2 |
i1 Pro 3 |
||
|---|---|---|---|
|
White status LED |
Ready for measuring |
Status LED flashes white slowly |
The measuring device is calibrated and ready for measuring |
|
Press the Measure button; the LED goes dark |
Ready for the first scan pass |
Press the Measure button, the LED shortly flashes green |
Ready for the first scan pass |
|
After the first pass: Blue status LED |
First pass successful, ready for the second pass |
After the first pass: Status LED flashes green |
First pass successful |
|
Press the Measure button again; the LED goes dark |
Ready for the second pass (with UV LED)
|
Status LED flashes white slowly |
Ready for measuring the next row |
|
Status LED green |
Measurement successful |
Status LED flashes red |
Measurement not successful |
|
Status LED red (briefly) |
Measurement not successful |
|
|
Possible reasons for unsuccessful measurements
•Status LED red: Measuring device was dragged over the row too slowly, too fast or unevenly.
Repeat measuring this row.
•i1 Pro 2: The automatic internal synchronization of both passes has failed. Repeat both measurements of this row.
•The measurement with the measuring device was successful, but no plausible data was found. In this case, the measuring device flashes green, but a warning message appears in Color Center Versafire, and the relevant line is highlighted in red: Possible Cause: You measured the wrong row.
In this case, click "Repeat last measurement" in Color Center Versafire and start measuring the row again.
See also the video tutorial Possible issues when measuring with the X-Rite i1 Pro.