
In many cases, it is sufficient to work with the paper profiles generated with the base linearization. In cases of particularly high demands on the color consistency, you can optimize profiles for specific paper types iteratively, i.e. you use an existing profile to print a profile test chart again directly via the workflow with appropriate CMM settings. Then, you can directly measure the printed test chart in Color Toolbox and generate a corrected or optimized color profile.
The paper profile resulting from this is more precise than the original profile. To further increase the precision, you can repeat this several times.
Such an optimization is not possible for printers with integrated measuring device (unless an external measuring device is additionally available) because an already printed test chart cannot be loaded into the printer at a later time.
With the "Optimize Profile" module, you can iteratively optimize profiles using a measuring device integrated in the printer.
To optimize a profile, proceed as follows:
•First, load a test chart file, a linearization file (.epl file) referring to an ICC profile, and a reference ICC profile file to the user interface. The linearization file and the profile file were generated in the "Create Base Linearization" and "Connect Profiles" steps.
•Then start the profile iteration process. To do so, print the test chart on the printer while applying the linearization and the reference profile and then have it measured automatically with the integrated measuring device.
•Color Proof Pro will use the measured data to generate an IT8 file to be used in Prinect Color Toolbox as template for generating an optimized ICC profile.
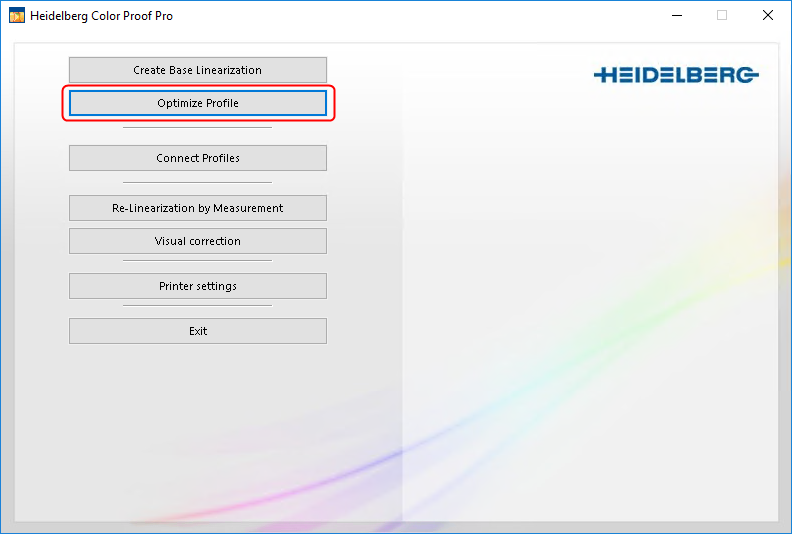
1.Start the "Optimize Profile" module.
The dialog "Please select an output device" opens:

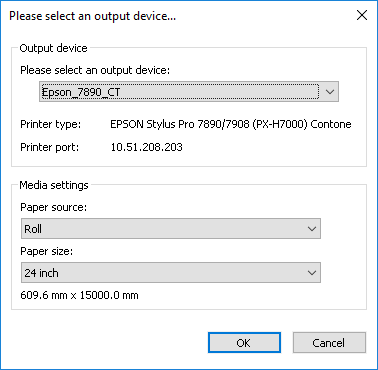
2.Select the printer whose profile you want to optimize. The list shows only those printers that feature an integrated measuring device. The printer must be connected and ready for operation.
If applicable, specify the paper source and size.
3.Confirm the dialog with "OK". The window where you can set up the test chart output displays.

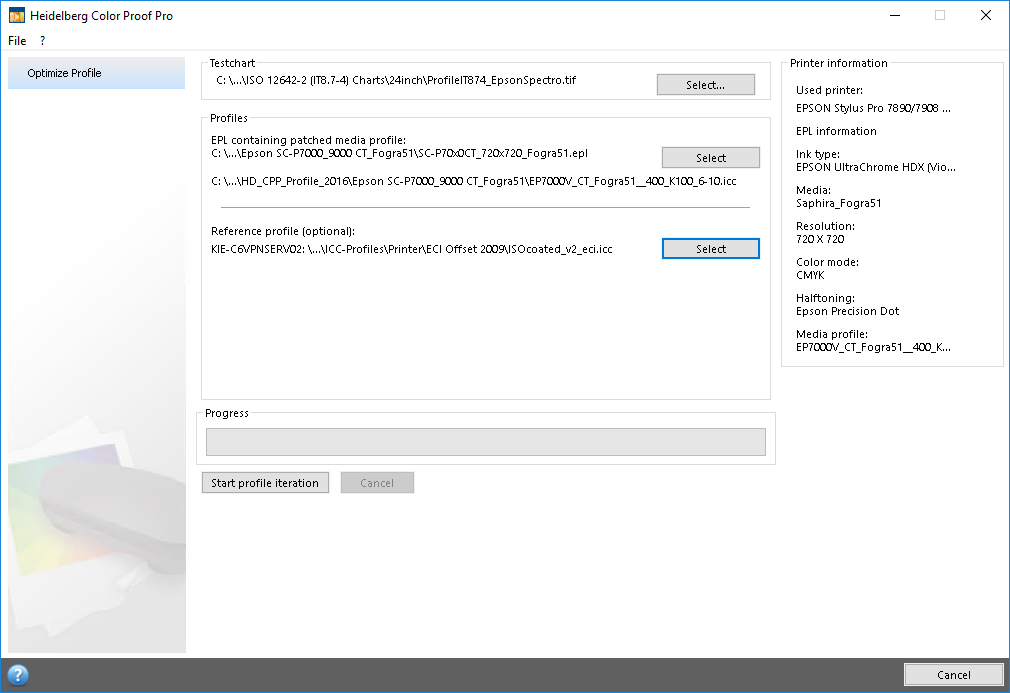
4.In "Testchart", select a test chart to print for optimization.

Note: Usually you must always select a CMYK test chart here, even if you want to optimize a multi color profile.
For proofing on a Labelfire Inkjet machine, usually multi color print profiles (CMYKOGV) are used. If a proof simulation for such a multi color color space should be executed, the employed proof profiles must be optimized for these multi color profiles with the Prinect Color Toolbox, for obtaining good results. In this case, you should select a CMYKOGV Test Chart, which can be used for optimization in the Color Toolbox.
5.In "Profiles", select the base linearization file (.epl file) linked to the ICC profile to optimize (see Connect Profiles).
6.In "Reference profile", select the ICC profile file to be used as reference profile.
7.Start printing with "Start profile iteration". Printing and measuring can take longer (up to 30 minutes!).
The measurement result is filed as an IT8 file in a subfolder of the "Working" folder (C:\Program Data\Heidelberg\Color Proof Pro\Client\Working).
8.Use this IT8 file as basis to generate the ICC profile in Prinect Color Toolbox.