
Procedure
Note: This procedure describes how to create an ICC profile in the automatic mode. You can also run an ICC profile in the non-automatic mode. Then you must manually control each of the program steps as described in the "Create Calibration" chapter. You can also use the automatic process without creating an ICC profile, for example, if the color settings are not sufficient. The measurement file is used in the Prinect Color Toolbox to generate the profile there with the settings desired.
To calibrate and create an ICC profile, proceed as follows:
1.Click "Create Calibration":


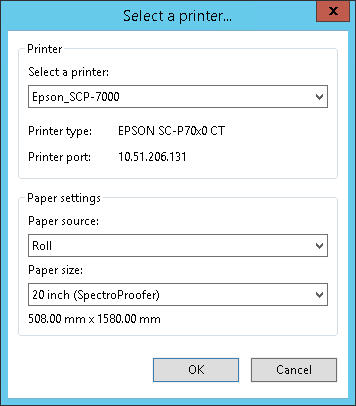
2.In the "Select a printer" dialog, select the proofer you want to use for calibration. Remember to select a proofer that has a built-in colorimeter. Enter the paper settings and confirm the dialog with "OK".

3.Set up the "Settings" window. Select the internal colorimeter of the proofer. Click "Settings" to set up detailed settings for the colorimeter, e.g. the measurement mode:
·M0: The UV portion of the object lighting is not defined. Measurement is done in a single step.
·M1: The UV portion of the object lighting is defined as "D50". Measurement is done in two steps. This option is suited, for example, for papers without optical whiteners.
·M2: With this setting, the spectral power distribution of the object lighting is cut to a wavelength of 420 nm to 700 nm (by light filtering). There is no noteworthy radiation power below 400 nm (UV light). This mode is also referred to as "UV cut". Measurement is done in two steps. This option is suited for papers with optical whiteners, in particular if they are viewed under light sources containing no UV portion. In Europe, non-UV color data is used predominantly for proofing.
The available settings depend on the properties of the colorimeter.

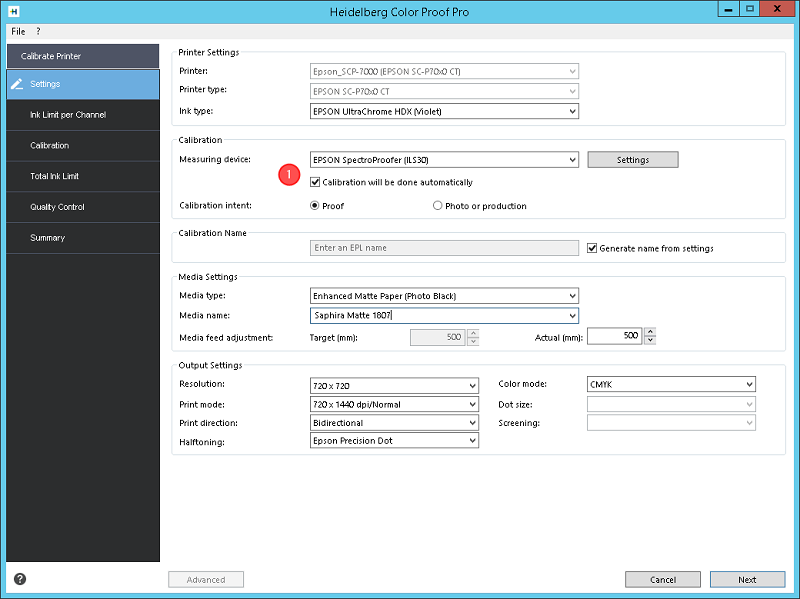
In the following example, we will enable "Calibration will be done automatically". Then the "Ink Limit per Channel", "Calibration", "Total Ink Limit" and "Quality Control" steps run automatically without user intervention. This option is available because internal profile calculation is possible only with proofers that have an internal colorimeter.
In the "Media name" box, type a name for the media or select a name from the list box. You will find more information about the setup of this window in the "Create Calibration" chapter. See Create Calibration.
4.Click "Next".
The "Ink Limit per Channel" view displays.

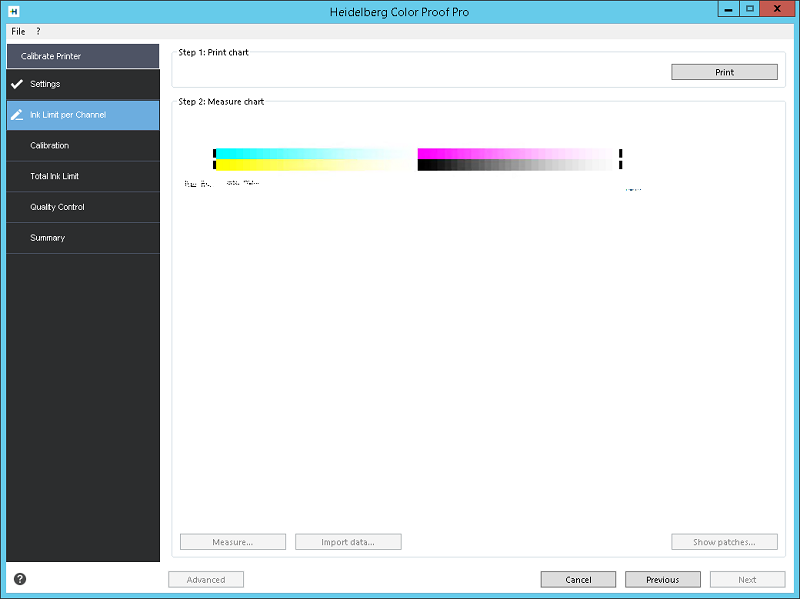
Click "Print".
The test chart is printed and then measured automatically. After this, all subsequent steps, "Calibration", "Total Ink Limit" and "Quality Control", run automatically, i.e. the respective test charts are printed and then measured with the integrated measuring device. The specified drying time set in "Printer settings" (see "Special" Tab) is kept between printing and measuring. This is why automatic calibration takes quite a while to finish.
You will find information about each of the modules under Calibration.
The "Summary" step displays when automatic calibration is finished:

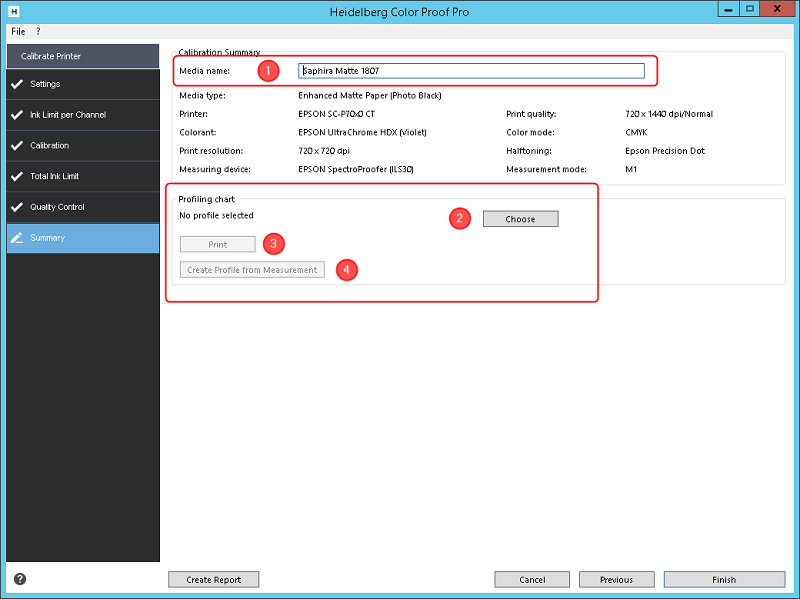
If necessary, you can edit the media name (1).
"Profiling chart" section
5.You must now select a chart file for profiling. After clicking "Choose" (2), a note appears indicating the type of chart (CMYK, CMYKOG, CMYKOGV) that you must select to match calibration. This information also displays in "Color mode". In the file system, select a suitable chart file, for example, "ProfileIT874_EpsonSpectro.tif".
6.Click "Print" (3).
The selected profiling chart is printed. Each of the test charts is then measured automatically. The specified drying time set in "Printer settings" (see "Special" Tab) is kept between printing and measuring. This is why the automatic profiling chart generation takes quite a while to finish. The result is a profile template file, e.g. an IT8 file, that you need to generate a profile.
7.Click "Create Profile from Measurement" (4).
The "Save Media Profile" dialog opens:

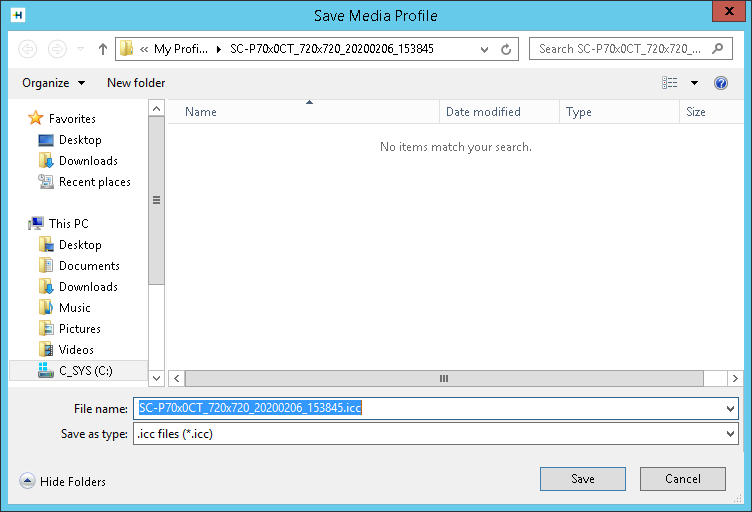
The "C:\ProgramData\Heidelberg\Color Proof Pro\Profiles\My Profiles" folder automatically opens. A folder is set up for the new profile, in which the ICC file and the .EPL file are stored.
The profile is automatically added to the list of installed color profiles for that proofer. See "Profiles" Tab.
Create report
You can print a report containing the settings used to create the calibration file.
A report on the calibration process displays in the standard browser when you click "Create Report":

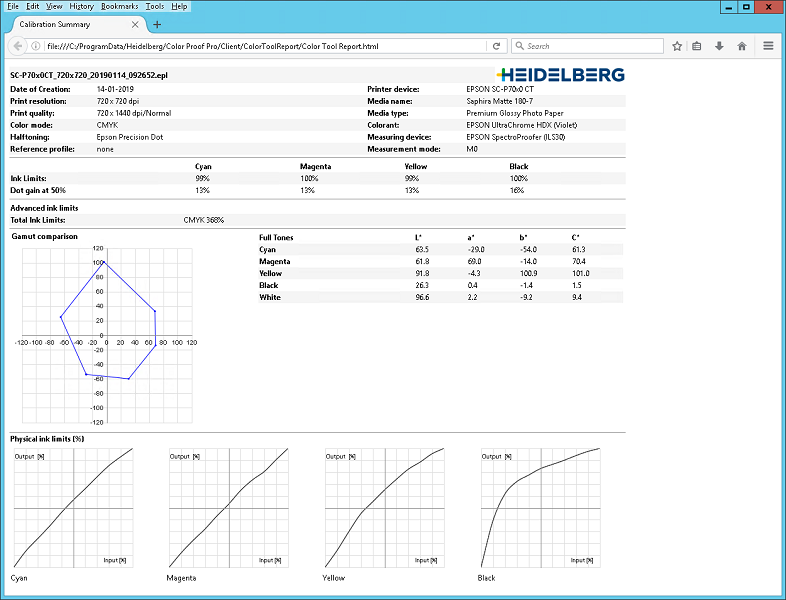
You can print the report using the print functions of the browser.
8.Close the browser window and then click "Finish".
This concludes calibration.
After you output the test chart, check whether the color gamut of the paper profile is big enough for the print process you will simulate (e.g. with Prinect Color Toolbox).