
This section lists each of the permissions with assigned license dependencies and groups. The different permissions are listed in the horizontal tabs "Common", "Prepress", "Press", "Postpress", "Integration" and "Digital".
Here you can assign or withdraw individual access permissions for the users or groups. For more information on assigning permissions, see also the Assigning or Withdrawing Individual Permissions.
Single permissions can be broken down into the following topics (tabs):
•Common
•Prepress
•Press
•Finishing
•Integration
•Digital
The headings/tabs displayed are dependent on the version of Prinect Manager installed. The interface is the same for all five tabs and is described below.
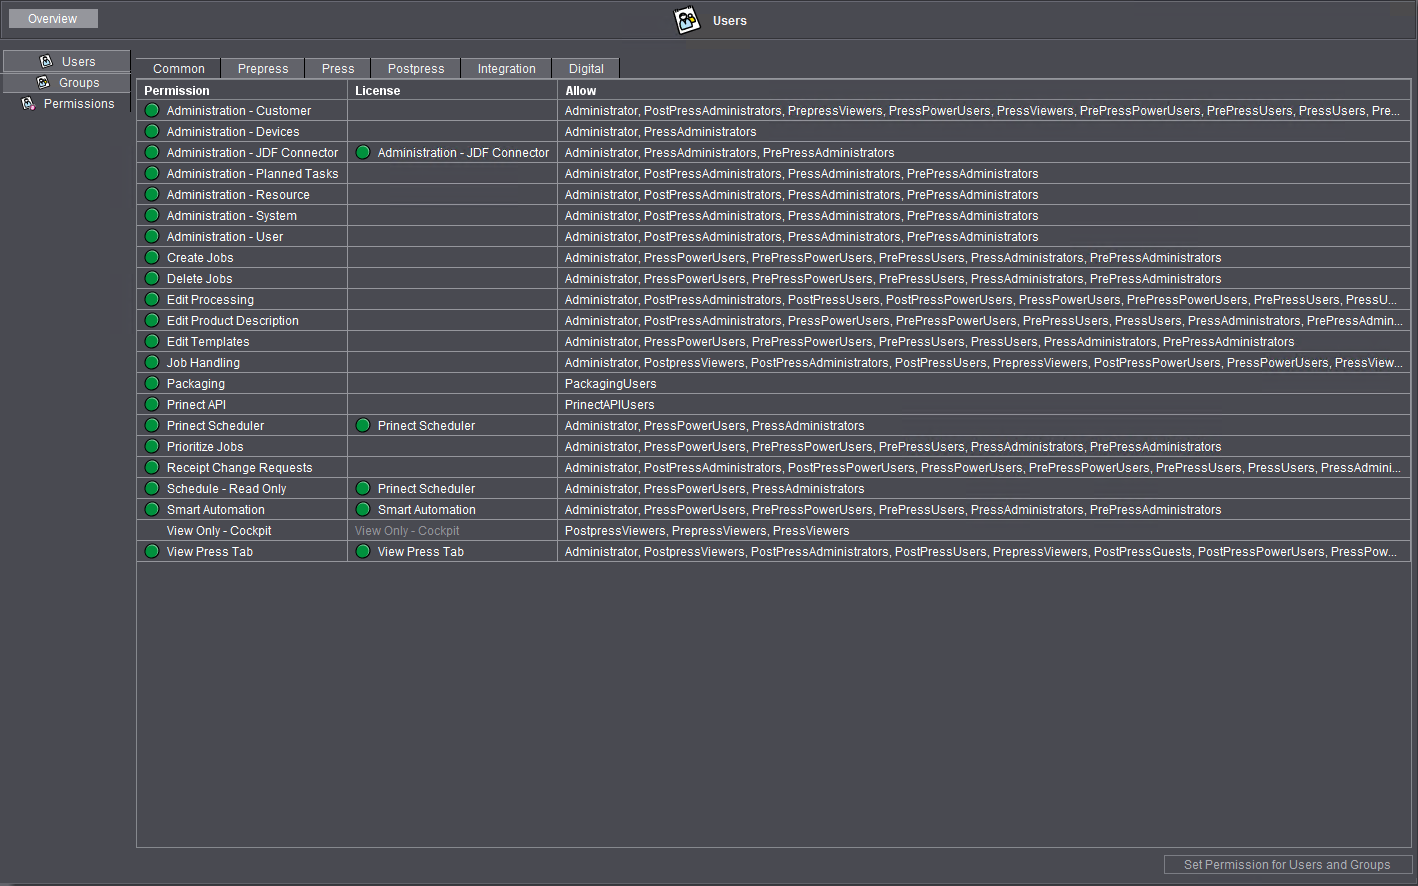
•"Permission" column This lists all the permissions. The green dot shows you whether the user logged in to the Cockpit has a permission or not.
•"License" column: Many permissions require a license. If a user logs in to Prinect Manager with his permissions, a license request is submitted to the license server for each of these permissions. The green dot indicates whether a license was requested successfully from the License Server.
·No entry: This field does not require a license.
·"Floating": This permission is licensed for a specific number of persons that may be logged in to Prinect Manager simultaneously. Floating licenses do not require the user to log in to a certain Cockpit as long as all applications use the same License Server. When a user logs off, the floating license is available to another user again.
·"None free": This property displays a red "X", indicating that the number of users allowed at the same time for a floating license has been exceeded. The next user can only access the respective permission if another user logs off.
•"Allow" column: This displays all users and groups that have this permission.
•"Set Permission for Users and Groups" button: You open a dialog with this button to assign a permission to a group or user or revoke it. To do this, select the desired permission in list and click on the button "Set Permission for Users and Groups".
Assigning or Withdrawing Individual Permissions
To assign an individual permission to certain users or groups or to revoke this permission, select the desired permission in the list and click button "Set Permission for Users and Groups".
The following window displays:

"Set Permission" section: This is where you can view the permission that you can assign to a group or user or can revoke it.
"Permission" section: This list contains users and/or groups the respective permission is assigned to. With the "Add" and "Remove" buttons, you can add users and groups to or remove elements from this list. The list has the following columns:
•"Users and Groups" column: Names of the users and groups.
•"Allow" column: If the check mark is set, the permission is assigned to the group or the user. If you add a group or a user to the "Permission" list, the "Allow" check mark is always set by default.
•"Deny" column: If the check mark is set, the permission is withdrawn from the group or the user. If you add a group or a user to the "Permission" list, the "Deny" check mark is not set by default.
"Available Users and Groups" section: This list contains all users and groups that are not part of the "Permission" list.
With the "Add" and "Remove" buttons, you can transfer items from this list to the "Permission" list or remove them from the "Permission" list.
Policies for users and groups:
•Groups: The following applies to groups listed in the "Available Users and Groups" list: they are not assigned the selected permission by default. The same applies to groups that are part of the "Permission" list and have the "Deny" option checked. Even if you can withdraw a group's permission by removing the group from the "Permission" list, we recommend transferring this group to the "Permission" list and explicitly enabling the "Deny" option there.
•Users: Users listed in the "Available Users and Groups" list can be assigned the selected permission if they are members of a group that was assigned the permission. You can identify this by the group being present in the "Permission" list and the "Allow" option being enabled. To nevertheless withdraw the permission from a user, move the respective user item to the "Permission" list and enable the "Deny" option there.
"Back/Next" buttons With the "Back/Next" buttons, you can set permissions for other access rights without leaving the view of individual permission assignment. With "Back" you go to the permission listed above the currently selected permission in the "Permission" list. With "Next" you switch to the next permission. The "Permission" and "Available Users and Groups" lists are updated accordingly.
"Save" button To apply the permission settings, press "Save" to confirm.
"Close" button: This will close the individual permissions' view.
Assigning or withdrawing a permission for groups
To assign a permission to a group, select the permission you want in the "Permission" list and click the button "Set Permission for Users and Groups".
Add the respective group item to the "Permission" list and enable the "Allow" option. Confirm your settings with "Save".
To withdraw a permission from a group, enable the "Deny" option in the "Permission" list.
Example: The "PrePressUsers" group is to be granted the "Analyze Point - Cockpit Base" permission.


1.Enable the “Permissions” view [1].
2.Go to the "Press" tab [2].
3.Highlight the "Analyze Point - Cockpit Basis" permission [3].
The "Allow" column indicates that this permission is currently assigned to the "Administrator", "PressPowerUsers" and "PressAdministrators" groups only.
4.Click on the "Define Permission for Groups and Users" button [4].
The following window displays:

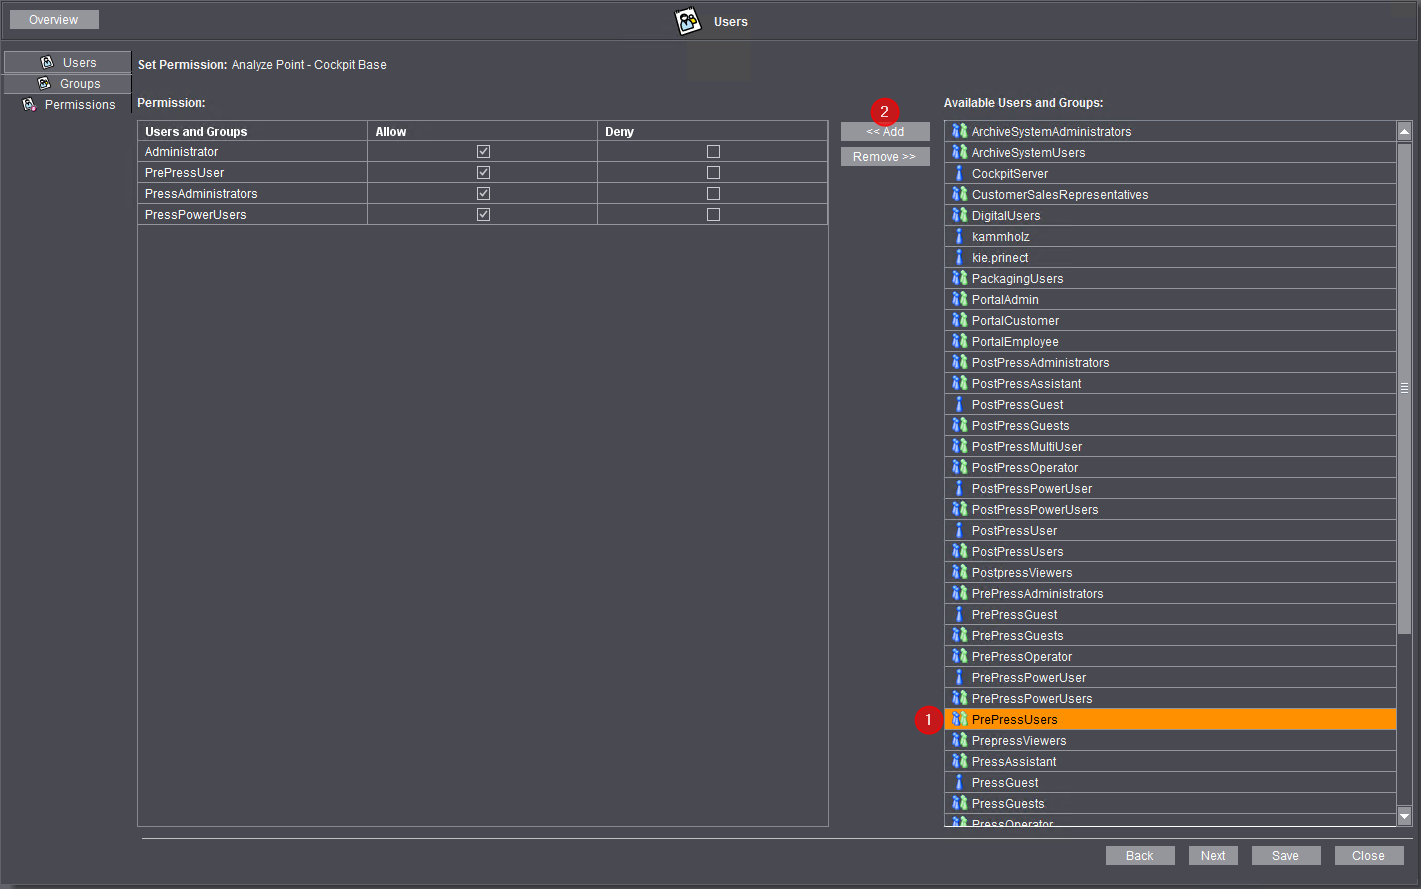
5.Highlight the "PrePressUsers" group in the "Available Users and Groups" list [1].
6.Click "Add" [2].

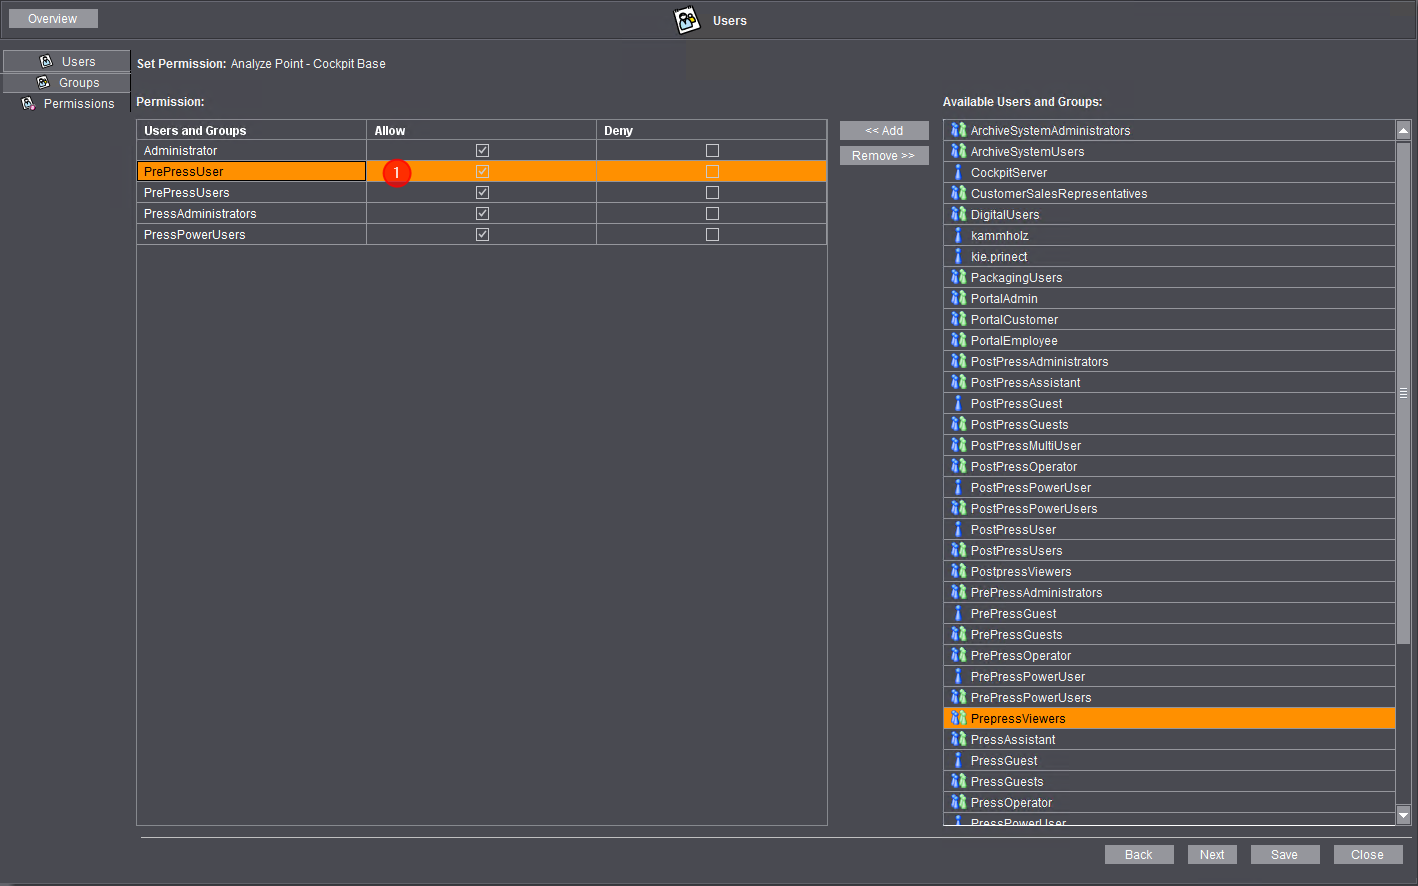
The group item is moved to the "Permission" section [1].
7.The "Allow" option is activated by default (check mark in the box) for the newly added "PressUsers" group in the "Permission" list.

Note: To withdraw the selected permission from a group or user, enable the appropriate "Deny" option.
8.Click "Save".
9.If you wish to grant this permission to other groups or users, repeat the steps 5 – 8.
10.Click "Close" to close the window.
The permission was assigned to the "PrePressUsers" group.

