
How do I create a new user account?
Prerequisite: To manage user permissions, you will need to be logged on to the Prinect Manager server with administrator permissions. The "Administration — User" permission in particular must be assigned to the user account you are logged in with.
1.Go to "Administration > Settings > Users > User".
2.Click the "New" button.
The "Create User" dialog displays:

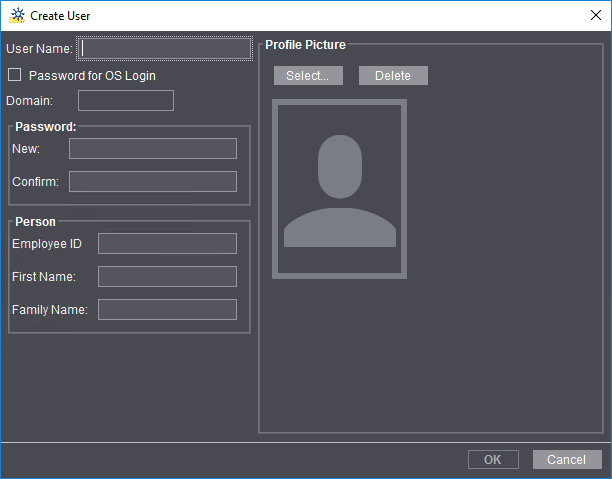
3.Enter the user name and the password.
·You must enter the user name and password with which you would like to log into the Prinect Cockpit here. The user name should be entered in lower case letters and must not contain any special characters. Repeat the password in the "Confirm" box.
·When activating the "Password for OS Login" option, you must enter the user name created under Windows. The password for the Windows user account will then be used for the user. When the option is activated, you must enter the domain in which the respective Windows user was created (if computers and users are managed in a Windows domain). In this case, you do not have to enter a password.
4.To log on to a Data Terminal, you also have to enter an employee ID, a first name and a family name.
5.In "Profile Picture", you can set a profile image for the user that identifies the user visually. The profile image must be available as an image file in the system environment of the Prinect server. A selection dialog for the file system displays when you click "Select". You can delete a set profile image with "Delete".
6.Click "OK".
The user is created and appears highlighted in the list.
No permissions have yet been assigned to the user. You must do this now individually.

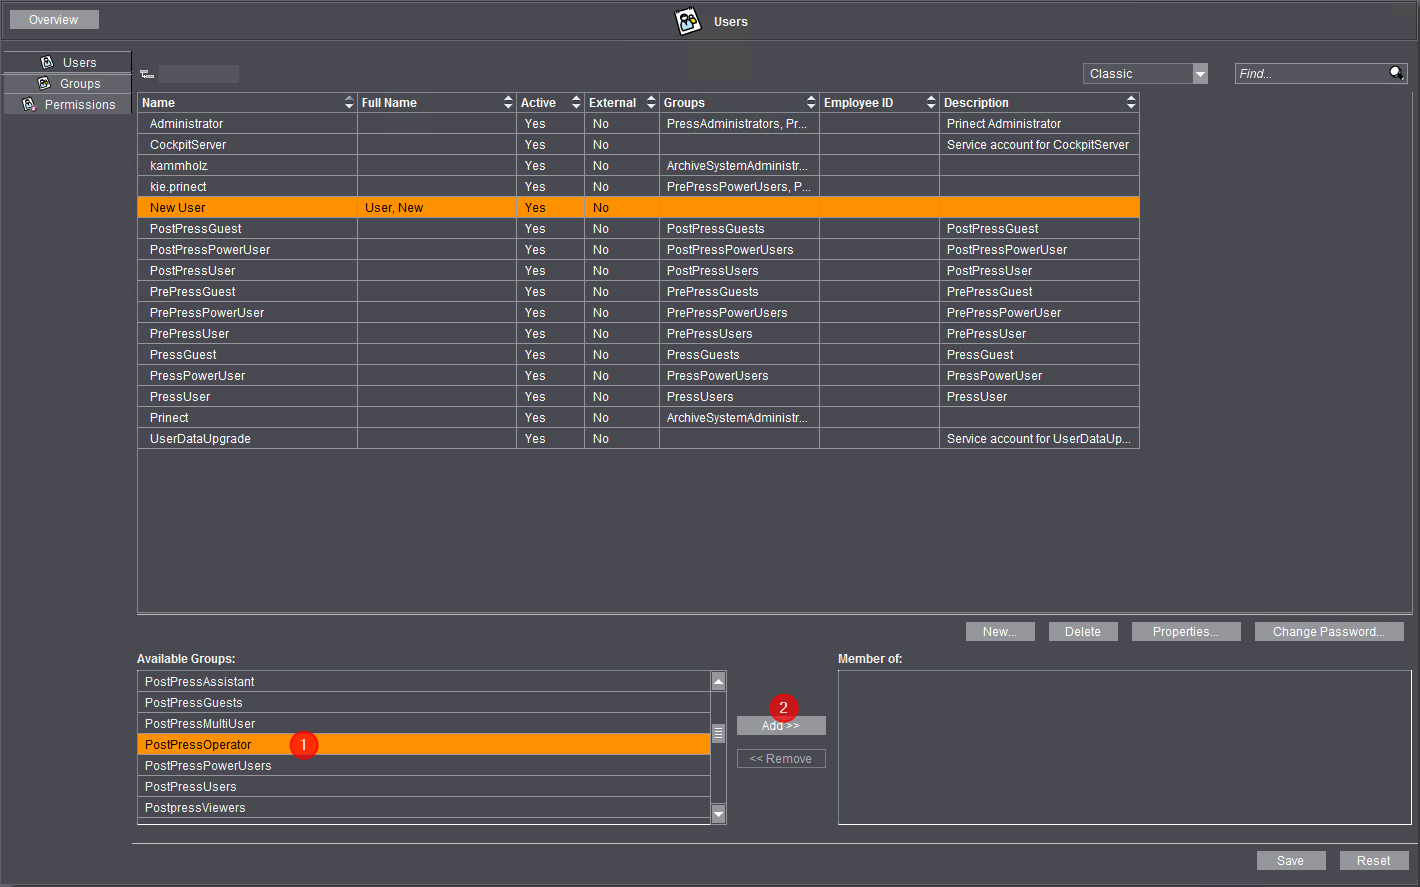
7.Highlight the permission group(s) you wish to assign to the user in the "Available Groups" section [1].
You can select several permission groups at the same time.
8.Click "Add" [2].

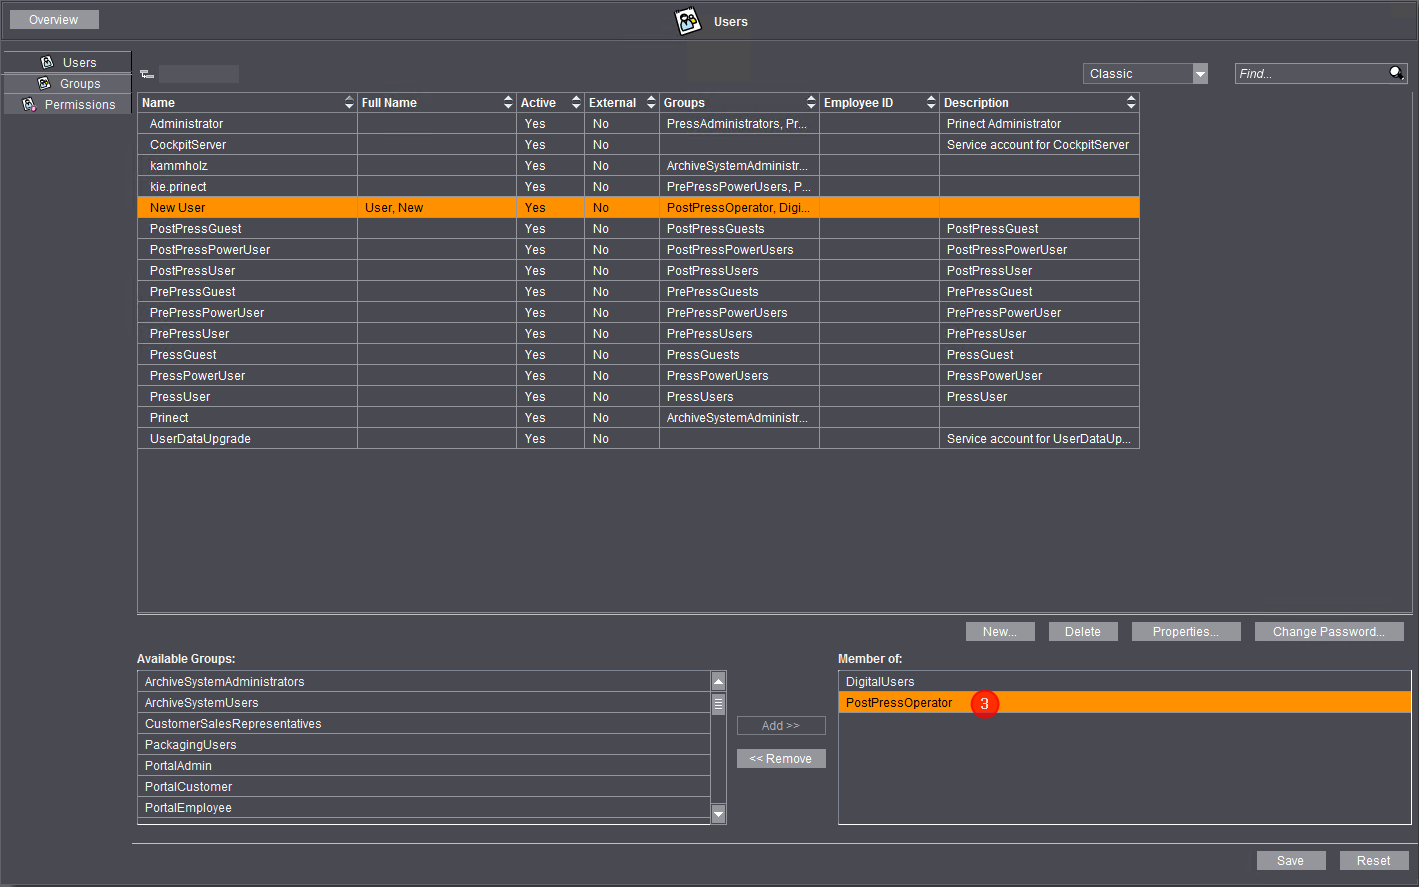
The selected permissions are assigned to the user and appear in the "Member of:" section. [3].
9.Click "Save".
All the entries you have made are then saved.