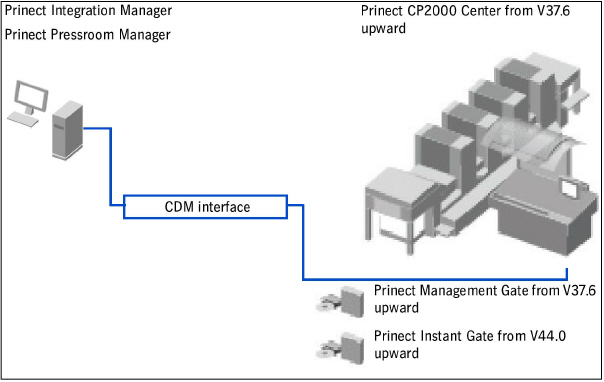
Connecting a Prinect CP2000 Center Press
You must "register" a job in Prinect Integration Manager/Prinect Pressroom Manager before you can send it to the press. This means a connection must be established between both systems.
Only then can the Prinect Integration Manager/Prinect Pressroom Manager process jobs generated by the Management Information System (MIS) or prepress system and send them to the press.
•What conditions must be in place on the Prinect CP2000 Cen-ter side?
•How do I establish a connection to the Prinect CP2000 Cen-ter?
•Synchronization of the PDC configuration with the press
What conditions must be in place on the Prinect CP2000 Center side?
A connection to the Prinect Integration Manager/Prinect Pressroom Manager can only be established if the following requirements are fulfilled:
•software version V37.6 installed with Prinect Management Gate software module.
•software version V44.0 installed with Prinect Instant Gate software module.
•provision of a network and a network connection for the Prinect CP2000 Center press.
In order to be able to correctly evaluate/analyze the job using the "Analyze Point" option, you need to consider the following for the configuration:
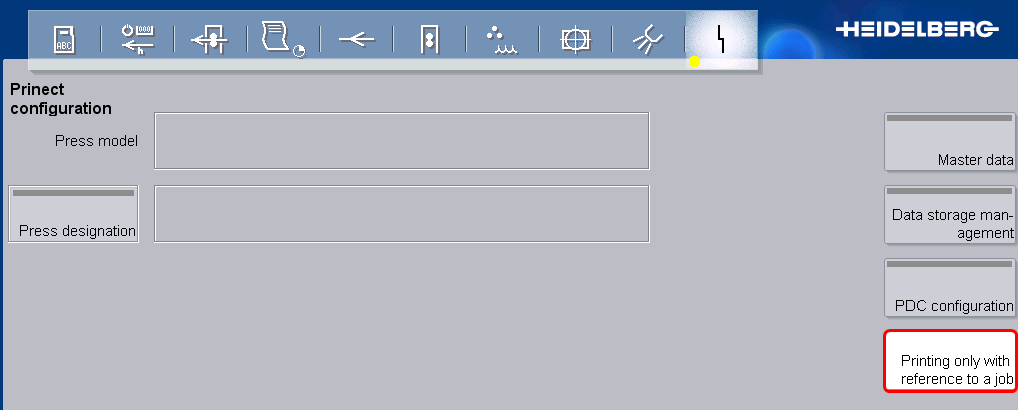
If you have activated the option "Printing only with reference to a job" on the printing press (as of version V46.0), a job needs to be loaded and production data collection started. This means that printing can only be started after the "Start of job" message has been sent. Printing is not possible if a job is interrupted or stopped.
To enable "Printing only with reference to a job", go to "System > Service > Prinect configuration > Printing only with reference to a job" in the Prinect CP2000 Center as shown below.
•When creating the device in the Prinect Integration Manager/Prinect Pressroom Manager, you assign previously defined operations (PDC messages) to the device via operation groups. When creating an operation (PDC message) you can define the following parameters using the "Job information" attribute:
·The operation (PDC message) shall only be activated on the machine if a job has been loaded and production data collection started. "Job information" must be set to "required".
·The operation (PDC message) shall be activated with or without a loaded job. "Job information" remains blank.
·The operation (PDC message) shall only be activated if no job has been loaded. "Job information" must be set to "Without".
This means that for all operations (PDC messages) affecting the production times you need to set the "Job information" attribute to "Required". For a more detailed description see Configuration of the JMF content.
The following rules apply for operating the system:
•Production data collection first needs to be started for a new operation. Then production can be started.
•The counters need to be reset to zero when a new job is started, otherwise the new job starts with the job counter of the previous job.
•If the specified run length is reached on the machine, the counters may not be reset to zero before the end of shop floor data collection. The counters should not be reset until a new job is begun.

Note: A detailed description of how to load a job can be found in the operating manual accompanying the Prinect CP2000 Center press.
1.Go to the "Job" menu and click "Job preparation".
2.Click on the "Load job" button.
·Select your data store here. In this example "Workplace Interface".
·You must have configured the data store beforehand. See Configure the corresponding data storage unit on the Prinect CP2000 Center.

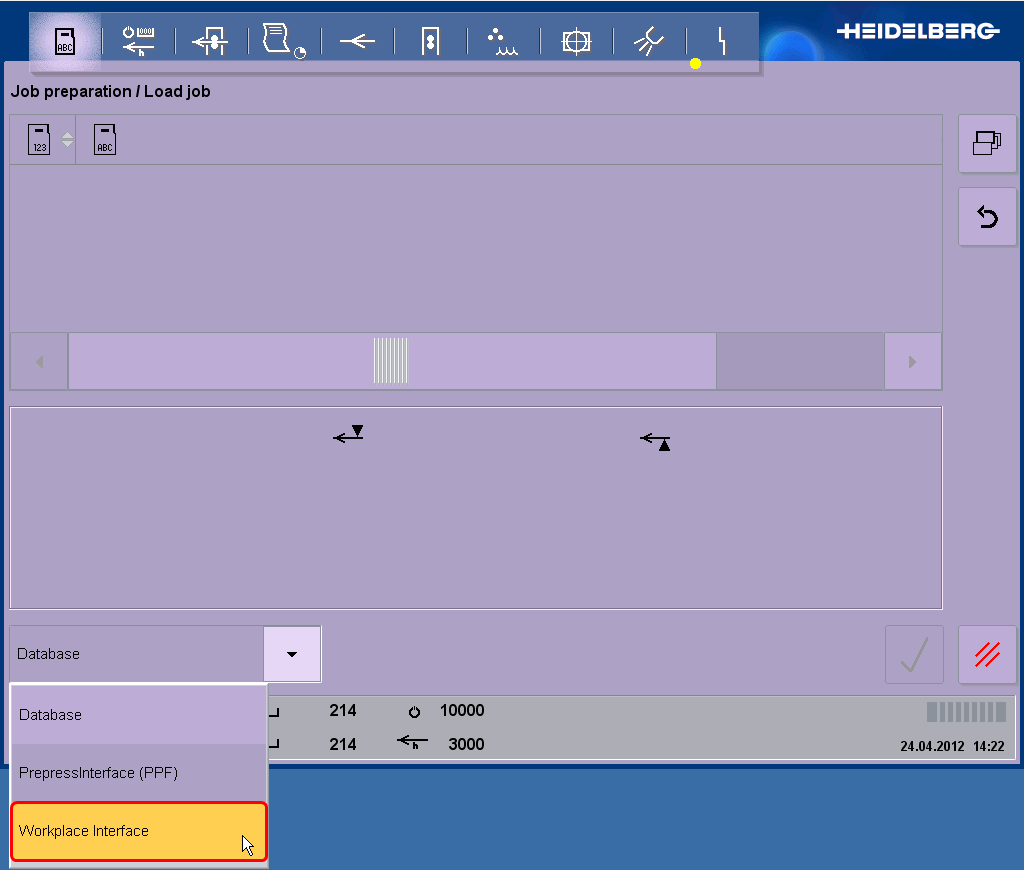
3.After that, you can select the job you want and load it to the machine using the button with the green tick. When the job is loaded, you go automatically to the "Job" menu and the selected job displays in the window.
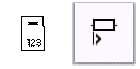
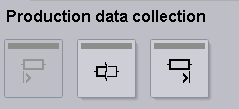
4.Click the "Confirm job" button. You go to the "Job preparation / Confirm job" menu. At this point you must always enable the following two icons to be able to start the job afterwards.

5.Print the job.

6.Once the specified run length is reached, end production data collection for the job.
7.Load a new job from the data storage unit.