As the procedure is always identical, we only describe one example here.
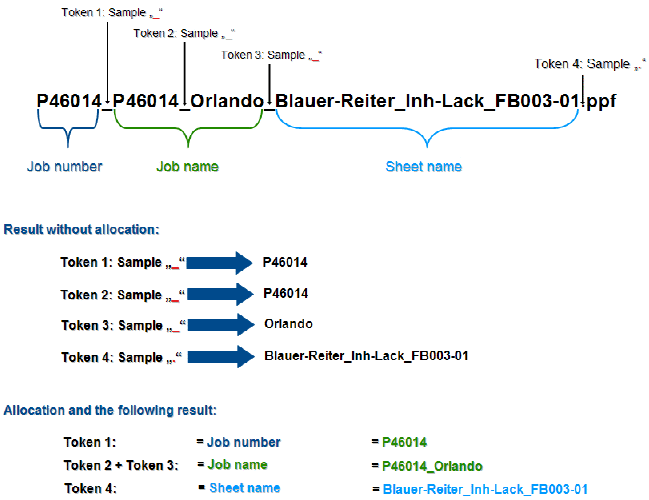
The name of the PPF/CIP file which the prepress system generates contains the job number, job designation and sheet designation. The individual pieces of information are separated in this case by the character (pattern) "_".
In order to be able to filter the above mentioned information, at least four tokens need to be defined (see figure above).
1.Go to the "Administration > System" menu.
2.Highlight the Prinect server (computer name of the server).
3.Scroll to the "JDF Connector Service" section.
4.Click the "Properties" button beside "PPF Import".
The PPF import configuration window opens.
5.Highlight the "Attribution rules" folder.
6.Right-click to display the context-sensitive menu and select "New item".

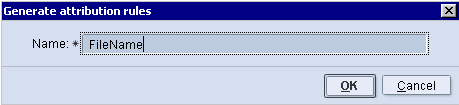
7.Enter the name of the new attribution rule.
The name has been selected because the information is to be filtered from the PPF file name. You can, however, enter any name you wish.
8.Click "OK".
The new attribution rule is accepted and the following window appears. You now have to define the tokens here.

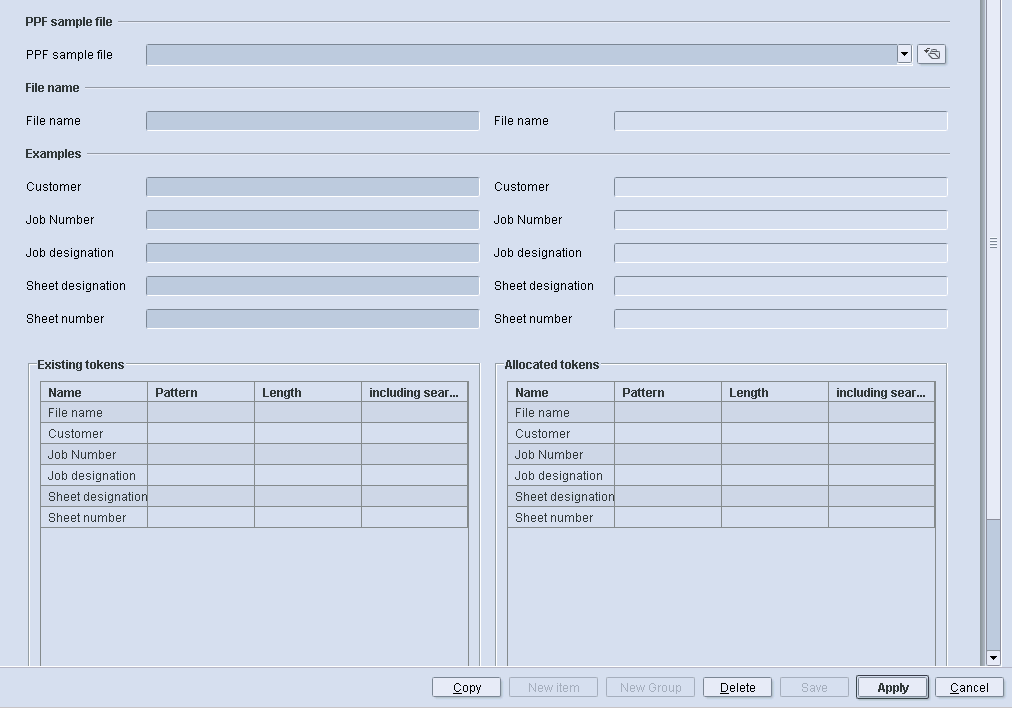
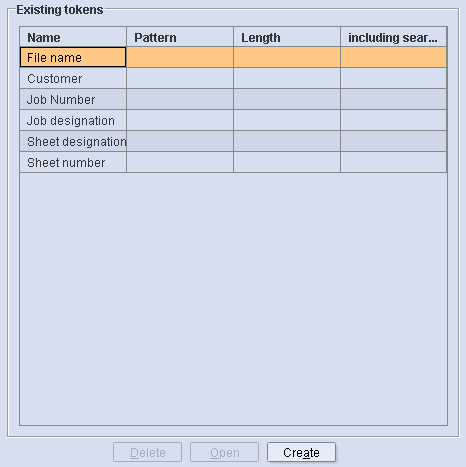
9.In the "Existing tokens" section the possible entries for which tokens can be defined are listed.
10.Highlight the entry for which you wish to define tokens.
In this example, this is the "File name" entry, as we wish to filter information from the PPF/CIP file name.

Next you have to define the tokens for the selected "File name" entry. A token always consists of a length and/or a pattern.
11.Click "Create".
Alternatively you can click on the right mouse button and select the "Generate" menu item.

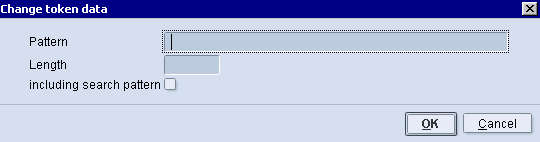
•Pattern: This figure defines the pattern (character) at which information is extracted. This means that everything in front of this pattern is filtered out as new information.
•Length: Specifies the number of characters after which the information is to be filtered.
•"Including search pattern" option
When this option is enabled, the specified search pattern is appended to the extracted information.
12.Click on the input field in the "Pattern" section and enter the character "_".
In this example, the job number is "P46014" and is separated from the rest of the information in the PPF file name by the character "_" (P46014_P46014_Orlando_Blauer-Reiter_Inh-Lack_FB003-01.ppf).
13.Then click "OK".
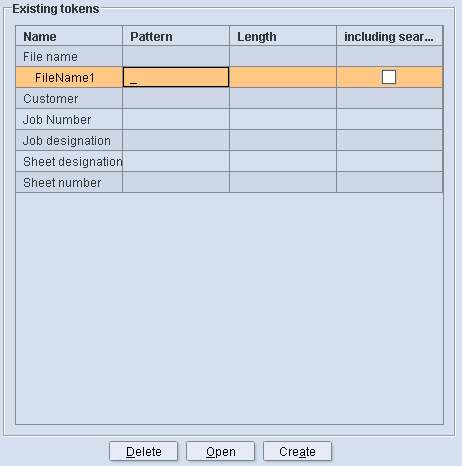
The token is saved under the name "FileName1" and displayed in the "Existing tokens" section. Using this token, the information "P46014" is filtered out of the PPF/CIP file name.

14.Highlight the "File name" entry.
15.Click "Create" to define the second token.


16.Click on the input field in the "Pattern" section and enter the character "_".
17.Then click "OK".
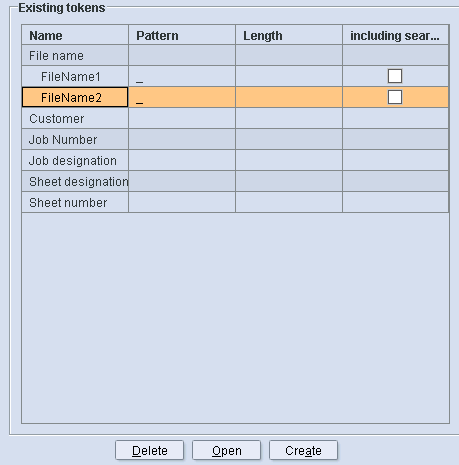
The token is saved under the name "FileName2 and displayed in the "Existing tokens" section.

18.Now define the two tokens which are still missing in the example by repeating steps 11 to 14.
·The token "FileName3" contains the pattern "_".
·The token "FileName4" contains the pattern ".".
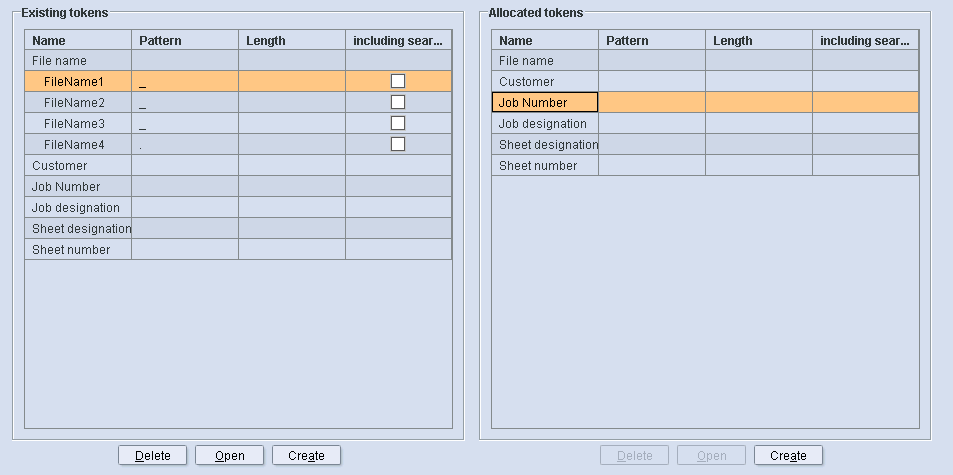
The list in the "Existing tokens" section should then look like the one shown in the figure below.


19.Once you have defined all four tokens for filtering information from the file name, you have to define the allocations.
Define allocation
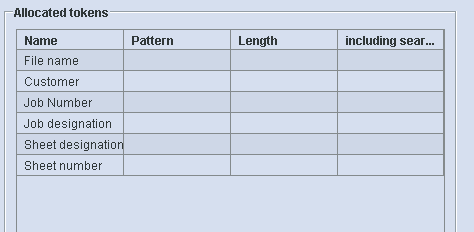
For this example, the allocations have to be made as shown in the following figure.


The "Allocated tokens" section lists the PPF/CIP attributes which can be generated by the defined tokens.

The tokens are allocated to a PPF/CIP attribute via drag & drop. A PPF/CIP attribute can also be generated from several tokens. For this purpose, a "separation string" (referred to as separation character in the following) must be defined between the tokens.
How to assign the tokens and insert a separation character is described in detail below based on our example.

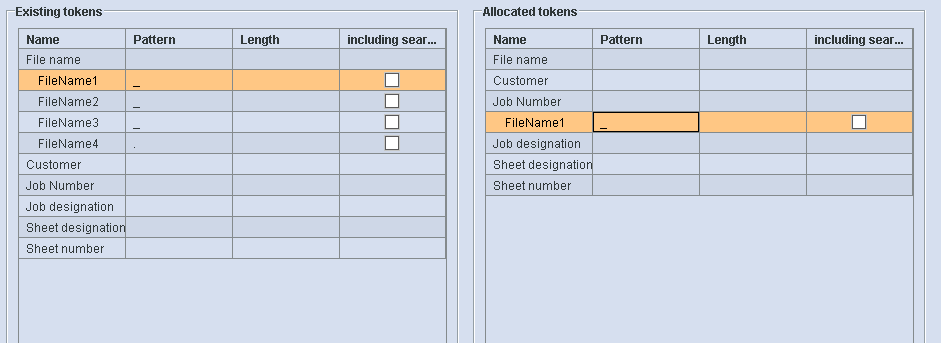
For this example, the job number is first generated from "FileName1".
20.Highlight the token "FileName1" in the "Existing tokens" section, press and hold down the left mouse button.
21.Now drag the token with the mouse into the "Allocated tokens" section onto the PPF/CIP attribute "Job number".
The mouse pointer now also contains a plus sign.
22.Release the left mouse button.
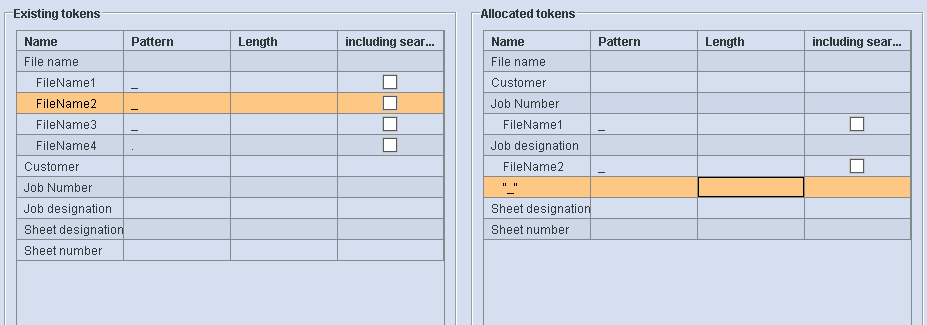
The "FileName1" entry is allocated to the job number and is now located in the "Allocated tokens" section.

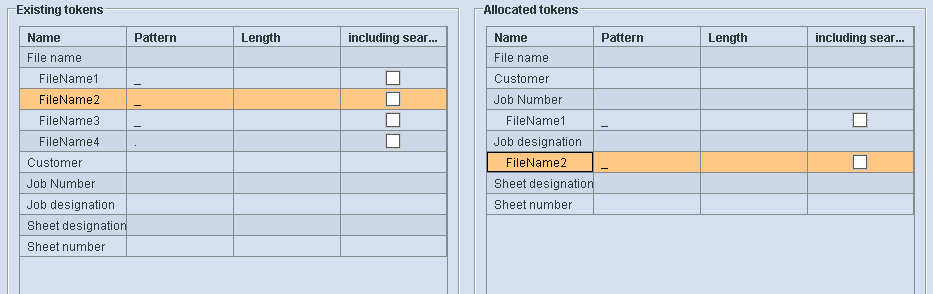
Next, the job designation is generated from "FileName2" and "FileName3".
23.Select the token "FileName2" in the "Existing tokens" section and drag-and-drop the token onto the PPF/CIP attribute "Job designation" in the "Allocated tokens" section (as described above).
·The "FileName2" entry is allocated to the job designation and is now located in the "Allocated tokens" section.
·The "Allocated tokens" section must now look like the one shown in the following figure:

As the job designation is generated from two tokens and these are not simply to be written one after the other, you have to insert a separation character.
24.Highlight the "FileName2" token in the "Allocated tokens" section.
25.Now click the "Generate" button in the "Allocated tokens" section.
Alternatively you can click on the right mouse button and select the "Generate" menu item.

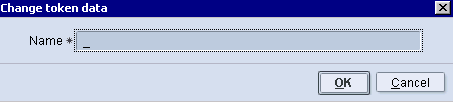
26.Click in the "Name" input field and enter the separation character _.
27.Then click "OK".
The separation character is accepted and is now located in the "Allocated tokens" section under the token "FileName2".

28.Select the "FileName3" token in the "Existing tokens" section and drag-and drop the token onto the separation character in the "Allocated tokens" section (as described above).
The "FileName3" entry is allocated to the job designation and is now located in the "Allocated tokens" section under the separation character.
The "Allocated tokens" section must now look like the one shown in the following figure:

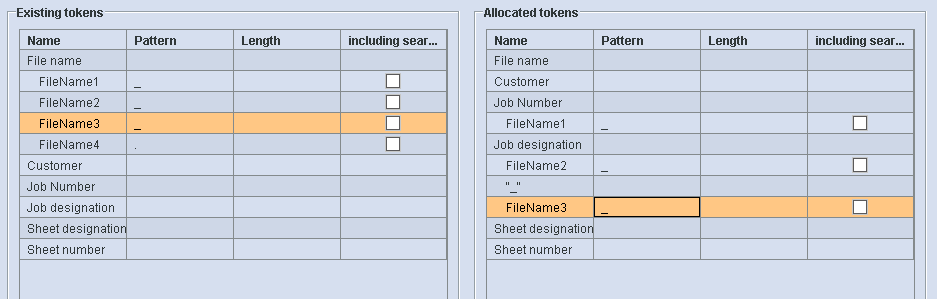
The job name is now made up as follows: FileName2_FileName3.
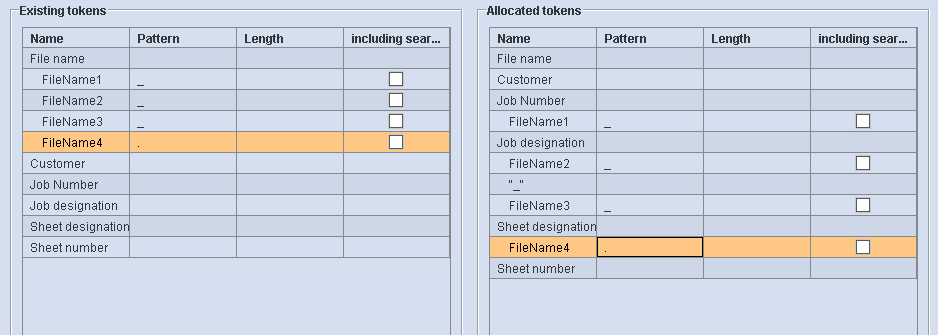
Next, the sheet designation is generated from "FileName4".
29.Select the token "FileName4" in the "Existing tokens" section and drag-and-drop the token onto the PPF/CIP attribute "Sheet designation" in the "Allocated tokens" section (as described above).
The "FileName4" entry is allocated to the sheet designation and is now located in the "Allocated tokens" section.
The "Allocated tokens" section must now look like the one shown in the following figure.

30.Click the "Save" button to save your changes.
You can now check the effects of your defined allocations using the preview.