
Administration - E-mail
You set up the Prinect Mail Service in "E-mail". The Mail Service can run the following tasks:
•Send e-mails (HTML mail) from the Prinect system. The SMTP format is supported.
•By using a central mail server, you make sure that all sent mails have a uniform identity. This is valid, for example, for approval mails that can be sent by the proof sequences and for mails sent by Portal Services.
•Manage e-mail account data (name, port, user, password).
•Templates that can be customized for each print shop are used for texts in the e-mails. Print shop-specific framework templates can also be used. Templates preconfigured by Heidelberg can be used for different contents.
•The e-mails can be made up of various modules (templates, texts, attachments).
•E-mails can be sent in the language of the addressee. Text templates can be translated into languages that are not supported in the shipped templates by changing them manually.
Prerequisite: The Prinect server must be linked to a suitable e-mail provider in order to use the e-mail server functionality.
The "E-mail" section has the following tabs:
•Snippets and
In this tab, you record the details that are required for the e-mail account.
"SMTP" group
Details about the sender's address are set here. This is where you enter the data of the e-mail account (depending on the provider) that will be used for the Prinect Mail Service.
SMTP Server
This is where you enter the identifier of the SMTP server. This detail depends on the e-mail provider. Example: "smtpserver.emailprovider.com".
Port Number
Enter the port number of the SMTP server in this box (default = 25). Your e-mail provider can provide you with this information..
Connection Security
This is where you select whether the e-mail account has to be (or will be) set up with a connection security and, if so, with which one, matching the e-mail server. You can obtain related information from your system administrator.
User Name
This is where you enter the user name of the e-mail account that will be used for the Prinect Mail Service. This user name must be accepted by the e-mail provider.
Password
Enter the password related to the user name in this box.

Note: "User Name" and "Password" must only be entered if authentication is required. If not, leave the boxes empty.
Sender
This is where you enter the sender's address of the e-mail account. This is the e-mail address related to the e-mail account.
Default language for customer e-mail
This is where you can select the language in which the e-mails will be sent. You can select from the following languages: German, English, Spanish, French, Italian, Japanese, Korean, Polish, Portuguese, Russian, Thai and Chinese.

Note: You can use customized text modules if you should need a different language.
E-mail address of administrator
This is where you enter the sender's address that will be used for e-mails of the Prinect administrator. Certain e-mails can be assigned to an "administrator" depending on the action that triggered the sending of an e-mail.
The "Test E-Mail" button lets you send a test e-mail that uses the administrator account as the sender. A simple text e-mail is sent to test the connection.

Note: We recommend that you use the test e-mail function (see E-Mail Templates) to check what your e-mails look like.
This is where you enter the e-mail address of the print shop. This address will be used for e-mails sent to customers.
E-mail address of service contact
This is where you enter the e-mail address of your local Heidelberg service branch. This address will be used for e-mails sent directly to the service branch.
Internal contact data
This is where you can enter additional information for internal e-mails.
Base Template
You can use a "base template" as the default for your various e-mails. You can create a base template with a HTML editor and match it, for example, to the corporate identity of your print shop (company logo, font design, etc.). You incorporate text modules for the e-mail contents into this base template.
To create a base template, you can design an e-mail template. Use an HTML editor that does not use any external references in the HTML code for this or use an ANSI text editor. Use text modules for text that will be inserted automatically by the Prinect system into this base template (see Snippets). Set each text module between percent signs, using something like the pattern below:
|
%header.prinect.job.id% |
%HdmPrJobId% |
|
%header.prinect.job.name% |
%HdmPrJobName% |
|
%header.your.customer.jobname% |
%HdmPrCustomerJobName% |
|
%header.submit.comment% |
%HdmPrSubmissionComment% |
Base templates (in HTML format) are filed on the Prinect server in the "PTConfig\SysConfig\Resources\MessageTextFiles" folder. You can select one of the available HTML templates in this folder, edit it with a HTML editor and, if required, give it a new name when saving it.

Note: Remember that the "PTConfig" share will usually be write-protected as of version 2019 of the Prinect Manager. See Security. To edit the base templates, you need either the relevant administrator permissions in the Windows system or write-protect must be inactive (temporarily).
You can then select this file as the base template with the "Select Base Template" button.
Message templates
Whereas base templates are used for sending e-mails to customers, message templates are used for internal e-mails and service e-mails. You can customize the message templates accordingly. The process for creating message templates is equivalent to that of creating base templates. Message templates are also filed on the Prinect server in the "PTConfig\SysConfig\Resources\MessageTextFiles" folder.
In this tab, you can create customer-specific e-mail templates.
Procedure:
1.In the "Customers" list box, select a customer from the Prinect customer administration. Any e-mail templates relating to this customer now display.
2.Click "New". The "Select E-Mail Template" dialog opens.


3.Select a template type in "Template Type".
4.In "File" click "Select".

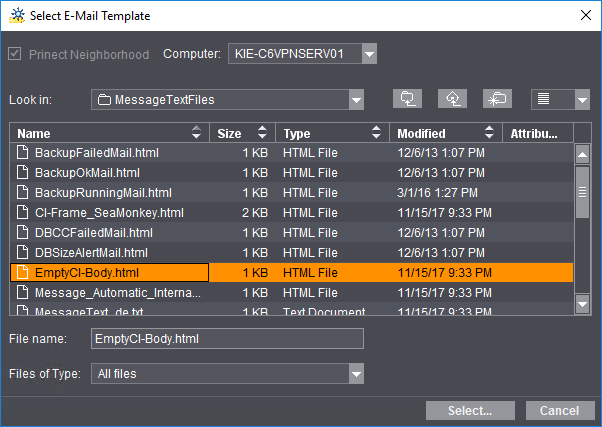
By default, you will find text templates in the "PTConfig\SysConfig\Resources\MessageTextFiles" folder.
5.Select a text template. Confirm the "Select E-Mail Template" dialog with "Save". The saved template displays in the list.
6.To test the e-mail template, mark the template and click "Test E-Mail". The "Test E-Mail Templates" dialog opens.


7.Select a template type. The e-mail address of the selected customer is set by default in "Recipient(s), as entered in "E-mail address of print shop" in the "Configuration" tab. See E-mail address of print shop. If required, you can enter a different, valid recipient e-mail address.
8.The e-mail is sent by clicking "Send".
9.Repeat steps 1 thru 8 if you wish to create further e-mail templates.
10.If you wish to delete a template, mark the item and click "Delete".
11.Click "Save" to save the template.
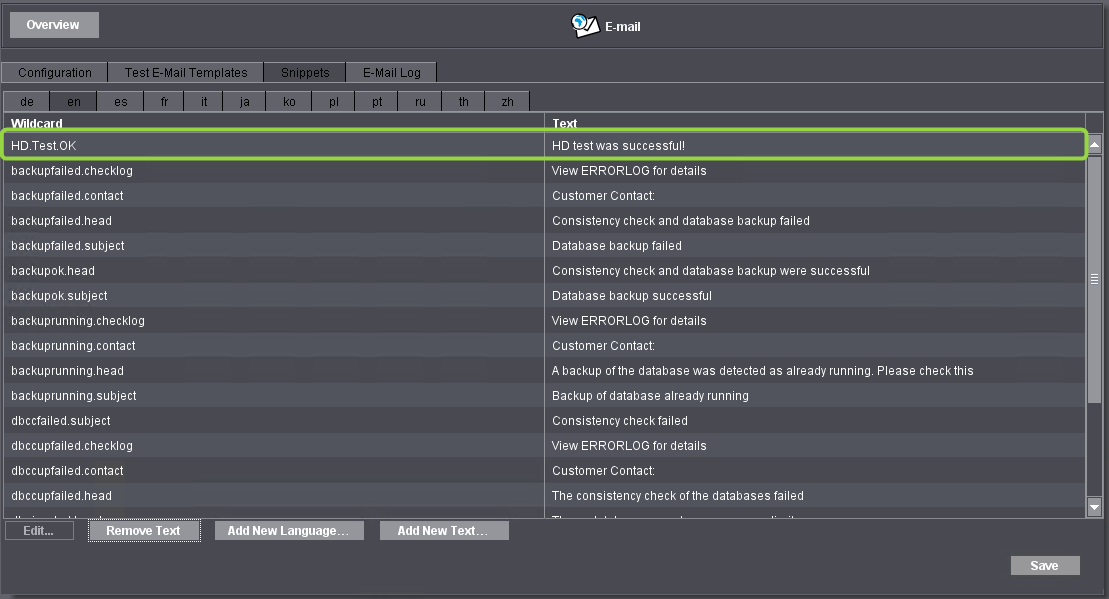
Text modules for e-mail messages are managed in this tab. Text modules are "placeholders" for various text elements which make up the contents of the e-mail texts. You can compile e-mail texts by joining together several text modules.
The reason for using text modules is that the texts relating to the single placeholders are available in different languages. This lets you compile the e-mail texts out of "language-independent" placeholders irrespective of the target language. When you select a target language, an e-mail text in that language is then produced.
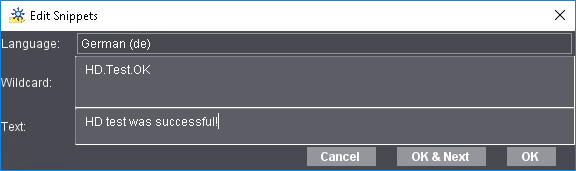
You can edit a text module by selecting one in the list and clicking "Edit".
The placeholder of the text module displays in the top part of the "Edit Snippets" dialog. You cannot edit this.
Below this is the text that will be inserted into the e-mails for this text module. You can edit this text.
Click "OK" to apply the change and close the window.
Click "OK & Next" to apply the change and load the next text module in the list to the window.
By default, text modules are available in the following languages: German, English, Spanish, French, Italian, Japanese, Korean, Polish, Portuguese, Russian, Thai and Chinese.
If you need other languages for e-mail texts, you can add them with the "Add New Language" button.

Prerequisite: This button is enabled only if a language tab is selected that does not match the currently set Cockpit language.
The "Select New Language" dialog opens after you click "Add New Language". You can select the language you want in the "New Language" list box.
You can select one of the languages installed by default in the "Based on" list box. This selection defines in which language the texts will be presented for translation into the new language. For example, if you select "English", the text modules first display in English.
Click "OK" to create the new language and close the window. A new tab is generated for this language.
Translate text modules
To translate the texts, go to the new language tab, mark the first text module in the list there and click "Edit".
In the "Edit Snippets" dialog, the existing text displays in the box in the language set in "Based on". You can now overwrite this text with its translation in the target language.
Click "OK" to apply the change and close the window.
Click "OK & Next" to apply the change and load the next text module in the list to the window.
1.Click "Add New Text":

Enter the identifier for the wildcard and the text that will appear in the e-mail into the respective boxes.

Caution: Overwrite all characters of the text defaults that display when the dialog opens! In particular, all special characters (%) in the defaults must be cleared. No new special characters that could be interpreted as HTML control characters may be entered. Correct conversion to the HTML code is done automatically when saving the dialog.
2.Confirm with "OK". Click "OK & Next" if you wish to create another text module.
3.The new text module displays in the list.

You can now use this text module in e-mail templates and edit it, if necessary, for example, translate it into other languages.
All e-mails sent by the system display in this tab. In addition to the date and time, recipient and subject, information about the success/failure of the outgoing e-mail also displays.