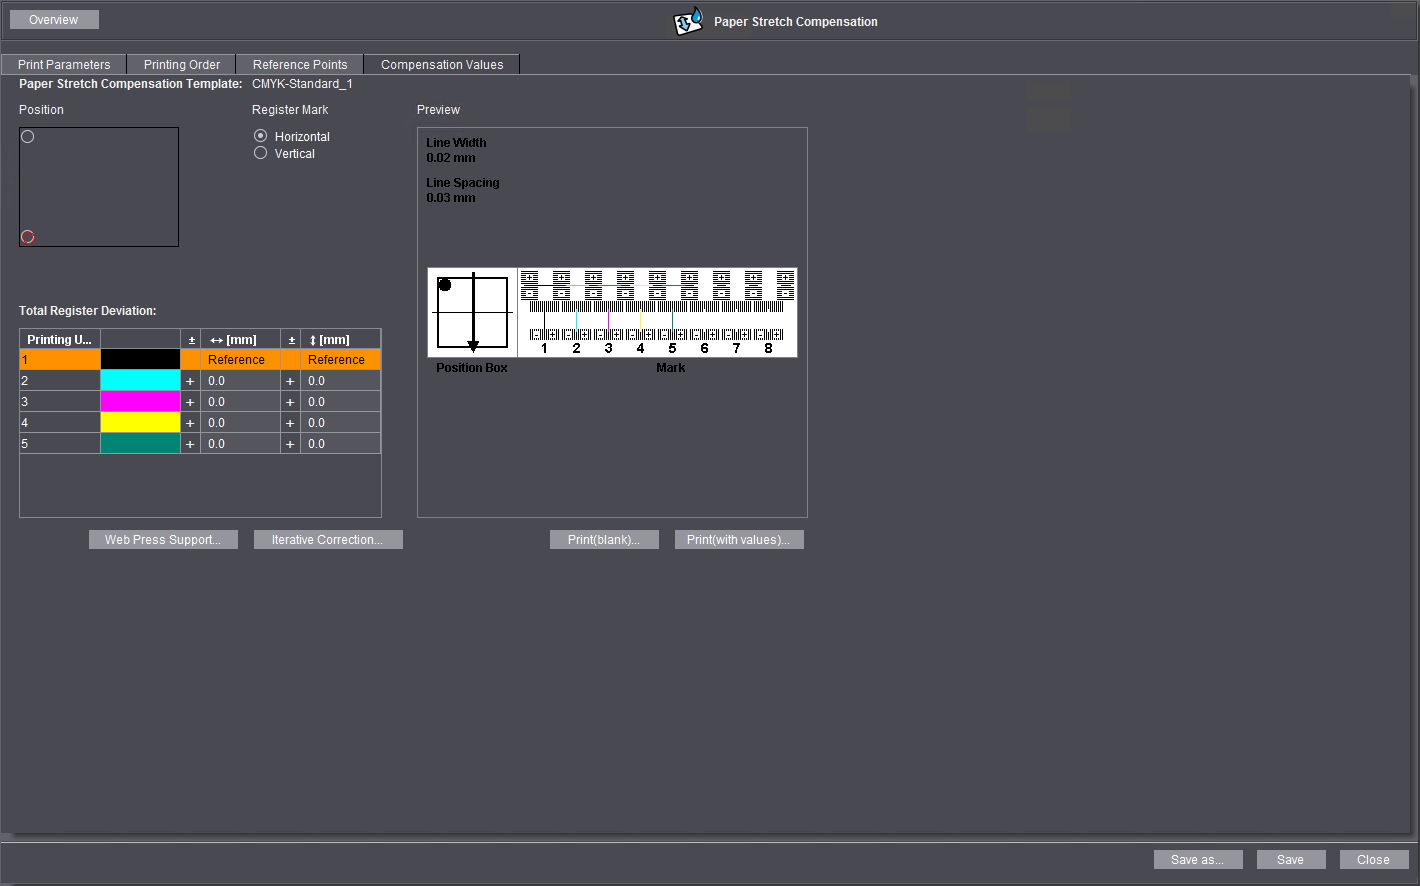
After you defined the reference points, you must enter the measured data for each reference point into the "Total Register Deviation" table.
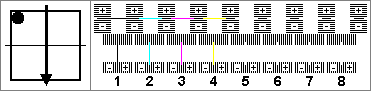
To be able to read the compensation values accurately, you may need a magnifying glass or a control microscope. You can print a table with the "Print(blank)" button if a (Office) printer is connected to your Prinect Cockpit PC. You can then jot down the values you read into this table. In this way, you can record the values without having to make inputs at Prinect Cockpit all the time. The measuring marks are structured as shown in the preview:

Note: You will find a detailed description of the measuring marks and instructions on how to determine the measured data in the documentation that is shipped with the marks.
The measuring mark has a horizontal and a vertical scale with positive and negative values for presses with up to eight inking units. In our example, four colors (K,C,M,Y) were printed and black is the reference color. The black measuring line is always at the "reference line" because the scales and the black measuring line are printed in the same printing unit. In the example shown, the measuring lines of the other colors have always shifted towards positive values. Negative values can also occur, depending on where the reference color is located in the press. The number of black marks that a measuring line deviates from the reference line produces the reading value as an integer. A measuring line lying between two marks on the scale results in a reading value with one digit after the decimal point.
All current Heidelberg measuring marks have the following scale division:
•Line width: 0.02 mm
•Line spacing: 0.03 mm.

Note: You will find a precise description of the measuring marks and instructions on how to read the measured data always in the documentation that is shipped with the marks.

Note: You can run an iterative correction if the compensation you get is not enough (see Iterative Correction).
Proceed as follows to enter the measured data:
1.First, mark the position of the measuring mark that is currently being read in the "Position" graphic.
2.Then click the appropriate option in "Register Mark" to specify whether the measuring mark is oriented horizontally or vertically (relative to the orientation of the sheet in printing). These parameters are shown in the preview image.
3.Enter the value determined (see Read off compensation values) into the "Total Register Deviation" table. The reference color is highlighted automatically in the table preventing you from inadvertently entering values in this position. Enter the horizontal and the vertical value for every other process color. Make sure that you enter the horizontal and vertical values as they are shown in the preview graphic. You can change the sign by clicking the sign column.
4.Now mark the position of the next measuring mark and enter the relevant measured data.
5.Repeat these steps until you have entered the data of all the measuring marks.
After you entered all your data, you can print the table with the compensation values to check it by clicking the "Print(with values)" button. To do this, a printer must be connected to the PC on which you operate the Cockpit.
You can increase the accuracy of the compensation you measured by one (or more) iterative measurements if you are not satisfied with the accuracy of a simple compensation measurement. Proceed as follows:
1.Measure compensation and save the compensation template.
2.Assign this paper stretch compensation template to a "PageOutput" or "ImpositionOutput" sequence and save the respective sequence.
3.Output the reference sheet again using this sequence and print it until you have a production sheet.
4.Open "Resources > Paper Stretch Compensation" in the Cockpit and open the compensation template you saved beforehand.
5.Go to the "Compensation Values" tab and click the "Iterative Correction" button. The "Iterative Correction" window displays:

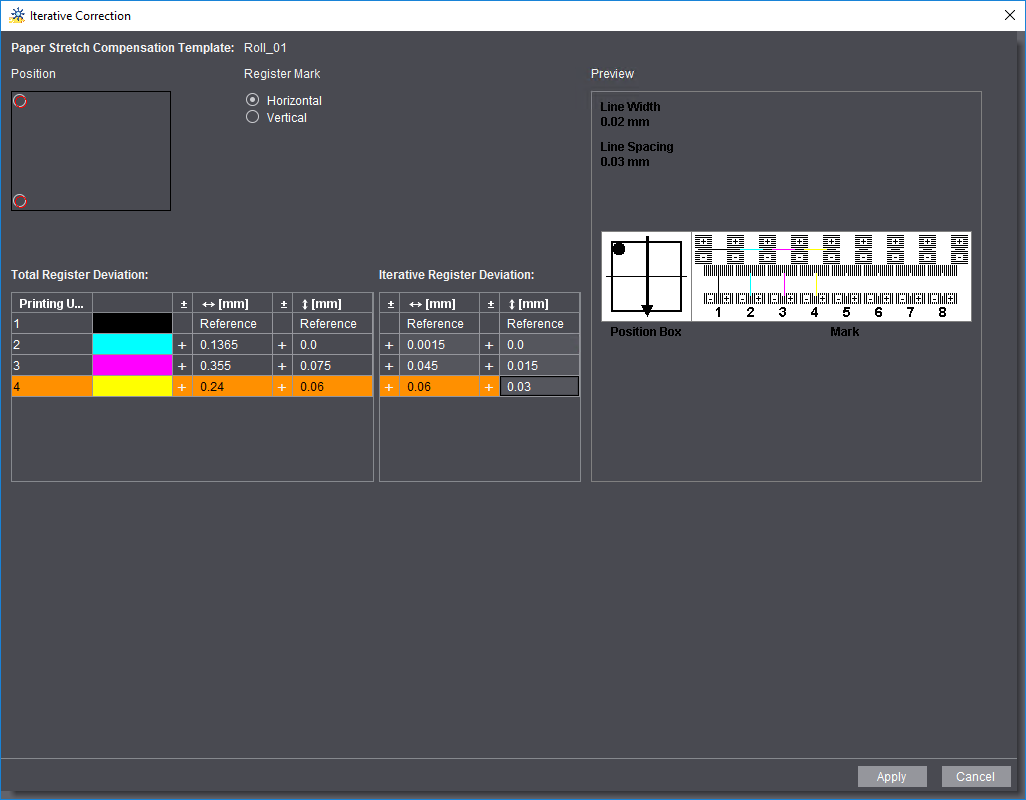
6.Now type in the measured data into the "Iterative Register Deviation" table as described in the section "Enter the measuring values" The total values of the measurement(s) saved beforehand and the iterative correction display in the "Total Register Deviation" table for checking purposes.
7.Click "Apply "to apply the data you entered. The "Iterative Correction" window closes. The "Total Register Deviation" table in the "Compensation Values" tab now shows the values that result from iterative correction.
8.Click "Save". The compensation template now corrects using the values determined with iterative correction.
9.To use the compensation template for print output, assign it to the "PageOutput" or "ImpositionOutput" sequence intended for printing.
Only compensation values in X and Y direction are needed for web presses. You can enter the paper stretch compensation values either in percent or in absolute percent.

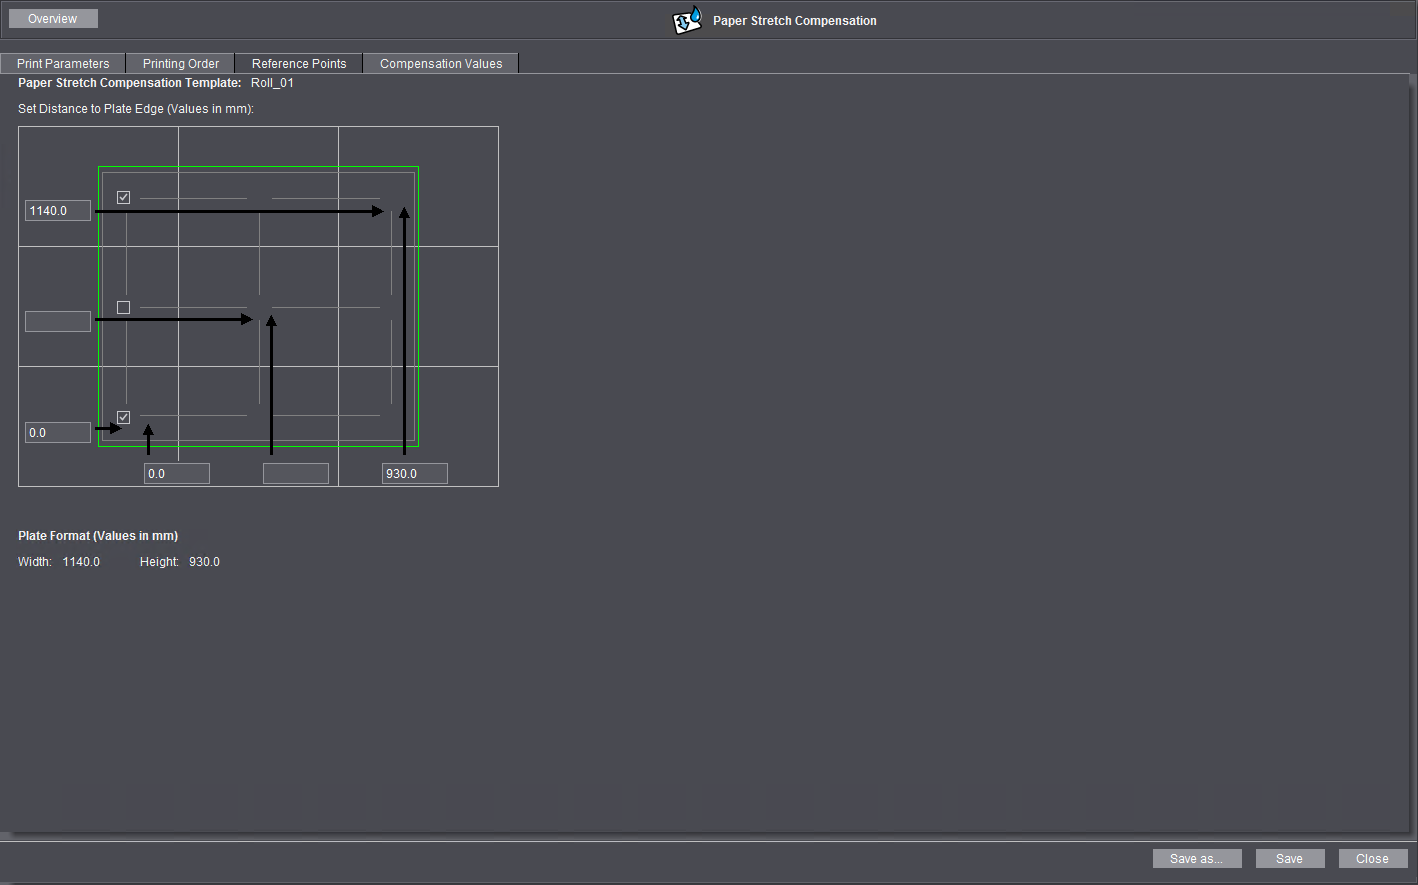
Prerequisite: Only measuring marks that are positioned in the outermost corners of the reference sheet may be used for web offset printing. The horizontal spacing for marks positioned on the left margin is zero; the horizontal spacing for marks on the right margin is equivalent to the full sheet width. The vertical spacing for the upper marks is equivalent to the full sheet height; the vertical spacing for the lower marks is zero. Only if the positions of the measuring marks meet these requirements can you open the "Web Press Support" window with the "Web Press Support" button in the "Compensation Values" tab.
You can use the "Web Press Support" button in the "Compensation Values" tab if you specified the mark positions correctly. You can enter your measured data when you click the button.
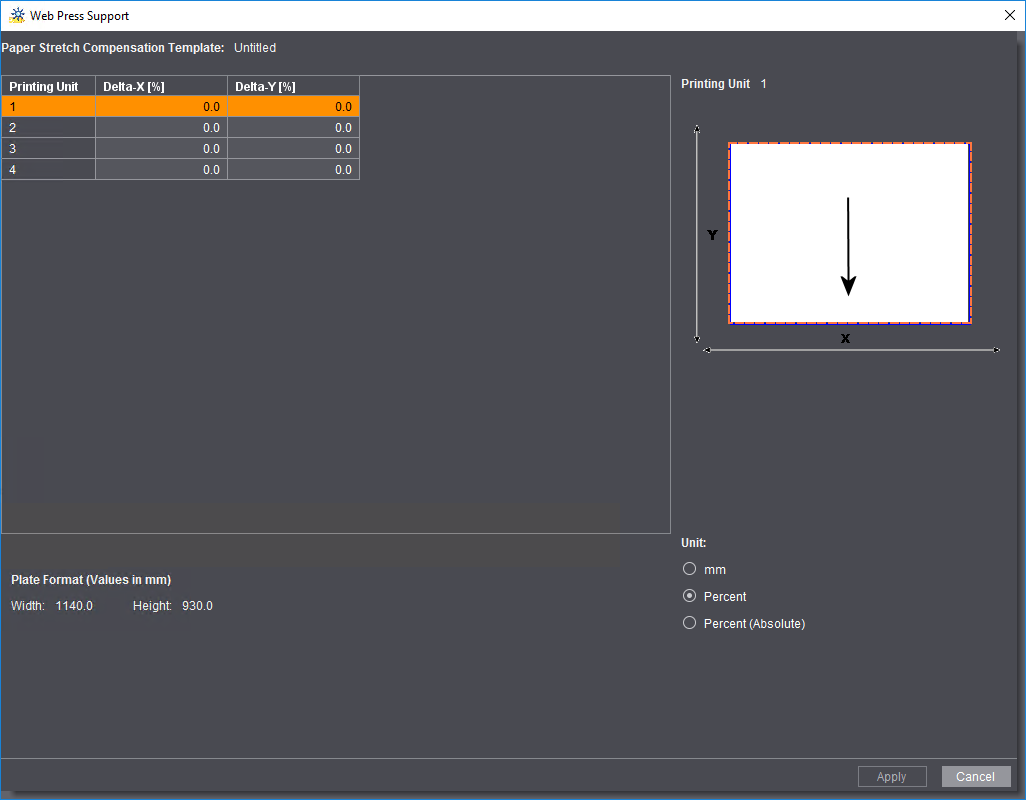
In paper stretch compensation for web offset printing, compensation values are specified frequently in percent and not in mm. You can choose between the following units of measure in "Unit":
•mm
Compensation values are determined as described in the Read off compensation values section.
•Percent
Compensation values are entered as "Delta percentages". If you set this option, a value of "Delta 0%" means that there is no paper stretch. For example, a value of 0.05% measured for paper stretch in the second printing unit is entered as the measured value.
•Percent (Absolute)
If you set this option, a value of "100%" means that there is no paper stretch. For example, a value of 0.05% measured for paper stretch in the second printing unit is entered as "100.05% absolute".