
Prerequisite: Before you can export a job, make sure that the job state is "Active".
In addition, you should have defined a custom "JobExport" sequence that matches your requirements (see Set up "JobExport" Sequence).
Proceed as follows to export print jobs with the "JobExport" sequence:
1.Go to the "Jobs" workspace and in the job list mark the job that you wish to export.

Note: You can also export several jobs at the same time using multiple selection.
However, if you use multiple selection, you cannot assign specific names to the exported ZIP archives. The ZIP file names are created automatically from the job names.
2.Right-click and select "Export" in the context-sensitive menu or select the "File > Export" menu command.
If a selected job is not "Active", a message displays, asking you whether this job is to be made active.
After that, the "Export Job" dialog opens.

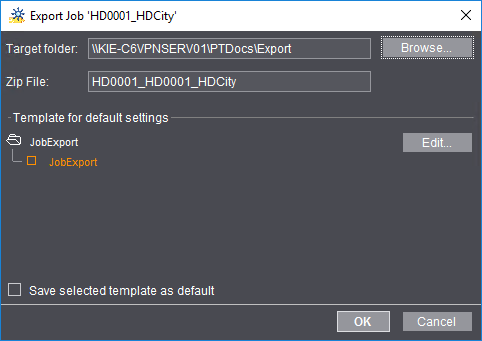
3.In the "Target Folder" box, use "Browse" to define a folder where the ZIP archive will be stored. The "PTConfig" folder in the system environment of the Prinect server opens by default. However, you can also select a folder in the network neighborhood of the Prinect server.
4.In "Zip File" you can assign a custom name for the export archive file if you are going to export just one single job. The name of the exported print job is used if several jobs are exported at the same time or if no items are changed in this box.
5.In "Template for default settings" select the JobExport sequence that will be used for the export. You can edit the selected JobExport sequence if necessary with "Edit".
6.The selected JobExport template is set by default for the next export, if "Save selected template as default" is enabled.
7.The export starts and the dialog closes when you click "OK".
To follow the progress of export, you can go to "Queues". Look for the "JobImExporter" item in the "Engine" column.
"JobImport" lets you import print jobs that were exported to a ZIP archive with the "JobExport" sequence again to a Prinect Manager.
You must do the following steps to import jobs:
Before you can import jobs, you must first define a "JobImport" sequence. In "Administration > Templates" you can mark "JobImport" as your sequence type and create a new sequence with the "New" button or you can open an existing JobImport sequence with a double click, define your settings and then save it as a new file.
You can define the following settings in a "JobImport" sequence:
•You can select one of the existing "import engines" in the "Job Import on" list box. Generally, you can leave the default setting "AllJobImports" as it is.
•The job number set for the export is used for the imported job if you enable the "Keep Job Number" option. Delimiters are ignored in job numbers that are used again for import. In a given case, keeping the job numbers can conflict with a job already in the system that is already assigned the same job number. To avoid this, disable this option and assign the job number manually in the import dialog.

Prerequisite: Jobs that are to be imported must have been exported from the Prinect Manager (see the "JobExport" Sequence Template) and the relevant ZIP files must be accessible in the system environment of the Prinect server.
To import an exported job again to a Prinect Manager, go to the job list in "Jobs". Proceed as follows:
1.If the job list has a folder structure, mark the folder to which the job will be imported. If not, highlight the "PRJOBS" folder.
2.Right-click and select "Import" in the context-sensitive menu or select the "File > Import" menu command.
The "Import Job" dialog opens. The "Select a zip file for import" dialog opens automatically at the same time.

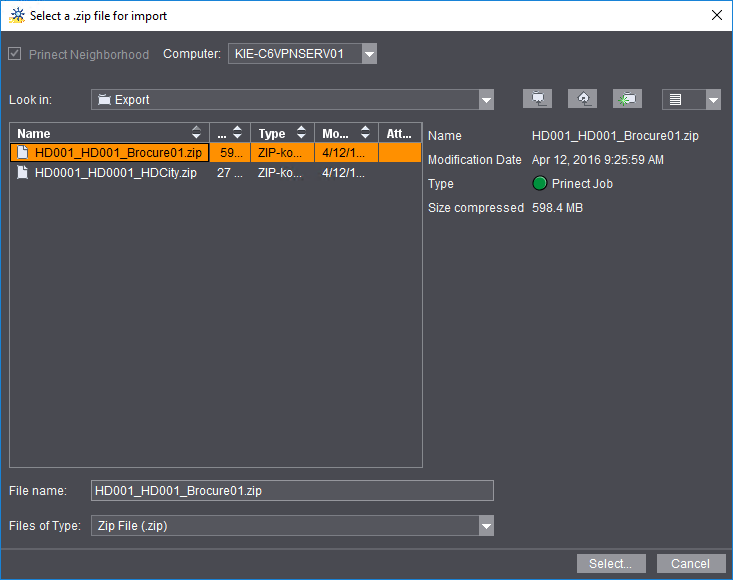
The "PTConfig" folder in the system environment of the Prinect server or the folder from which a job was last imported opens by default. Go to the folder where the ZIP file is located and mark the ZIP file you want. Then click "Select". The job details are copied to the "Import Job" dialog.

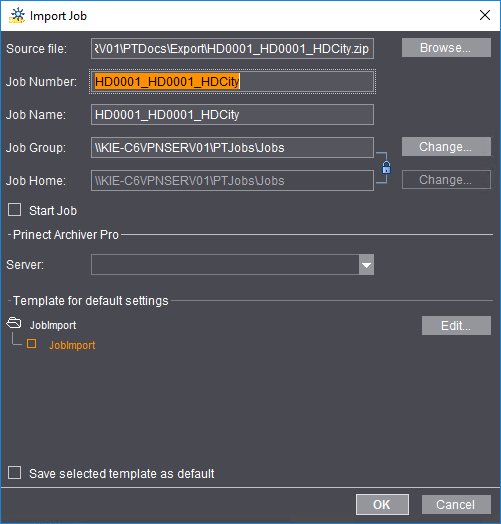
3.If you opened the wrong ZIP file by mistake, you can use "Browse" to select a different file in "Source file".
The "Job number" box displays the job number assigned for export. The job number is red if this number already exists. You must then change the job number.
The "Job name" box displays the job name assigned for export. The job name is red if this name already exists. You must then change the job name.
The "Job Group" and "Job Home" boxes display the respective group folders. These appear by default when the relevant folder is selected in the job list. You can select a different folder with "Change".
4.The imported job starts automatically after import if the "Start Job" option is enabled.
5.In "Template for default settings" select the JobImport sequence that will be used for the import. You can edit the selected JobImport sequence if necessary with "Edit".
6.The selected JobExport template is set by default for the next export, if "Save selected template as default" is enabled.
7.The import starts and the dialog closes when you click "OK".
Replace an existing job by importing a job that was exported beforehand
In certain cases, an existing job may be replaced by an archived job. In this case, the replaced job is removed from the system and the imported job takes its place.
Proceed as follows to replace an existing job:
1.In the job list highlight the print job that you wish to replace.
2.Right-click and select "Replace by Import" in the context-sensitive menu or select the "File > Replace by Import" menu command.
A dialog with an alert message displays. You must confirm this with "Continue" if you really want to replace the existing job.
The "Replace Selected Job by Import" dialog opens. The "Select a zip file for import" dialog opens automatically at the same time. The "PTConfig" folder in the system environment of the Prinect server or the folder from which a job was last imported opens by default. Go to the folder where the ZIP file is located and mark the ZIP file you want. Then click "Select". The job details are copied to the "Import Job" dialog.
3.If you opened the wrong ZIP file by mistake, you can use "Browse" to select a different file in "Source file".
The "Job number" box displays the job number assigned for export. The job number is red if this number already exists. You must then change the job number.
The "Job name" box displays the job name assigned for export. The job name is red if this name already exists. You must then change the job name.
The "Job Group" and "Job Home" boxes display the respective group folders. These appear by default when the relevant folder is selected in the job list. You can select a different folder with "Change".
4.The imported job starts automatically after import if the "Start Job" option is enabled.
5.In "Template for default settings" select the JobImport sequence that will be used for the import. You can edit the selected JobImport sequence if necessary with "Edit".
6.The import starts and the dialog closes when you click "OK".