
In this context, "Rendering" refers to the preparation of document data especially for reproduction in proofs. In this option, you can set specific settings for the selected proofer in "Device" and in "Proof Color Management" configure settings that affect color reproduction in the proof.
"Device" Section
In this group you can configure device-specific parameters for the proofer set in the "on" list box. The settings that are possible can vary depending on your device.
"Type" box
This shows the proofer that you set in the "on" list box.
"Size" list box
Set the size of your proofing material in this box. The "Dimensions" boxes show the sizes in the various units of measure.
"Borderless printing" option
Borderless printing is active by enabling this option and if the selected proofer is capable of borderless printing.
"Material" list box
You can select different paper grades for the proof in this box. The settings that are possible in this group are read from the properties of the proofer device driver (e.g. Prinect Color Proof Pro) and sent to the Prinect Cockpit. For that reason, different materials can be available, depending on what device is active.
"Resolution" list box
Select the resolution you want for the proofer from the list box. The resolutions that are presented depend on the properties of the proofer.
"Optimization for Inspection Control" option
Prerequisite: This option is available only if the following prerequisite is met:
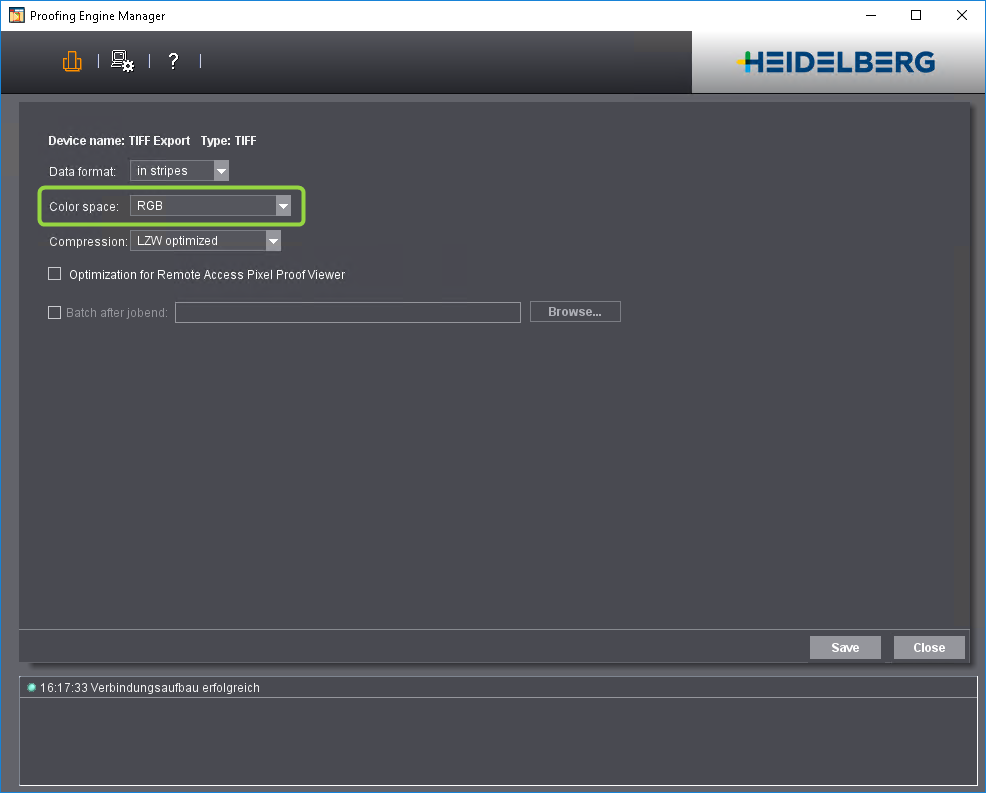
A "TIFF" soft proof printer must be set up with the Proofing Engine Manager and set for the RGB color space. This soft proof printer must be set for this sequence:
When you enable this option, the "PageProof" sequence creates special Tiff files for Inspection Control. The output files then have the following setup:
•Resolution is set to 200 dpi (needed for Inspection Control).
•An antialiasing factor of '6' is set. This creates a very smooth image that optimally matches the scan results of Inspection Control.
"Interpreter Resolution" list box
Select the resolution you want for the interpreter from the list box. With some printers, it's possible for you to set a different interpreter resolution to the printer resolution. For example, you can set a lower interpreter resolution to increase the job processing performance.
"Antialiasing" option
Antialiasing is used when calculating the proof data if you enable this option. Antialiasing is disabled automatically if the resolution exceeds certain limits. In such cases, better quality is not possible and antialiasing would only inflate the volume of data.
"Ink" list box
In the Color Proof Pro Engine Manager, you can use the "Profile Keeper" to select different types of ink, depending on your proofer. Select the ink that will be used for proofing with this PageProof sequence from the list box. For example, different inks for matte or glossy paper are available for the Epson Stylus Pro 7600. Make absolutely sure that the ink you set is actually loaded in the proofer.
"Tray" list box
If the output device has different paper feeds, you can select one in this box. For example, you can choose between "Single Sheet" and "Roll" for the Epson Stylus Pro 7900.
"Proofer Profile" list box
This box displays the profile that is used, depending on the parameters you selected for "Paper", "Resolution" and "Ink". You can select a profile in this list box if more than one EPL/ICC combination (e.g. with different quality modes) was created in the Color Proof Pro Engine Manager.
"Visual Correction" option
In the Color Proof Pro Engine Manager, you can visually correct the linearization data for color output with your proofer. To do this, you can manually change the gradation curves of single separations or groups of separations, based on the visual assessment you made of your print and proof results. You can save the settings as a file (*.lvc). To use the linearization correction for proofing, check this option and select the ".lvc" file you want using the "Browse" button.
"Color Separations" list box
This is where you set what will happen to process or spot colors during proofing. The following options are given:
•Convert all colors to grayscale
All CMYK and spot color channels (color separations) are mapped to the black channel. As a result, you have a black separation that contains cyan, magenta, yellow and any existing spot colors as grayscales in addition to black.
•Leave spot color handling to device (default):
Spot colors are handled as set in the Engine Manager (Color Proof Pro, Proofing Engine Manager) set up for the selected proofer. Spot colors are generally converted to process colors for "real" proofers, i.e. devices that create printed proofs. You can also output spot colors with special proofers or a "soft proof" device like "TIFF Export" (Proof Open).
"Remove ProofColor/DieLine Colors" option
Objects defined as "ProofColor" or "DieLine" do not appear in the proof if this option is enabled. Such objects can be trim marks or register marks, for example. Such marks are designed generally for an imposition proof and are not needed in the color proof.
"ProofColor" is a special spot color that is assigned to objects when creating the signature layout at the Prinect Signa Station. These objects are to appear in the imposition proof but not in the imagesetter output. Such objects can be trim marks or register marks, for example. Similarly, the "DieLine" spot color is used at the Prinect Signa Station in the marks layer. Lines in the "DieLine" color describe the pages and the sheet format.
"Remove Transparent Separations" option
Transparent separations are not shown or output in the proof if you enable this option.
"Show Trim Box on Proof" option
A trim box is output for each page in the proof if you enable this option.
"Optimize Step and Repeat" option
This option is designed for print jobs that have several identical pages placed on one sheet (copies). The aim of step-and-repeat optimization is to interpret each of the objects that are repeated just once to shorten processing time.
This function is enabled when you select the "Optimize Step and Repeat" option. Then each of the objects that are repeated in jobs that have copies is interpreted just once.
Restrictions:
Step-and-repeat optimization is not applied even if the option is enabled if you have one of the following conditions:
•The multiple pages are rotated and rotation is not a multiple of 90° (e.g. 1° to offset errors during cutting).
•The pages are split for proofing by selecting "Imposition > When Media Too Small > Tile across Multiple Media".
"Proof Color Management" Section
You can set up color management through the "Color Conversion" option at various places in the Prinect workflow. These settings affect different parts of the Prinect workflow, depending on the sequence they were enabled in. Proofing has special color management parameters. These parameters are not set up using the parameters that are found in the "Color Conversion" option. Such parameters are, for example, special device profiles, proofing options such as paper white simulation, etc. You can set up these options in the "Proof Color Management" group. A correct Proof Color Management is absolutely essential for page proofing to a "real" proofer that is used mainly for judging color pages. For that reason, you should define your settings in this group very carefully.

Note: Proof Color Management is disabled as the default if a soft proofer that outputs image files is set as the proofer. This makes sure that the color data are not falsified when measured in the Bitmap Viewer.
In this case, the ImageViewer provides correct Color Management or in a Remote Approval workflow the Pixel Proof Viewer does this.
On the other hand, Proof Color Management must be enabled for "JPEG" files for the Portal Services Booklet Approval tool and a sRGB proof profile must be set, e.g. "HDM_sRGB_Profile.icm".

Note: The display of spot colors in proofs for outputs using the Renderer has been optimized further by matching the spectral algorithm to the exact L*a*b* definition of the spot color.
"Proof Color Management" is enabled with the appropriate check box.
"Press Profile" box
To match offset printing and proofing, you must select a press output profile (ICC profile) from this box that represents an offset printing standard (e.g. ISO coated). The profile selected here must be identical to the press profile selected in the "Prepare" sequence in "Color Conversion > Output". You can use this press output profile to determine which color adjustments Proof Color Management will make for the printing process. The press profile is used during proofing to simulate the output process on the proofer. A number of standard print output profiles are already installed with the Prinect software. You can load a press profile by clicking "Browse". A folder with the press profiles installed by default opens automatically in the Prinect environment. You can also enter the path and the name of a profile manually.
In "Administration" > "Resources" > "ICC Profiles" you can see an overview of all the ICC profiles available in the Prinect workflow. You can also import new profiles, create new profile folders, delete profiles, etc. there. The ICC profiles are filed in "SysConfig\Resources\ICC Profiles". "SysConfig" is the shared configuration folder on the Prinect server.
"Use Press Profile from Job Settings, if Available" option
An output press profile that was assigned to the job in the job settings in the "Printing Process" tab is used if this option is enabled.
In the job settings you can check in "Consistency Check" in the "Printing Process" group whether a press profile that you will assign to the job is suitable for this purpose.
•If there is a green dot in front of the selected press profile, you can process the job with the selected press profile.
•There is a conflict if there is a yellow triangle before the selected press profile. If this is the case, you should use a different press profile.
"Use Embedded PDF/X Output Intent, if available, as Press Profile" option
•The system behaves as follows if this option is enabled:
·When a PDF/X file with an embedded ICC profile as its Output Intent is processed, the embedded press profile is used for color space conversion. The press profile set in "Press Profile" is ignored.
·If there is no Output Intent, the ICC profile set in "Press Profile" will be used.
•The press profile set in "Press Profile" is used for color space conversion if this option is not checked.
Any embedded PDF/X Output Intent will not be used for color space conversion during output.
You must always enable this option if you process jobs using the PDF/X policies.
"ISO paper grade in offset printing" parameter
The Prinect Renderer processes spot colors for proofing using special spectral algorithms and maps these colors to the proofer color space. Different spectral data sets are used for simulation of the various offset ISO paper grades to give you as realistic results as possible.
In the "ISO paper grade in offset printing" list box, you can select the ISO paper grade that will be used for offset printing. The selected paper grade lets you control which spectral data set will be used for simulating during proofing. This gives you a very precise reproduction of the spot colors in the proof.

Note: In ImpositionProof outputs, the selected ISO paper grade is overwritten by the ISO paper grade of the layout printing material if this is set.
"Proofer Profile" option
Select the output profile for the proofer that you want to use for proofing. This profile is used by color management for conversion into the device color space of the proofer that will be used. A number of standard print output profiles are already installed with the Prinect software. You can load a press profile by clicking "Browse". A folder with the press profiles installed by default opens automatically in the Prinect environment. You can also enter the path and the name of a profile manually.
In "Administration" > "Resources" > "ICC Profiles" you can see an overview of all the ICC profiles available on the Prinect server. You can also import new profiles, create new profile folders, delete profiles, etc. there. The ICC profiles are filed in "SysConfig\Resources\ICC Profiles". "SysConfig" is the shared configuration folder on the Prinect server.

Note: To make sure proofing is true-color, we recommend characterization of the proofer with each of the media and inks you will use and import of the resulting ICC profiles. The standard proof output profiles provided are for test purposes and are not suitable for high-quality proofing.

Note: You cannot select a proofer profile for proofers driven by Color Proof Pro because a suitable profile is already set up in the device settings of the Color Proof Pro software.
"Rendering Intent" list box
In addition to selecting ICC profiles, you can set the rendering intent for the individual graphic/image types that can be found in the documents. Rendering intent determines how the color space adaptation should be executed: Since losses always occur during a color space transformation, it can be helpful to, for example, retain the photographic perception of an original and to accept a limit on the number of color values. The following parameters are available for rendering intent: "Saturation", "Perceptual","Relative Colorimetric" and "Absolute Colorimetric":
•Saturation:
In the output, the colors are rendered in such a manner that the color saturation is retained or even emphasized. The colorimetrically precise rendering of colors can be retained or not. The type of color matching is manufacturer-specific, with the user being able to define some settings during profile generation. This option is suitable for business graphics where the color saturation is the most important attribute in color rendering.
•Perceptual:
When you use the "Perceptual" parameter, you obtain an output, that essentially contains the perceptible impression of the original. This means that the precise, colorimetric rendering of the colors is modified in favor of the retention of the relative color relationships. Here, the output color space is compressed, i.e. "fewer" colors are output as existed in the original. With this color matching option, the hue in all the natural colors of the original is reproduced for the most part correctly but with restrictions in the contrast. The type of color matching is manufacturer-specific, with the user being able to set some of the aspects such as contrast and chroma change during profile generation. This option is especially suitable for photographs.
•Relative colorimetric (no paper white simulation)
Colors are rendered taking solely the light source into account. The rendering intent of the print medium (e.g. the color of the unprinted paper) is not taken into account. For example, the illuminant of a monitor would be correctly rendered on the print medium. All colors that lie within the output color space are rendered identically. All colors that lie outside of the output color space are displayed on the margin of the output color space. The advantage of this rendering intent is that different illuminants of different output media are taken into account. The disadvantage is that the color adaptations are not exactly retained when switching from one output medium to another. As a result, very dark or very colorful details in the originals can be lost when they are reproduced. The printing material is not simulated during an output process simulation. If production run paper is used during the simulation, the result is the same as if you used the "absolute colorimetric" rendering intent. This rendering intent is suitable mainly for vector graphics.
•Absolute colorimetric (paper white simulation)
Colors are rendered taking the light source and the medium illuminant (e.g. the color of the unprinted paper). For example, the illuminant of a newsprint paper which is shifted from illustration printing paper towards yellow compared to the illuminant of paper is rendered with a yellowish cast. That is why "Absolute colorimetric" is the default setting for a proof output. All colors that lie outside of the output color space are displayed on the margin of the output color space. The advantage of this rendering intent is that the exact color values are retained when switching from one output medium to another. The disadvantage is that any colors that lie outside of the output color space cannot be distinguished. This rendering intent is especially suitable for logos or monochrome objects which must be reproduced exactly the same way on different output media.

Note: You should define the following settings for rendering intent if you want true-color proofing:
You should use "Relative Colorimetric" rendering intent if you do not need paper white simulation.
You should use "Absolute Colorimetric" rendering intent if you need paper white simulation. Consequently, all colors in common of the source and target color space are rendered identically. It makes sense to use this rendering intent since a proofer normally has a wider gamut than the print process it simulates. In case colors in the color file you want to proof extend beyond the proofer's gamut, these colors will be mapped to the "edge" of the proofer color space. This means, all colors not covered by the proofer's color space are rendered with those colors the proofer can just about support. As a result, shadow areas may lose detail.
The "Perceptual" and "Saturation" rendering intents are not suited for proofing. You can use them in the "PageProof" sequence if you wish to use this sequence for color prints on a proofer where a true-color proof preview is not important.
Pure 100% black, e.g. black text, will not be changed by Color Management when you enable this option.

Note: This option affects CMYK outputs in addition to the parameters set in "Keep Black". In other words, it overrides the parameters of "Keep Black". You must disable this option if the settings of "Keep Black" are to affect CMYK outputs.
This option also affects outputs to multicolor proofers with CMYKOG or CMYKRGB output color spaces whereas "Keep Black" has no effect on these proofers (see note below).
"Keep Black" option

Note: The "Keep Black" option works only if the input profile and the output profile are CMYK profiles. These settings do not affect multicolor proofers with CMYKOG or CMYKRGB output color spaces. You can enable "Keep 100% Black" to keep 100% black unchanged for these proofers.
Jobs are often created deliberately with a "long" or "short" black, for example, with a short black to improve the impression of smooth screening in skin tones or with a long black to stabilize gray balance when reproducing black or metallic-colored technical equipment. Generally, you talk about a "short black" if only a little black ink (K) is used to improve the contrast and definition in dark areas. If black is used to replace more or less large but equal parts of the three chromatic inks C, M, Y in the color blending (under color reduction) and, by doing so, to reduce the volume of ink in the print, then we talk about a "long black".
If a job involves a process conversion (Color Management from CMYK to the CMYK of the planned output device), the length of the black channel in the output normally depends only on the makeup of the press profile. However, Heidelberg Color Management is able to modify black in the press profile during process conversion in such a way that it is similar to black in the input profile. This only works if the original black in the press profile is longer than black in the input profile.
This option affects the black portions in CMYK graphics and images. If the option is activated, black generation is retained as far as possible so that it matches that in the job. Color Management makes adaptations only when they are required to retain the visual impression of the black tone.
"Special", "Basic" and "K = K" options
•Special (default)
This is a special setting that works as follows:
·C, M, Y are converted to the target CMY color space for mid-range and light hues. K is converted by means of a gradation curve.
·A special four-dimensional model keeping K is used for dark hues.
Extensive test series have shown this process to be the best. The "Special" parameter eliminates most of the problems in complex documents. This parameter is available only in Heidelberg Color Management. This setting is suitable for documents with text, color and gray images.
•Basic
C, M and Y are converted to the target CMY color space, K is converted to the target density with the help of a gradation curve. The gradation curve solves any problems you may have with differing black ink densities. This setting is suitable for documents with grayscale images.
•K = K
Only C, M and Y are converted to the target CMY color space, K is not converted. Black remains identical. This setting is ideal for documents with a large amount of text and line art.

Note: The "K = K" setting can cause problems during an output if the black inks have different densities in the original and target color spaces.

Note: It is recommended that the "Preserve Black Generation" option is always enabled, even if this slightly increases the calculation time of the jobs.
Spot colors are replaced by their CMYK values for proofing. You can set the overprint behavior of spot colors with the following options:
"Closest representation of spot colors to print (compositing and opacity)" option
An intelligent algorithm that accesses an internal spot color database is used for proofing spot colors if you enable this option. This database contains details about the known spot colors, making a very precise reproduction of spot colors in the proof possible. This procedure is a significant enhancement compared to the process of substituting spot colors with process colors that are defined in the color tables.
Values for the substitute process colors that were determined by exact analyses and test series are used to display spot colors in the proof. In this process, the opacity of the spot colors that was defined in the color tables or in the job settings is also implemented precisely.

Note: The number of spot colors that can be shown is restricted in this method of displaying spot colors in proofs. The maximum number of spot colors is calculated using the following formula:
Maximum number of spot colors that can be shown = 32 - 2 * number of process colors.
For example, if you output four process colors (CMYK), the maximum number of spot colors is 32 - 2 * 4 = 24.
With six process colors (Hexachrome), the maximum number of spot colors is 32 - 2 * 6 = 20.
If the maximum number of spot colors is exceeded, the substitute process colors as defined in the color tables are used in proofing. Generally, this produces a completely different reproduction of the spot colors in the proof. Remember that this changeover occurs as soon as the maximum number of spot colors using the formula above is exceeded.
"Print colors that are defined to be opaque 100% opaquely" option
All spot colors are 100% opaque in printing.

Caution: This option is designed only for special cases where it is absolutely necessary for the spot colors to be output as opaque colors in the proof. Enable this option only if you are sure that opaque spot colors are really needed in the proof. Otherwise, you run the risk that objects defined in process colors will be covered by opaque spot colors in the proof and can still be seen later in print ("shine through").
"Print all spot colors transparent to check overprinting" option
When you enable this option, all the spot colors are transparent in printing and the opacity with which they originally were defined in the color tables is not used. This makes it easier to see in the proof if there are spot color objects that are defined as overprint but that actually should be set to knockout. These colors could cause the background later in print to "shine through" inadvertently.
"Invert order of process colors to proof offset printing to transparent foil" option
Proofing is in the reverse order compared to offset printing when this option is enabled.
This option is designed for the case that offset printing is to be to transparent foil and that this is to be simulated in the proof. If overprinting spot colors (e.g. background white) are used in this case, you must take into account which color separation represents the emulsion side in offset printing or the order of the colors in the composite. For example, if the emulsion side is at the back in offset printing, you must invert the order of colors in the proof to simulate the composite.
Example: In offset printing, printing is to a transparent foil, and the order of the colors is BCMY. In addition, opaque white that is placed below the other colors will be printed. The emulsion side is at the back as seen by the observer. To simulate this to a proofer, opaque white must be used first when combining the colors because it would otherwise cover the 1up. Opaque white is a typical case that generally is valid for all overprinting spot colors.

Note: When the order of the process colors is inverted, effects that occur in the overprint because of the expected modified emulsion thicknesses are ignored.
Make sure that the order of the process colors is set up correctly in the Color Proof Pro Engine Manager if a proofer with a white option is used (e.g. Epson WT7900) and a WHITE_INK separation printed.
"Show DieLine Colors Opaque"
The DieLine colors (see the "Remove ProofColor/DieLine Colors" option) appear opaque in the proof if you enable this option. This option has the following impacts:
•This option fundamentally has no impact if output (hard proof or soft proof) is in the "CMYK + spot colors" model.
•This option affects output if the output color model is not "CMYK + spot colors", i.e. for RGB and CMYK-Tiff outputs.
•This option does not affect soft proofs because the "CMYK + spot colors" model is used for this.
"High-precision calculation for overprinting spot colors (longer computing time)" option - not necessary for ISO offset process
This option can enhance the handling of spot color shades in Proof Color Management.
If shades that are defined for overprinting spot colors are to be output, they are calculated in a special, complex process when this option is enabled. This produces smooth shading on the transitions between areas without spot colors and areas with a very thin amount of spot color. Visible breaks can occur occasionally in these transitions without this option, especially if non-standard press profiles are used.

Note: This option only makes sense in conjunction with the "Relative colorimetric" and "Absolute colorimetric" rendering intents. This option has no benefits when proofing in an ISO offset process.

Caution: Calculation time for the proof slows down when this option is enabled. For that reason, you should enable this option only if issues with breaks in shading really occur!
"Color Handling" group
"Overprint Emulation" option
This option influences the overprint behavior of spot colors that are converted to CMYK for proofing by InRIP conversion.
Overprint of the original spot colors is simulated for the spot colors converted to CMYK if this option is enabled. There is no overprint of the spot colors following conversion if this option is not enabled.