
How to Create a Smart Template
Prerequisite: Before you start to set up your smart template, give some thought as to which sequence types or clearly defined sequences are needed for the template and how the template placeholders will be linked with each other.
Proceed as follows to create a new smart template:
1.In "Administration > Templates", mark "Smart Templates" and click "New". An empty window ("untitled") will open up, into which you can insert the template placeholders. All available sequence template icons display to the right of the window.

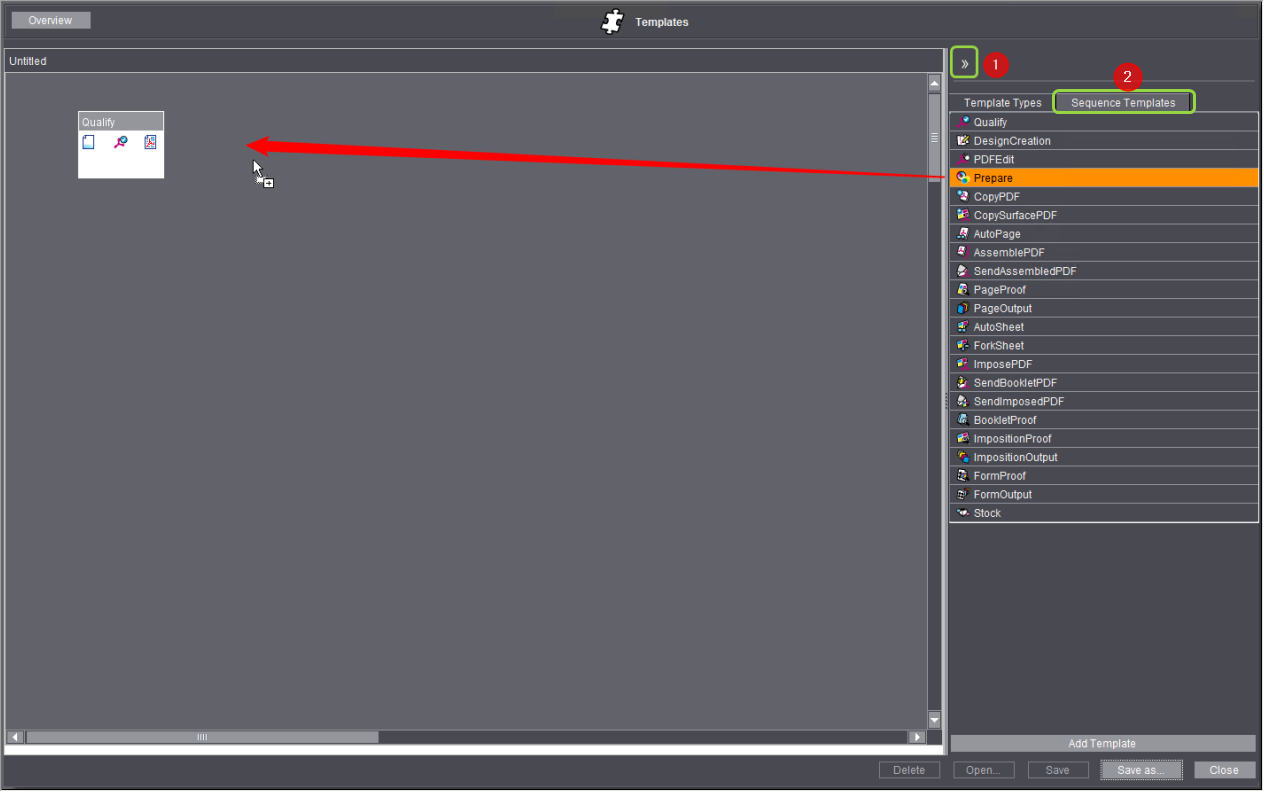
2.You can add various template placeholders to the template window by clicking the template placeholder you want and either dragging-and-dropping it to the window or clicking "Add Template.
You can show or hide the view of available template placeholders by clicking the double arrow (1). You cannot add any template placeholders if this view is hidden.
If you do not wish to add a template placeholder for a template type that will be replaced dynamically by a concrete sequence template only during processing but want to add a sequence template that is already defined, go to the "Sequence Templates" tab (2) on the right and select the template(s) you want. You can mix template types and sequence templates as you want in a smart template.
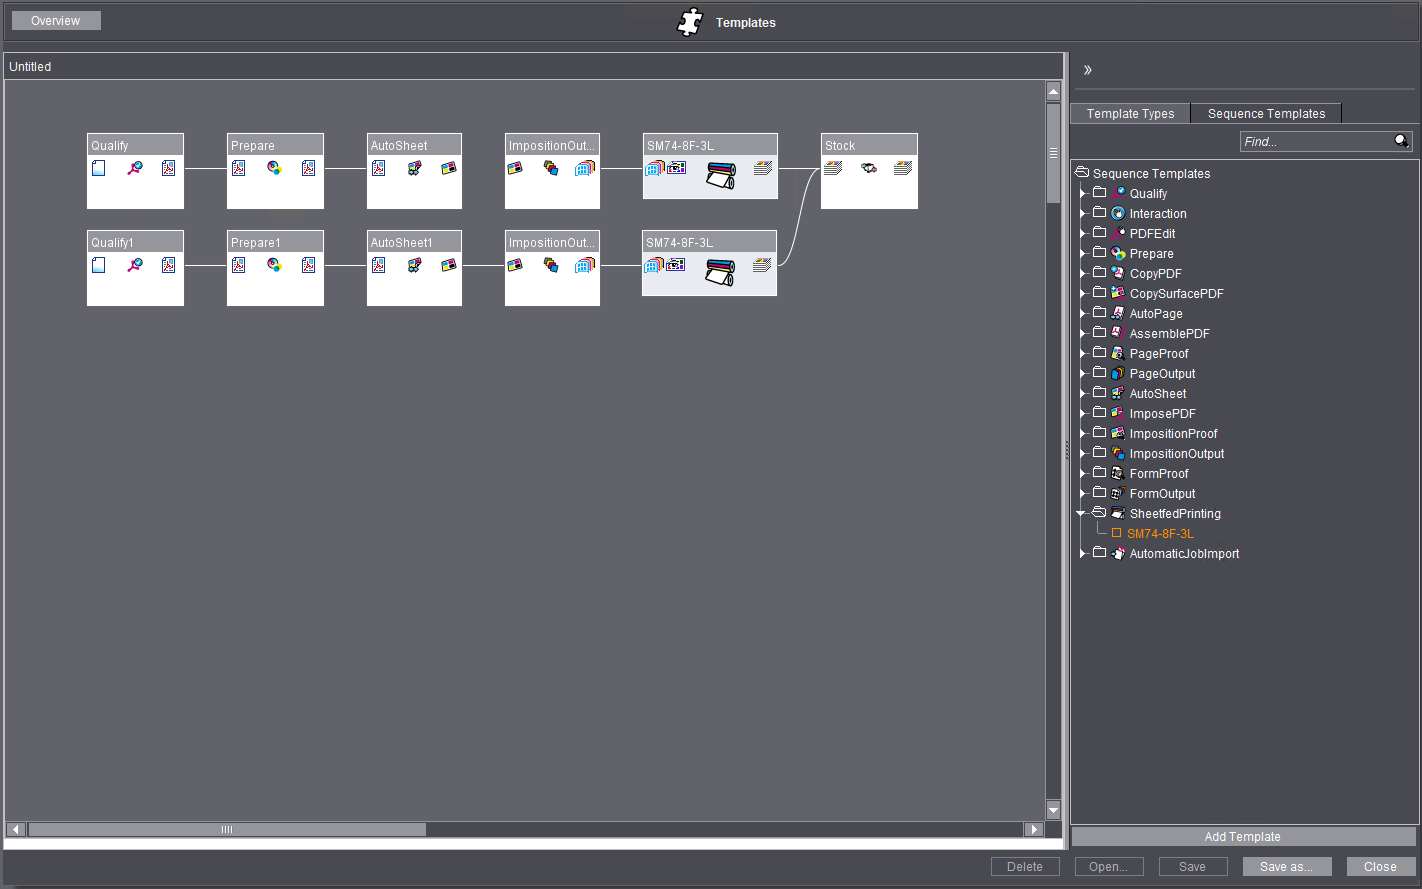
If you wish to define Cover and Body product parts, you need two sequence template placeholders for each step that will be processed differently depending on the product part. You just need one sequence template placeholder for each step that will be run on all the pages of the product.
3.Then, link the placeholder icons. By doing this, the steps will run automatically one after the other. Sequences that are suited for links have a small icon on the left and/or right of the sequence icon. This small icon indicates the document type that can be sent on or used at the appropriate point. The icon for the documents that are used is found on the left of a sequence icon, while the icon for the documents that are sent on after processing is located on the right. To link two template placeholders, click the "send" icon of a sequence and, holding down the left mouse button, draw a line to the "use" icon of the next sequence and let go of the mouse button (i.e. drag-and-drop). You can only link document icons of the same kind (e.g. PDF page, sheet layout). An appropriate error message displays if you try to link different kinds of icons.
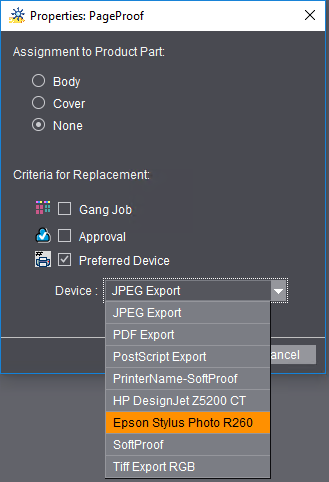
4.If you wish to define different steps for cover and body and/or define gang jobs (these are not possible for all sequence types), then click each template placeholder icon in succession and display "Properties" using the context menu (this only works for placeholders but not for concrete sequence templates):

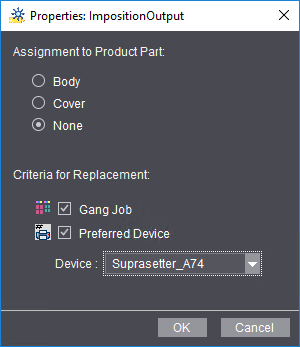
In this dialog, enable the options you want and click "OK".

Note: The following dialog displays if you define properties for a template placeholder that is linked to other template placeholders or if the smart template has other placeholders where assignment of the same property could be useful:


The properties are also applied automatically to the linked template placeholders or to the relevant ones in the smart template when you confirm the dialog with "Yes".

Note: For "PageProof", "BookletProof", "ImpositionProof", "FormProof", "PageOutput", "PagePrint", "ImposedPrint", "ImpositionOutput", "FormOutput" and "SheetfedPrinting" templates, you can also enable "Preferred Device" and set an output device (proofer, press) if several suitable devices are installed. You can also select another variant (see Setting up variants) for "SheetfedPrinting", "PagePrint" and "ImposedPrint" templates. As a result, the relevant print sequences are submitted to the preferred device or preferred variant in an automatic workflow.

Set product part or gang job properties are shown in the template placeholder icons:

The "Cover" or "Body" property displays as text in the relevant icons.
5.You can right-click and select "AutoArrange" (or use shortcut "Ctrl + U") to display the icons in a clear, easy-to-follow order. Then the icons and their links display as shown above.
6.You can undo the link between two sequence icons by clicking the connecting line and then clicking "Delete" or by using the shortcut "Ctrl + Del". Likewise, you can delete template placeholder icons using this shortcut after all links to this icon are already deleted.
7.When you have defined all the template placeholders you need and their links, save the smart template with "Save as". We recommend that you use self-explanatory names for the smart template so that you can see at a glance its exact use.
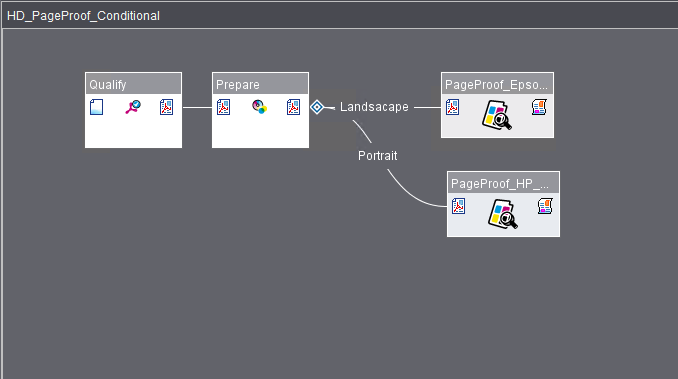
Like in group templates you can also define conditions for the automatic submit mode in smart templates. The procedure for this is the same as in group templates (see Conditional processing). An example of a smart template with "Qualify" and "Prepare" templates and two concrete PageProof sequence templates can be as follows:


Note: Once defined, submit conditions are available in the entire system for group templates and for smart templates.