In many sections of the Prinect Cockpit, information displays in lists or tables. Each column in the tables shows different properties about the selected elements. For example, the job list has columns for specific information about the job (job number, job name, job status, etc.). Two different views are available for displaying the job information:
For your day-to-day work, you can configure the two views so that they complement each other. Define a custom column set describes this in more detail using an example.
A freely definable filter is also available so that you can find a certain job in the table quickly.
In a linear view, the items in the list display one below the other in an unstructured view.

A structured view gives you a clearer overview of a long list than a linear view. This is done by using the various column headers that represent certain properties of the listed elements as hierarchy levels. In this case, a folder level is generated for each hierarchy level in the first column of the table. This folder level contains all other elements sorted by the relevant column filter. Generating another hierarchy level produces an additional subordinate folder level, etc.
Procedure for generating a structured list
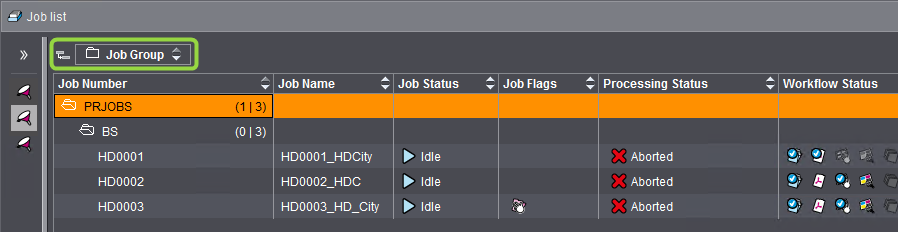
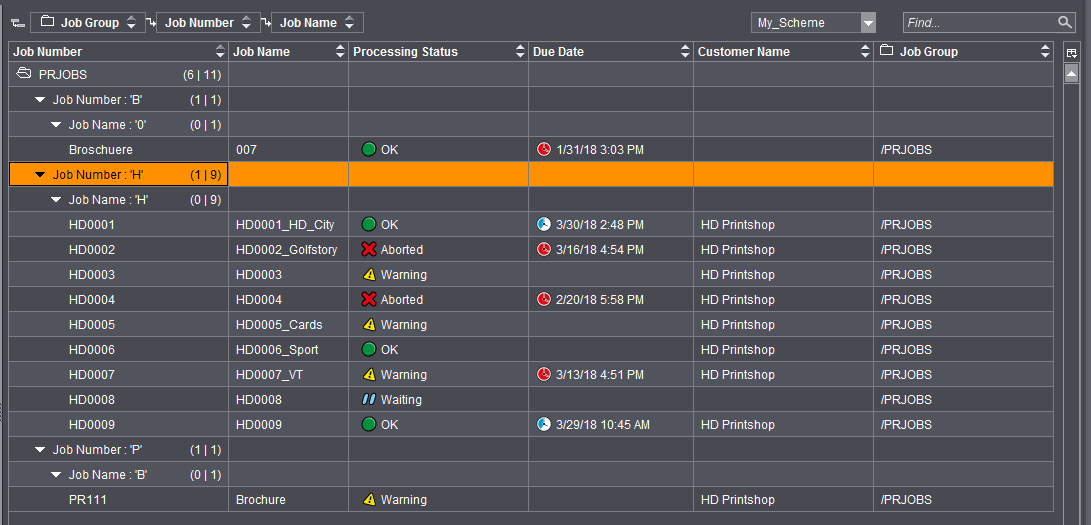
We will use the job list to illustrate how you generate a structured list. In this example, we assume that all the columns of the job list display (see also Define a custom column set ).


1.Position the mouse pointer over the "Job Name" column header.
2.Hold down the mouse button and drag the mouse pointer to the right side of the "Job Group" box (yellow border). Let go of the mouse button.

The "Job Group" grouping option is set by default. You will see an empty box if this option should not be set. You can also use this for structuring.
The job list now displays with structure levels "Job Group" and "Job Name".

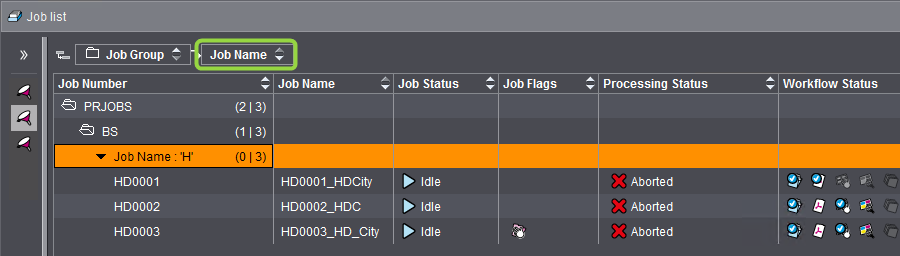
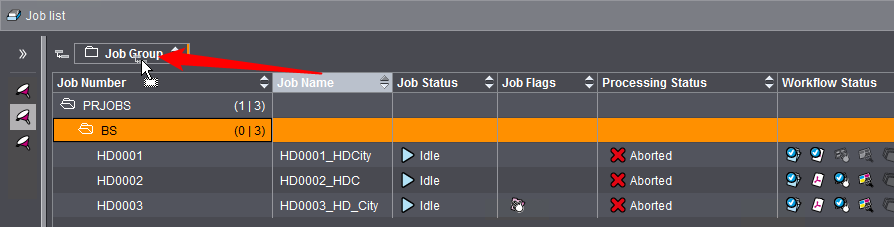
3.Repeat steps 1 thru 2 to generate further structure levels.

Note: If there are one or more grouping boxes, you can insert a new column by placing the mouse pointer at the desired spot in the order of the grouping boxes. The new grouping box is inserted at this point and the job list view changes accordingly.
Toggle between sorting in ascending and descending order
You can sort the list items, also within groups, in ascending or descending order by clicking the respective column header.
Changing the grouping sequence
In grouping the order of the hierarchy levels is determined by the order (from left to right) of the grouping boxes above the list. You can modify this order later by resorting these boxes using drag-and-drop.
Removing grouping
You can remove a grouping in one of the following ways:
•Right-click the grouping box you want and select "Remove Group" in the context-sensitive menu or
•click a grouping box and drag-and-drop it to the column header of the table.
In the "Column set" list box (on the right above the table) you can select one of the available column sets or you can define a new custom one. A column set defines which columns display in the table and which do not.
Create a new column set
A new column set is created in the following steps:
•Customize a column set:
Define which columns will display.
•Save the set using any name of your choice.
A typical column set will now be created below as an example.
|
Designation |
Table view |
|---|---|
|
Name of Column Set |
•My_Scheme |
|
Columns |
•Job Number •Job Name •Due date •Customer Name •Job Group |
|
Group columns |
•Job Number •Job Name |

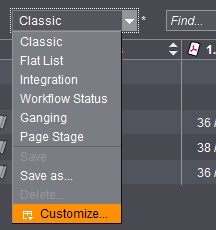
1.Open the "Column set" list box and select "Customize".
The setup window displays:

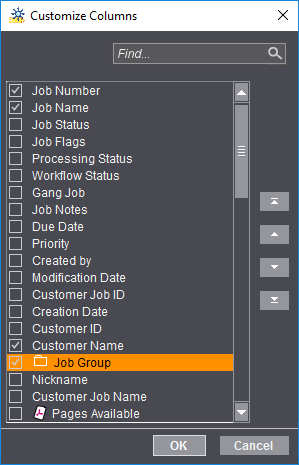
2.For our example, enable only "Job Number", "Job Name", "Due Date", "Customer Name" and "Job Group". Disable all other attributes.
3.Click "OK".
The new column set is enabled and the job view displayed accordingly. The new settings are not yet saved as a set.

4.Select "Save as" in the “Column set" list box. The following dialog displays:

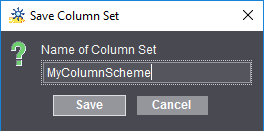
5.Enter the name of your new column set, in our example, "My_Scheme" and confirm your input with "Save".
The new column set is applied and added to the list.

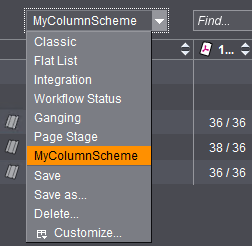
You can enable a different column set at any time and, when needed, return to this set.