
The "Devices" tab gives you an overview of all the devices you set up.
The following functions are available to you:
•Enable/disable the printing of accompanying papers and time sheets
•Assign a printer for printing accompanying papers and time sheets
•Select an accompanying paper template for accompanying papers and time sheets
Assign an accompanying paper/time sheet template to a device
A device must have been assigned a template if the device is to print an accompanying paper and/or a time sheet.
Proceed as follows:
1.Go to "Administration > Device configuration > Devices".
2.Select the device to be assigned a template in the list box.
3.Click "Open".
The "[device name]" window displays.
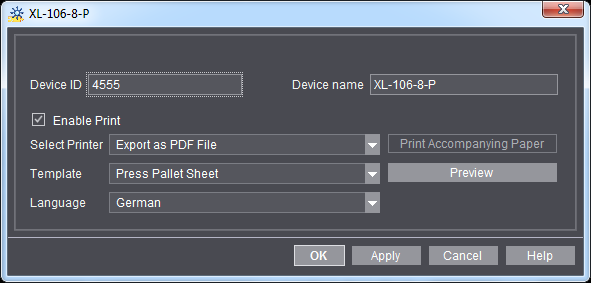
The following settings are available:
"Enable Print" option
You can print accompanying papers and/or time sheets for this device when this option is enabled. Disable this option if you never want to print them for this device.
This is where you select the printer on which to print the accompanying paper and/or time sheet. You can print the accompanying paper and time sheet directly to a connected printer or export them as PDF.
•Option 1: Print to a connected printer.
All printers that were set up beforehand are available. To set up a printer, see Defining Windows printers on the Prinect server.
•Option 2: Export as PDF.
The accompanying paper or time sheet is saved as a PDF on the Prinect server: "[servername] > PTJobs > AD-PDF > [DeviceID]".

Note: If you wish to print the PDF directly to a printer, you must set up your printer or print spooler accordingly beforehand. Read the user manual of your printer for details.
"Template" list box
This is where you can select all the accompanying paper templates available for this device.
•"Daily Time Sheet Only" option
With this template, you can only print the time sheet for the selected device on the machine (see Print Time Sheet on the Machine). Select one of the other templates if you wish to print pallet sheets and time sheets. These templates let you print time sheets and pallet sheets.
"Preview" Button
With this button, you open a preview of the selected accompanying paper.
Button "Print accompanying paper"
With this button, you start a test print of the accompanying paper on the selected printer.
4.Confirm your settings with "OK".
The settings are applied and are immediately active.