
A counter box records the totalizer readings of as many as 12 connected presses and transfers them to the Data Terminals of the presses through the network (TCP/IP Ethernet). This means that the produced quantity does not have to be recorded manually on the Data Terminal. Instead, it is calculated automatically based on the totalizer reading and submitted to the Prinect Integration Manager.
The graphic below shows the logical structure:
The counter box must be set up in the Prinect system in order for the Prinect Integration Manager to receive the produced quantity correctly. In addition, the channels must be assigned to the devices as shown in the wiring diagram. See Creating a New Counter Box.

Note: A detailed description of the installation and replacement of a counter box is enclosed with the counter box. Go to the document using the following link: Installation and Replacement of the Counter Box
To set up a new counter box in Prinect, we have copied the parts needed for this for you.

Prerequisite: A valid IP address was assigned to the counter box.
1.Go to "Administration > Device configuration > Counter box".
2.Click "Create".
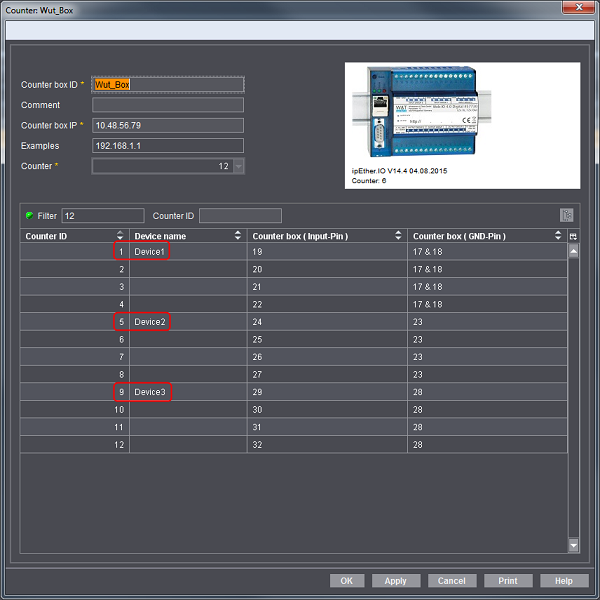
The dialog for configuration of the counter box opens:

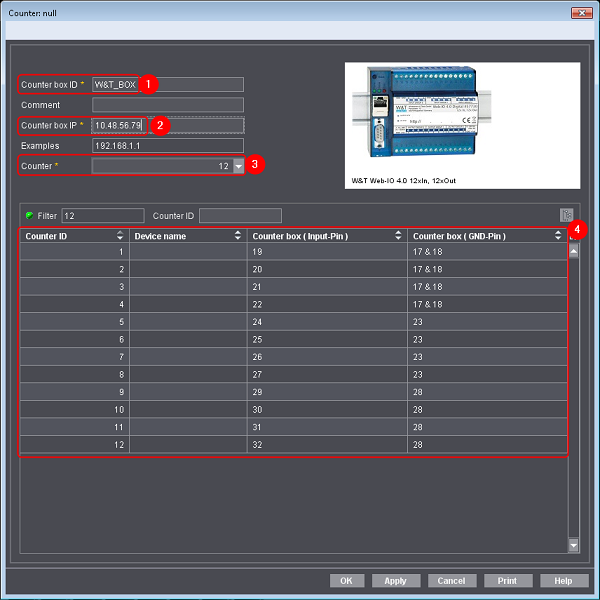
3.Give the counter box a name (1).
The name displays when the device is set up on the CDM.
4.Enter the previously assigned IP address (2).
5.Select the number of channels (3).
12 = New counter box
6 = Old counter box
In the example below, you can see a connection variant as is used for voltage signals. Because each machine has its own ground connection in a connection and the counter box links four channels with one ground, the voltage signal in each ground block must be shifted. This means:
Device 1 to channel 1-4
Device 2 to channel 5-8 and
device 3 to channel 9-12

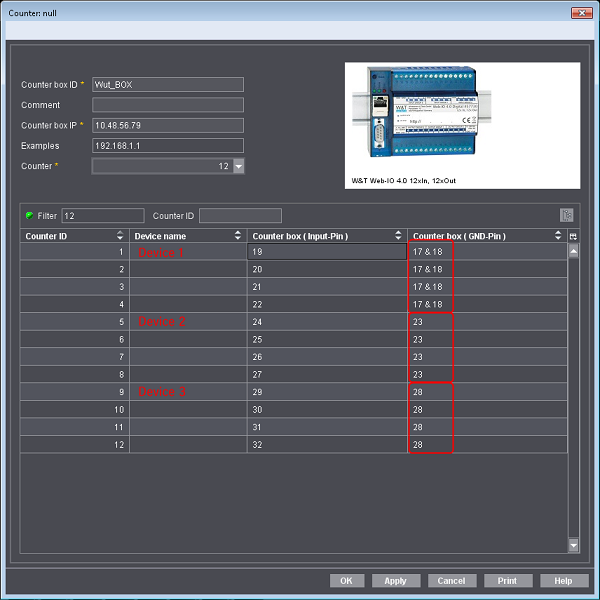
6.Make a note of the channels for each device (you can print the dialog with "Print").
7.Click "OK" to save your settings.
In the next step, you assign a channel to the devices.
Assign a channel to the devices
When the counter box is set up, you must assign the channel to the devices. You assign it on the Central Device Manager (CDM).

Prerequisite: We assume below that the devices are already set up on the CDM. You can find out how to set up a new device in the Online Help of the Prinect Cockpit.
Proceed as follows to assign a channel to the device:
1.In Prinect Cockpit, go to "Administration > System >[name of the Prinect server]>".
2.Open "CDM".
3.Select the device.
4.Click "Edit" in the context-sensitive menu.

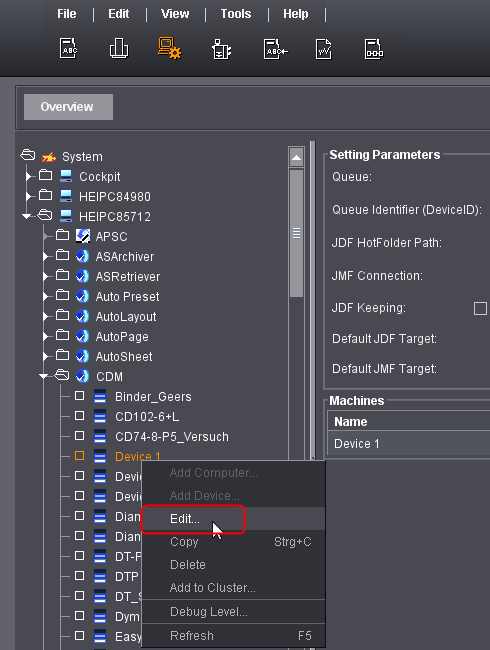
The "Device assistant" opens:

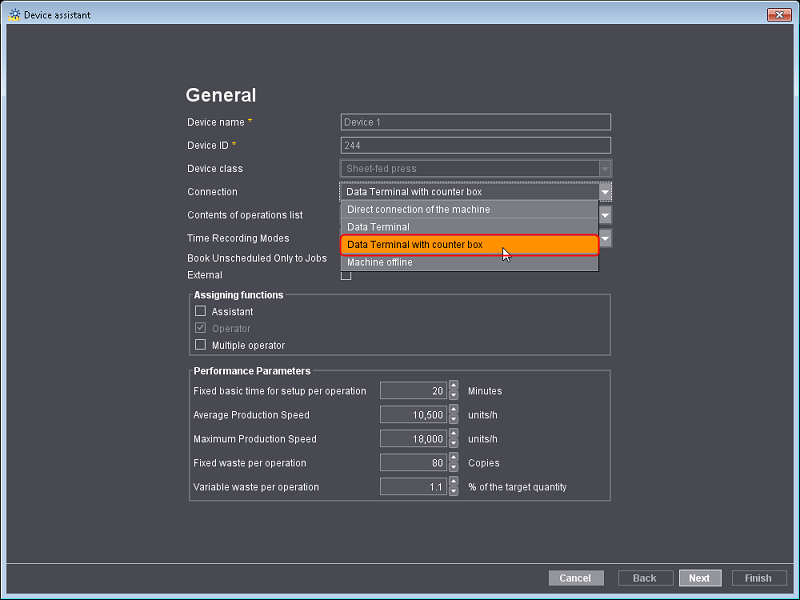
5.Select "Data Terminal with counter box" in "Connection".
6.Click "Next" until you are at "Counter box configuration".

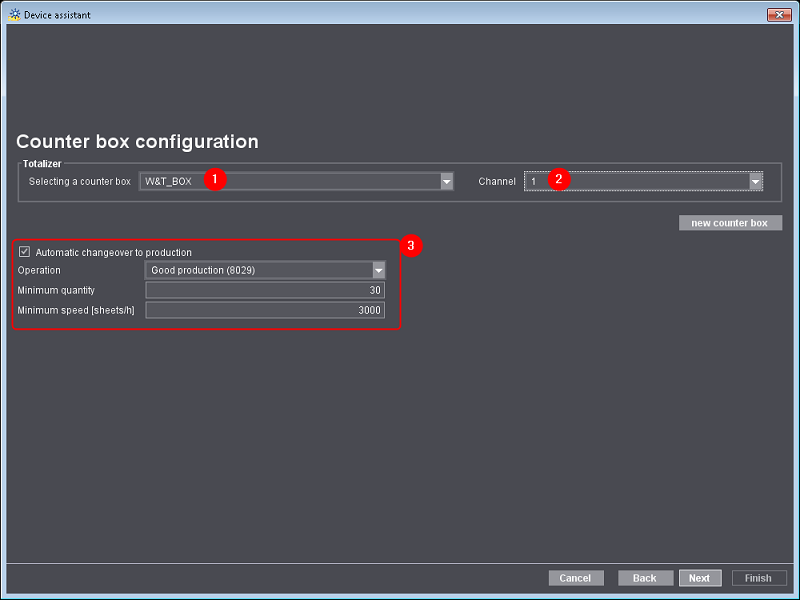
7.Select the counter box you set up beforehand (1).
8.Assign the channel to the device (2).
In this example, we assign channel 1 to device 1.
(9).If wanted, enable "Automatic changeover to production" and enter the appropriate values (3).
10.Click "Next".
11.Click "Finish".
12.Repeat the steps for the other devices.
13.Restart the Prinect Cockpit. If you don't, the device names do not appear correctly in the device configuration.
Afterwards, check whether you assigned the channels correctly. To do this, go again to "Administration > Device configuration > Counter box" and open the counter box.
The devices should now be assigned to the correct channels:
Print the graphic to then set up the wiring on the machine.