
What needs to be taken into account in a workflow with an MIS?
If you use an MIS in your Prinect Workflow system, cost centers, user data and operations (SFDC messages) should be synchronized between the MIS and the Master Data Store (MDS). You can then synchronize the MDS and the Prinect Press Center / Prinect CP2000 Center.
Please contact your Prinect Service if you want to run synchronization between the MIS and the Prinect Manager.
Synchronization is carried out in two steps:
1.Three XML files are automatically generated via the interface "Export of the CP2000 configuration". This always takes place when defining a new CDM device. When the device features are altered, the XML files are overwritten. The files are saved in a subfolder for each device. The folder is named like the device (DeviceID). The XML files contain the cost centers, the operation groups (cost type groups), the operations (SFDC messages), and the staff.
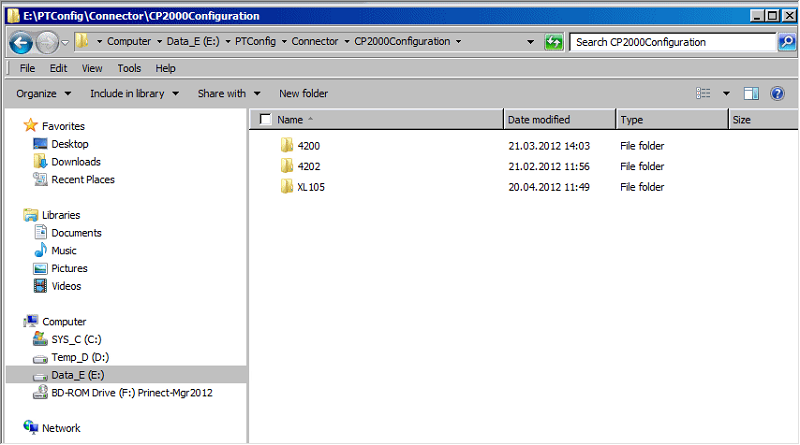
The XML files are saved in a user-definable directory:
\\Prinect Server\PTConfig\Connector\CP2000Configuration\
2.Import the previously generated XML file on the press:
·In Prinect Press Center, use the menu
"Service > Integration/System > PDC configuration > [import icon]".
·In Prinect CP2000 Center, use the menu
"Service > Prinect configuration > PDC configuration > Transfer".

Note: You must run the import for each of the presses set up in CDM.
If you now wish to set up a new CDM device, the XML files are automatically generated and saved in the source directory defined above. A subfolder named according to the DeviceID is created for each device.
Importing the XML file in Prinect Press Center
Automatic import of the SFDC (PDC) configuration
Automated import is possible as of Prinect Integration Manager/Prinect Pressroom Manager version 2011 and Prinect Press Center version V11B and later.
In this case, the SFDC configuration is imported automatically after the "Workplace Interface" data storage has been configured and activated.
Heed the following:
•The "Workplace Interface" data storage must have been configured successfully for the connected press and set to active (in the "Active data storage devices" column).
•Import can take a few seconds.
•Check whether or not import was successful after data storage device configuration with "System > Service > Integration / System > Prinect Configuration > PDC configuration".

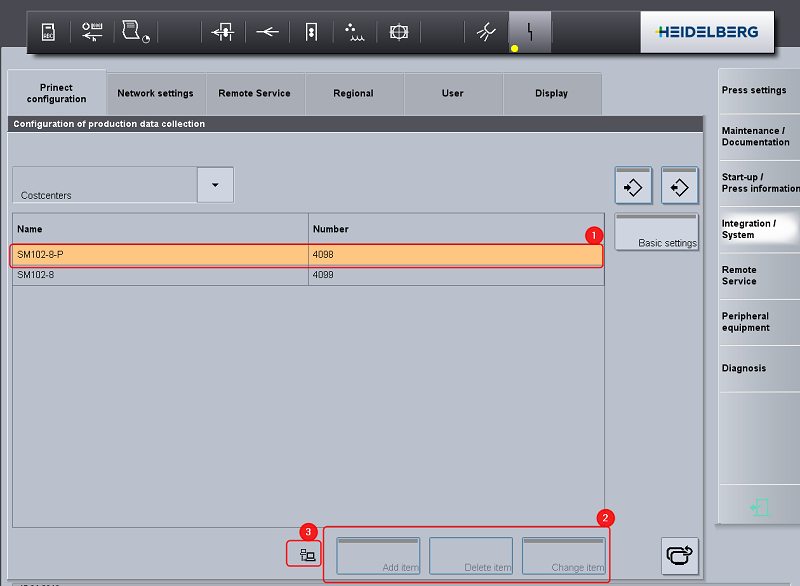
·The name and the number of the cost center(s) must match the configuration in Prinect Integration Manager/Prinect Pressroom Manager (1).
·The buttons for manual input are not active during automatic import (2).
·The network icon indicates that the automatic import was successful (3).
Run a manual import if you are in doubt. See Manual import of the SFDC (PDC) configuration.
•In case of an automated import, all locally defined cost centers and operations (SFDC messages) are deleted and overwritten by those of Prinect Integration Manager/Prinect Pressroom Manager.
Please contact our Prinect Service (support.prinectpress@heidelberg.com) if you want automated import to be disabled.
Manual import of the SFDC (PDC) configuration
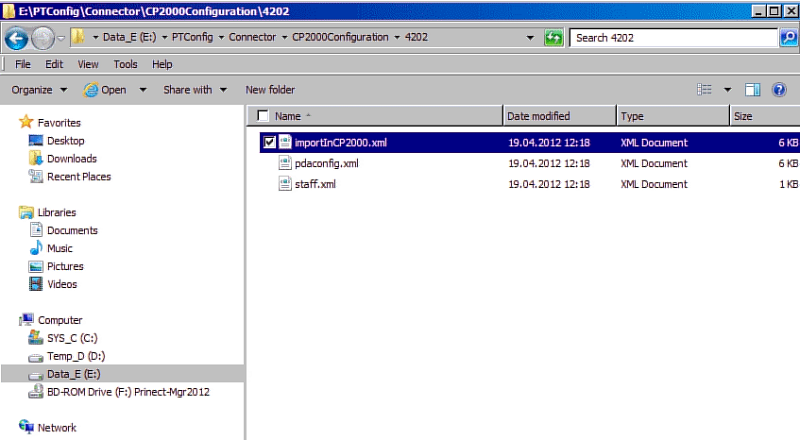
The generated XML file is imported using the import function.
The generated XML file "importInCP2000.xml" must be imported.
1.Go to the corresponding Prinect Press Center press for which you have generated the XML file.
2.Go to the menu "Service > Integration System > PDC configuration" and press the button shown below.


The window "Import configuration" appears.

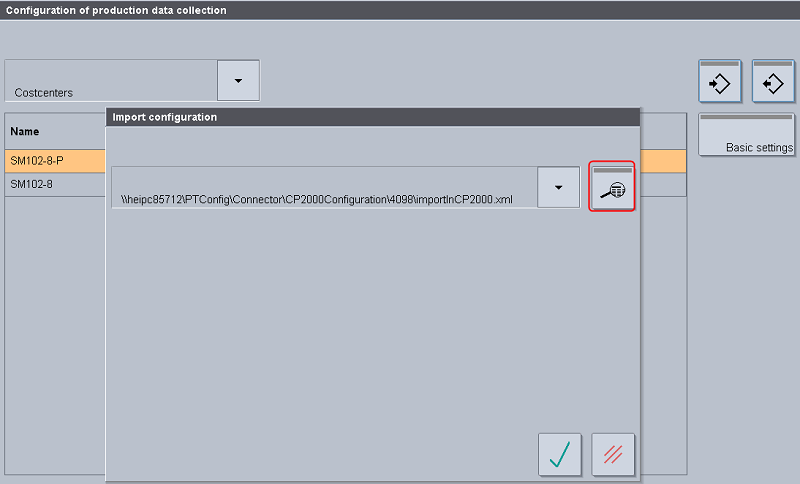
3.Click the magnifier icon to specify a path for the XML file.
The name of the XML file to be imported is always "importInCP2000.xml".
In our example this is: \\KIE-ESXPN1005\PTConfig\Connector\4202\importInCP2000.xml.
4.Confirm your input with the "green check mark" button.


5.Confirm the path once again with the "green check mark" button.
The import icon appears briefly while the network connection is being set up.
The configuration window closes and the file is read.
Importing the XML file in Prinect CP2000 Center
The import of the generated XML file depends on the Prinect CP2000 Center software version. As such, we describe the following two cases here:
•Case A: Prinect CP2000 Center with import function, version v41 and later.
The generated XML file "importInCP2000.xml" must be imported.
•Case B: Prinect CP2000 Center without import function, version v41 and earlier.
The generated XML files "pdaconfig.xml" and "staff.xml" have to be copied into a directory manually.
Case A:
1.Go to the corresponding Prinect CP2000 Center for which you have generated the XML file.
2.Go to the menu "Service > Prinect configuration > PDC configuration > Transfer".
You can find a detailed description in the Prinect CP2000 Center operating manual.
3.Click the "Data storage configuration" button.

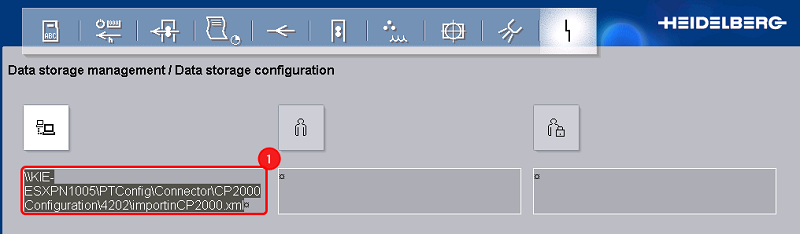
4.Enter the transfer directory and the name of the XML file in the "URL" input field (1).
The name of the XML file to be imported is always "importInCP2000.xml".
5.If necessary, enter the user name and password for access to the data storage unit.
You can find a detailed description in the Prinect CP2000 Center operating manual.
6.Confirm the entry.
The window closes, and the menu "Configuration of production data collection/Transfer" appears.

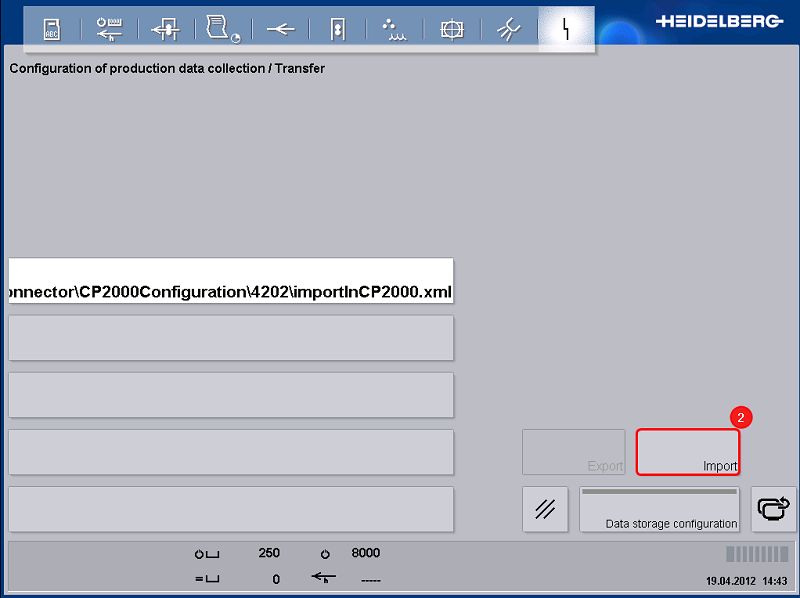
•The transfer directory is accepted, and the button "Import" turns active (2).
7.Click the "Import" button (2).
The import is started and takes a few seconds. No message is issued stating that the import was successful. However, if the import is unsuccessful, this is displayed by a yellow service symbol.
Case B:
As no import function is available in this case, the generated XML file "importInCP2000.xml" cannot be used. The automatic export of the CP2000 configuration generates two more files which are also available in the IPC (Prinect CP2000 computer). These are the files:
•pdaconfig.xml
•staff.xml
These are also located in the generated device directory. For example "\\KIE-ESXPN1055\PTConfig\Connector\4202".

These two files have to be copied manually into the directory "C:\CP2000Ap\bin" on the IPC (Prinect CP2000 computer). The old files are simply overwritten here.
Finally, restart the Prinect CP2000 Center.