
Administration - Workflow
Prerequisite: To use this section, you must have administrator permissions, i.e. at least one permission including the denominator "Administrator". For more information regarding the Prinect user administration, please refer to: Users.
What is the purpose of the Workflow Configuration?
With the "Workflow Configuration" tool, you can customize the steps offered in a print job.

Caution: After a restart of Prinect Cockpit, the changes made here take effect on all existing and future print jobs. They affect all users defined in the Prinect system. Even if another user with different permissions logs on at the Cockpit, the jobs will contain the changed steps.
In an open print job, each of the steps (also called "workflow steps") are represented by icons in the workflow bar:
You can go from one step to another by clicking one of the respective icons.
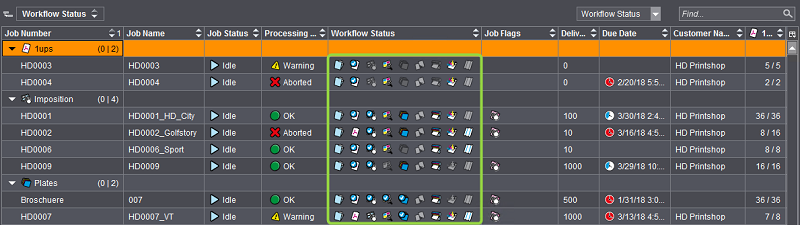
The job list shows the steps in the "Workflow Status" column:
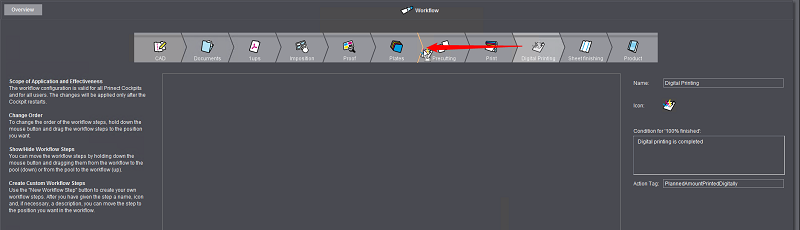
With the "Workflow Configuration" tool you can specify, which steps are offered in which sequence in each of the jobs. In particular, you can do the following:
To change the sequence of steps, click one of the icons, drag it with the mouse button pressed to the desired position and release the mouse button there ("drag & drop").
When there are steps that are not required in any workflow of the present installation, you can remove the respective icons from all job views. As a consequence, these steps will no longer be offered in any of the jobs, and the overview of steps becomes clearer. Potential operating errors can also be excluded in this way.
To remove a step, click the icon in question and drag it to the initially empty box below the explanatory text with "drag & drop":
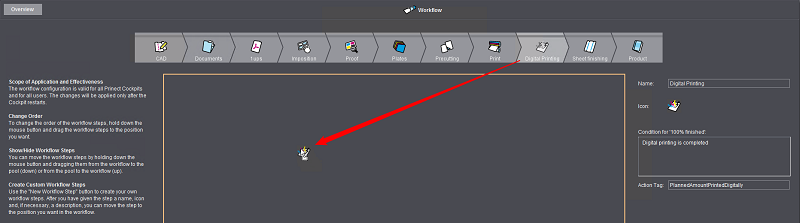
This box serves as a pool for (temporarily) disabled steps.
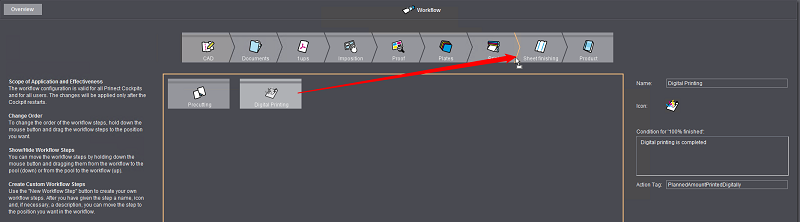
To enable a step removed beforehand, simply move it back to the desired position in the active section with "drag & drop":
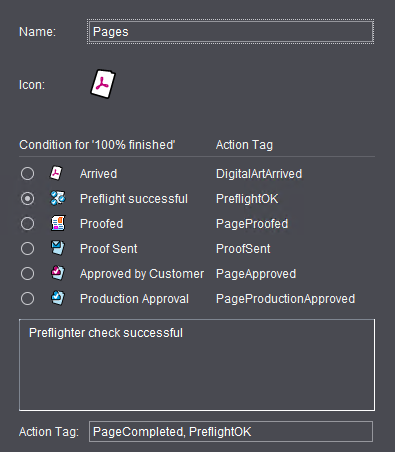
Set the condition for "100% finished"
An "Action Tag" is set in "Condition for 100% finished". The "Action Tag" is an identifier that is sent to other specified Prinect modules like a connected MIS as soon as a step is completed (reported finished).
For the "Pages" step, you can select a condition or action tag with a related symbol in "Condition for 100% finished". This symbol appears in the icon of the "Pages" step whenever the condition is fulfilled in a print job.
You can create new, customized steps with the "New Workflow Step" button (1). With these steps, you can cover procedures not contained in the automated Prinect workflow, for example the visual press sheet inspection, as a formal process step. By assigning an "Action Tag", you can submit the completion of such a process to a connected MIS or include it in Production Data Capturing (PDC).
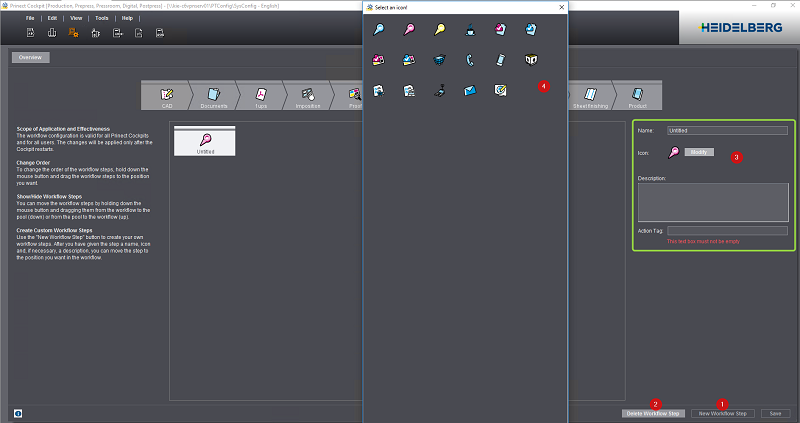
Specify the parameters of the new step in the right window section:
•Name: The designation of the step
•Condition for 100% finished: This displays the action tag or you can select a condition.
•Icon: Select one of the icons displayed (4).
•Description: We recommend that you type a meaningful description of the task and the principle of operation for each of the new work steps.
Changing the properties of a custom step
When you mark a step icon, you can view the "Name" and "Action Tag" properties or select a different action tag in the right section of the "Workflow Configuration" window.
You can also change other properties of custom steps at a later time, if required.
Confirm your change with "Save".
To delete a custom step, mark the icon in question and then click the button "Delete Workflow Step" (2).
The settings are applied when you click "Save". The changes take effect only when Cockpit is restarted. You will be informed about this in an appropriate dialog.