Menu "View” > "Administration" ![]()
In this view you can set the connection to the Heidelberg Network and test it manually. You can also connect the PMC to computers which have not yet been found automatically.

Prerequisite: For the transfer of the update packages an existing Heidelberg Remote Service Connection is required. This requires the full and correct entry of the administrative data and the Prinect Site ID.
"Administration" > "HEIDELBERG Connection" tab

Note: In this view, you can only edit when the connection to the Heidelberg server is interrupted. See Disconnecting the Connection .
To enable the connection, enter your data in "Setting". The following icons display after the input boxes:
|
|
Your entry is incomplete. As long as this icon appears next to an input field, you will not be able to establish a connection. |
|
|
Your entry is complete. If this icon appears next to all input fields, you can continue. |
"Prinect Site ID"
The Prinect Site ID is displayed when the license server is available. If this is not the case, refer to Connection Settings.
In the selection field "Start Request" you can set the time at which the daily exchange of lists between PSC and PMC is to take place. Please note that the subsequent downloading of the update packages may take a while and could impact the Internet transfer rate.

Prerequisite: Customer data must be transferred during the update. To take up the connection, you must give your agreement to this. See also "Prinect Remote Update - Why?", page 63.

Note: Many customers choose a full hour as the time for their daily update requests, something which can cause peak loads on the PSC. To prevent the performance of the PSC from dropping at such times because of too high a workload, the requests have a random delay of max. 10 minutes. A message displays in the status messages panel, informing you that a software update is scheduled. When the transfer starts, a message displays, informing you that transfer was started.

Note: In the case of a software request, the PMC checks the time difference between the PMC software request and the PSC reply to this request. A maximum time difference of 25 minutes is set in the PMC. The requested update packages are not downloaded from the PSC if the maximum time difference should be exceeded, and an appropriate error message is issued in the status messages panel.
Check hard disk space of the PMC repository before update download
The memory space is checked automatically before the update packages are downloaded from the PSC to the PMC repository. The PMC is instructed to download by the PSC. Subsequently, the PMC checks the required memory space of the PMC repository.
•Hard disk space below 20 GB: A warning and a warning icon display in the status line if calculation shows that the expected disk space after the download will be less than 20 GB. Despite this, you can still download the update packages to the PMC repository but you must confirm the download.
•Hard disk space below 5 GB: An error message and an error icon display in the status line if calculation shows that the expected disk space after the download will be less than 5 GB. The update packages are not downloaded to the PMC repository.
You can communicate a low disk space also via e-mail, see Information About the Event "Not enough disk space" .
To increase your hard disk space again, you can open the "Loaded Software" dialog with a double click and remove update packages that are no longer needed and are tagged by the  icon. See also Menu "Extras" > "Loaded Software".
The PMC must be restarted if the proxy settings are changed. You will automatically be requested to do this.
It is not possible to restart the PMC while a software update is running. An appropriate message displays.
To establish the connection, proceed as follows:
1.Statement of agreement: Set the option "I agree that information about my Prinect installation will be transmitted to HEIDELBERG."
The "Connect" button is enabled for use.
2.Click "Connect".
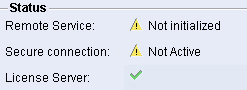
The status display for the connection is updated (refer to the table). If a red icon appears, refer to Connection Settings.
|
Connection status |
|
|
|
|
|
Initial situation: You can now connect. |
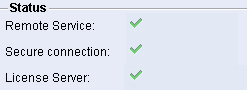
Active connection: The connection was made successfully. |
When the connection is set up, the data can be transferred automatically and in the background.
The "Disconnect" button is enabled for use. The two options relating to the statement of agreement are disabled. As long as the connection is active, you cannot enter administration data in the "Administration > HEIDELBERG Connection" tab.
Click the "Disconnect" button to disconnect the connection.
The connection is disconnected. The "Connect" and "Disconnect" buttons are then deactivated. The option "I agree that information about my Prinect installation will be transmitted to HEIDELBERG" is no longer activated. This means that by disconnecting you have revoked your agreement.
"Administration" > "HEIDELBERG Connection Test" tab

Note: Please note that during a connection test normal requests cannot be made to the PSC.
In this tab you can carry out a manual test of the Remote Service connection and the Download connection. The test includes sending a query to the PSC, downloading a test package and checking the entry in the PMC Repository. This test can be useful if the PMC has not downloaded any updates from the PSC for a longer period.
The connection test can be interrupted by the customer; in this case the message "Connection test failed!" appears in the status message area. For an error analysis, refer to Connection test.
To the right, there are two icons that let you enable or disable automatic scrolling and delete the displayed text.
"Administration" > "Computer Connections" tab
The PMC cannot establish an automatic connection to a computer if computer and Prinect Maintenance Center are located in different (sub) networks. In this tab you can set up an alternative, manual (fixed) connection of these computers to the PMC.

Note: Please note that the Prinect Maintenance Center can only connect to computers on which the Windows service "Heidelberg Local Information Service" (from version 13.00.37 onward) is running. You can check this in "Start > Control Panel > Maintenance > Services".
The "Computer" group displays all the computers the PMC is currently connected to or the PMC was connected to in the past. For these computers, "Automatic" displays as the status in the "Connection" column. See also Update inactive computers as well.
You can extend this list. To add a computer, proceed as follows:
1.Enter the name or the IP address of the computer in "Connection > Computer / IP Address".
2.Click on "Manual Connection."
If accessible, the computer is now connected to the PMC. You can see the computer in the list. The computer is now also available in the "Software Update" view.
"Computer" displays all the computers the PMC was connected to in the past but to which an automatic connection could not be set up at present. For these computers, "None" displays as the status in the "Connection" column. To set up a connection between a computer and the PMC, proceed as follows:
1.Select the computer in "Computer > Computer / IP Address".
2.Click "Automatic Connection" in "Connection".
If the connection was manual before, the computer should now connect to the PMC automatically. Proceed as follows if a connection cannot be established after one minute:
3.Click "Manual Connection" in "Connection".
If accessible, the computer is now connected to the PMC. You can see the computer in the list. The computer is now also available in the "Software Update" view.
Manual connection no longer works if connection is via IPv4 and the IPv4 address of the PMC changes.
Changing a Computer Connection
In "Computer" you can see all the computers that were connected automatically or manually. You can change the connection of a computer, e.g. for tests or when a computer cannot be accessed. This may occur if the PMC has been installed in a different sub-network. In this case, computers with a "Manual" status may be highlighted in red. To change the connection of such a computer and the PMC, proceed as follows:
1.Select the computer in "Computer > Computer / IP Address".
2.In "Connection" click the "Automatic Connection" button.
If accessible, the computer is now connected to the PMC again. You can see the computer in the list. The computer is now also available in the "Software Update" view. If this is not the case, reset the connection to "Manual Connection".
You can specify three types of details for each computer (location, user, comment), for example to quickly find its location or its owner. The information about the computer is displayed in a tooltip when you hover the mouse over a computer name in the navigation pane of the "Software Update" view.
Select the computer in the left "Computer" pane to specify computer details. Type the information in the bottom right "Computer Information" pane and click "Save".
"Administration" > "Outgoing E-Mail"
In this tab, you can set up outgoing e-mails that are triggered by events. For each listed recipient, you can set a combination of events that are listed below. A separate e-mail is sent to the recipient each time such an event occurs. Sending of the e-mail also displays in the status messages panel:
|
E-Mail Category |
The following events belong to the category |
|
Update available |
Update available Update changed |
|
Running updates |
Update started Update finished successfully Update finished with error Update aborted Computer restart required |
|
Unexpected events |
Not enough disk space Could not connect to the Heidelberg Remote Service Problem with the update request Prinect Supervisor reports a limited accessibility of a Prinect System. (An e-mail is sent only if the Supervisor triggered the start process that failed. No e-mail will be sent if a user starts components from the Supervisor View of the PMC and the components fail.) |
|
Prinect Product News |
Prinect Product News |
|
Prinect Service News |
Prinect Service News |
1.Set the "Outgoing E-Mail" option to "On".
2.Expand the "Dispatch Settings" section.
3.Make your selection in the "Connection Security" and "Authentication Method" list boxes.
4.Specify the SMTP Server, the SMTP Port and a correct e-mail address here.
(5)."Check Server Certificate": Depending on the authentication method, you can choose with this option whether or not custom security certificates are accepted.
(6).Depending on the network configuration, authentication is sometimes required on the SMTP server, sometimes not. If necessary, enter the user name and the password.
7.Use the "Apply" and "Discard" buttons to exit the edit mode and apply or discard the data you entered.
8.Expand the "Addressee" section.
Specify the addressee and the events to inform the addressee of by e-mail in this section.
9.Click ![]() to create a new recipient. Click
to create a new recipient. Click ![]() to delete the entry and
to delete the entry and ![]() to edit the addressee's properties.
to edit the addressee's properties.
When you create and edit the recipient, select the event about which you wish to notify the recipient.
10.Select the language for the e-mail texts.
11.Use the "Apply" and "Discard" buttons to exit the edit mode and apply or discard the data you entered.
To send a test e-mail to a recipient you want, a row with a valid e-mail address must be selected. If it is not, the "Test E-Mail" button is dimmed.
Information About the Event "Update available"
Select the e-mail category "Update available" to inform the recipient of new Prinect software updates received in the PMC Repository.
The e-mail also contains the following information:
Product name
Four-part version number
Priority (High/Normal/Low)
Size in MB
File name

Note: E-mail notification is sent only if at least one usable update package was downloaded successfully and is available in the PMC repository. There is no notification with faulty or aborted downloads, checksum errors, etc. Such messages display in the status messages panel.
Information About the Event "Not enough disk space"
The disk space is verified automatically before the update packages are downloaded from the PSC to the PMC repository; see also Check hard disk space of the PMC repository before update download.
There will be no automatic downloads if the disk space of the PMC Repository is insufficient. The respective message is displayed in the status line.
You can also enable the e-mail category "Unexpected events" to communicate this event via e-mail.
Information About the Event "Could not connect to the Heidelberg Remote Service"
The system administrator will automatically be notified by e-mail if the customer does not receive an answer within a specific period of time after having sent an update request. In this context, there are two cases each of which has a separate e-mail type:
•An e-mail is sent if the connection to the Heidelberg Server is interrupted for a longer period of time. The default response time is 5 days. An e-mail is triggered each time the attempt to establish a connection has failed.
•An e-mail is sent if an update request fails to trigger a response although there is a connection to the Heidelberg Server. The default response time is 5 days. An outgoing e-mail is triggered when the PMC starts and an update request is sent.
Information about the "Prinect Product News" and "Prinect Service News" events
In contrast to all other events, "Prinect Product News" and "Prinect Service News" do not refer to PMC actions. They contain information from Heidelberger Druckmaschinen AG that is to be distributed through the e-mail. A difference is made in this case between product information ("Prinect Product News") and service information ("Prinect Service News").
"Administration" > "Settings" tab
Usually, the PMC is to be updated automatically whenever a product update is available for the PMC. In "Administration" > "Settings" tab, you can disable this automatic feature by removing the checkmark in "Update Prinect Maintenance Center automatically". This feature is enabled by default and remains enabled even after an update or upgrade.