
Note: Mostly only the varnish color is shown in the preview if the "Advanced > Overprint Preview" function is not enabled in Adobe® Acrobat®.
Varnish layers are created with this editor. Varnish layers are used for finishing printed products, especially in the packaging industry.
Another area of application is the creation of a base coat, e.g. for printing on glass or the like.
The created varnish objects lie on top of all other objects of a page. However, this isn't important for the order in which the data are printed. This means that, even if a white base layer lies on top in the PDF, it can of course be printed first.
|
|
Note: Mostly only the varnish color is shown in the preview if the "Advanced > Overprint Preview" function is not enabled in Adobe® Acrobat®. |
|
|
Open the "Coating Editor" by clicking the icon shown opposite in the Prinect PDF Toolbox or selecting "Plug-Ins > Prinect 2020 > PDF Toolbox > Coating Editor". |
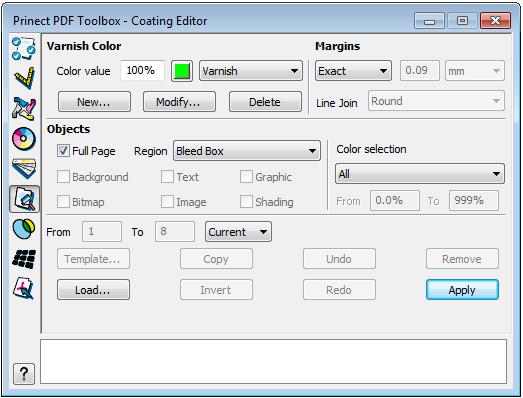
You define the varnish color in the "Varnish Color" group. You can select varnish colors that are already defined from the list box or colors from a color table. Use "New" to define another varnish color. You can also "Modify" and "Delete" an existing varnish color.
Color value
You can enter a color density between 0% and 100% for the color that you will use for varnishing.
Click the color box on the right to apply the selected varnish layer with 100% ink density or to remove this again with 0%.
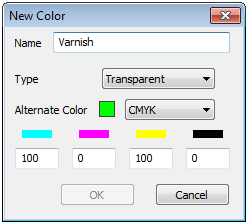
Define your varnish color and color type.
1.Click "New..." to define a new varnish color.
|
|
|
2.Give the varnish color a name.
3.Select a type for the varnish color from the list box. You can choose between the following options: "Transparent", "Opaque", "Opaque & Ignore", "DieLine" and "Normal". With this new feature, you can also define opaque white as an overprinting varnish color.
4.Select a color space from the list box to define the new varnish.
The text boxes that appear for the definition of the varnish depend on the color space you selected.
5.Enter your color data and then click "OK". The new color appears in the list box.
Modify
Click "Modify..." to edit a varnish color. See "New......" for how to proceed further.
Delete
You can delete a varnish color definition form the list of varnish colors.
Margins
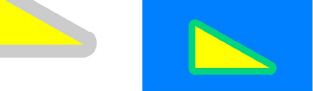
This is where you set whether choking or spreading will be used for the varnish.
Exact/Spread/Choke
This is where you enable spreading or choking. Enter the width you want and select the unit of measure. You must enter a minus sign in front of the value for choking. If you choose "Exact", you cannot set any value.
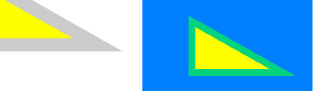
For spreading/choking, you can choose between:
round:
miter:
In the "Objects" group, you can define which objects will be given varnish. The following options are possible:
Full Page
You can select varnish for the whole page with this option. All other options are disabled.
Region
The area to be varnished is confined to the box you selected.
Text, Graphic, Bitmap, Image, Shading, Background
This is where you set which objects will be varnished. Remember that the objects also have to be defined for varnishing.
You can restrict automatic varnishing with the options provided in Separations/Area. This will let you, for example, generate varnish (or a second black) for 100% Black only or varnish CMYK objects only without applying varnish to other spot colors.
By means of a color selection, it is also possible to varnish images without their white background, even if they do not have a clip path. To do this, confine the colors for "All" to a certain range, e.g. 0-200.
This applies to text, bitmap and graphics only.
Page range
This is where you define which pages in the current file will be edited, i.e. varnish will be applied to these pages. This allows you to varnish just a single page as well, for example, the title page. See Specify a page range.
You can save a varnish layer as a template (separate PDF). You can then apply this template to other documents as often as you like and save it as a new PDF document.
Invert
You can invert an existing varnish separation (single separation). In "Color selection", select the varnish separation that you wish to invert. Create a new varnish color and then click "Invert". This creates an inverse varnish separation of the color you selected in "Color selection".

|
Note: You can apply varnish to several PDF pages. Click "Apply", holding down the Shift key. A windows displays where you can select various PDF pages for this process. |
Clicking this button will remove the entire varnish layer of the set varnish color, including those you placed with the mouse and the keyboard.
The varnish layer is applied to the selected objects.
Status Panel
The status panel shows information about the varnished objects (e.g. text, graphic, image).

HD Privacy Statement | Imprint | Prinect Know How