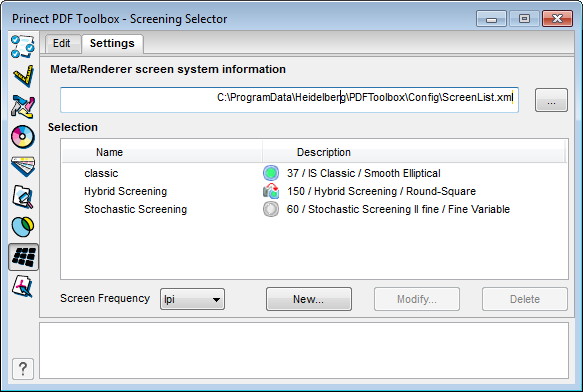
Your screen settings are listed in this tab.
Click "New" to create a new screen setting. You can then select a screen system and set its parameters. This screen setting is saved under a new name.
The new screen setting is listed in "Selection" and also displays in the list boxes in the "Edit" tab.
Meta/Renderer screen system information
This is where you select the file location of the file containing details about the screen systems supported by the Renderer.
The correct file is automatically set by default if the Prinect PDF Toolbox is connected to a Prinect system. This makes sure that only screen settings that are compatible with your imagesetter can be assigned.
Selection
This displays the screen settings that you can select in the "Edit" tab. Beside the name, you see a brief description and one of the following icons:
|
|

|
No angle changed |
|
|

|
Angle changed |
|
|

|
No angle change possible |
Screen frequency
In this list box, select whether the screen frequency will display in lpi or lpcm.
New
This lets you create new screen settings. You must first select an existing screen setting if you wish to use it as the default. The "Settings" dialog opens after you click "New". See "Settings" Dialog.
Modify...
Select the screen setting you want and click "Modify...". The "Settings" dialog displays. See "Settings" Dialog
Delete
Select the screen setting you want and click "Delete". The setting is deleted without any alert message. You cannot delete screen settings used in the PDF.
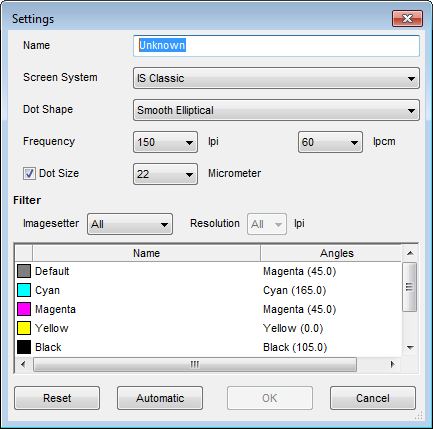
In this dialog you can create a new screen setting or modify the properties of an existing one.
1.
Name
Give the screen setting a suitable name.
Screen System
Select the screen system from the list box.
The following parameters depend on the screen system you selected. For example, in frequency-modulated screens you cannot define the frequency but only the dot size.
Dot Shape
You can select the dot shape of the screen in this box. The options available depend on the screen system you selected. For example, there is:
|
Round |
|
|
|
Dot shape for flexographic printing. The dot shape stays round throughout.
|
|
Round-Square |
|
|
|
This dot shape is derived from the classic glass engraving screen and is suited for offset printing. This dot starts off as a round dot in the highlight area and then becomes increasingly square. As the shadows increase, first square and then round white "holes" result.
|
|
Smooth Elliptical |
|
|
|
This dot shape is suited especially for offset printing. This dot starts off as a round dot in the highlight area and then becomes increasingly elliptical until it has a rhombic shape in the dot join. As the shadows increase, first rhombic, then elliptical and finally round white "holes" result. |
Frequency
In some screen systems, this is where you can set the density of the screen dots. Select the value either in lpi or lpcm. The system automatically switches over to the other value, with the value rounded to the nearest rational number.
Point size
Enable the checkbox to be able to set the dot size. Then select the dot size in micrometers from the list box, providing that the selected screen system supports this.
Imagesetter
If you want, you can select the imagesetter in this box and perhaps its resolution. This confines the screen systems, frequencies and dot sizes to those available for the imagesetter you selected. Other options are filtered out.
Angle
The table lists all the color separations and the angles assigned to them.
The various screen systems each have set angles to which a process color is assigned by default. With IS Classic, for example, yellow is rotated by 0°, magenta by 45°, black by 105° and cyan by 165°. These angles are named by the colors assigned by default: This means that 0° is "Yellow (0.0)" and 105° is "Black (105.0)". All other spot colors are given the angle set in "Default". In the case of IS Classic, this is "Magenta (45.0)". You can also interchange the angles. For example, black could be printed also with the "Cyan (165.0)" angle.
Proceed as follows to interchange the angles:
1.Mark the color you want in the list box.
2.Click the item in the "Angles" column. A list box displays.
3.Select the angle you want.

|
You cannot interchange angles in frequency-modulated screening. |
Automatic
If you click "Automatic", the angles for spot colors are assigned automatically based on a certain order.
Reset
You can undo any changes you made with "Reset".
HD Privacy Statement | Imprint | Prinect Know How


