
The following options are available in all job lists and in the user list ("Administration > Users") for customizing the view:
•Group by columns (1)
•Use column set (2)
•Customize columns (4)
Drag the column header by which you want to group to the "Group" box or select the "Group" command from the context menu of the column header.
You can add more grouping levels by dragging additional column headers into the Group box.
You can specify the order of the grouping boxes by placing new items before or after existing items. The target position is tagged by orange bars:

You can modify this order later by resorting these grouping boxes using drag-and-drop.
You can undo a grouping in one of the following ways:
•Right-click the grouping box you want and select "Remove Group" in the context menu.
•Click the grouping box concerned and drag-and-drop it back to the column headers of the table.
A column set defines which columns display in the table and which do not. In addition, a column set also contains the column width settings.
In the "Column set" list box, you can:
•select from existing column sets,
•define new custom column sets,
•delete column sets,
•edit column sets.

An asterisk "*" displays next to the name of the column set while the changes to the column set are not saved.
You can sort the list items, also within groups, in ascending or descending order by clicking a column header. The icon to the right of the column header that was sorted by indicates the sorting order.
|
|
The "Material" column is sorted in ascending order. |
|
|
The "Material" column is sorted in descending order. |
Quick customization directly in the table
To change the order of the displayed columns fast, click a column header and drag-and-drop it to the position you want:

To change the width of a single column, position the mouse pointer over the right separating line to the next column and move the separating line to the left/right:

Commands in the context menu of the column headers
|
Resize the column width |
This lets you customize the width of each column to the minimum width at which all the items in the column can be fully seen. |
|
Resize all column widths |
This lets you customize the width of all columns to the minimum width at which all the items in the columns can be fully seen. |
|
Group |
This lets you group the table items by the selected column header. See Group by columns. |
|
Hide |
This lets you hide the selected column in the table view. |
|
Customize... |
This lets you open the "Customize Columns" window. See "Customize Columns" window. |
Commands in the context menu of the table items
|
Reset columns |
This lets you customize the width of all columns to the minimum width at which all the items in the columns can be fully seen. |
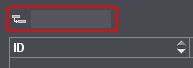
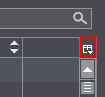
If you miss columns in the table, you must first show them. To do this, invoke "Customize…" in the context menu of the column headers or click the "Customize Columns" icon (if available):
The "Customize Columns" window opens:
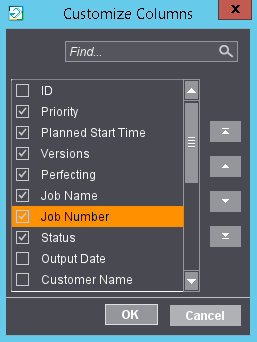
This lists all available columns. You can disable or enable the checkbox for each column separately. As a result, the columns concerned display or are hidden.
To filter, you can enter a string for the column you want to customize in the "Find" box.
You can also customize the order of the columns in this window by selecting the column name and clicking the button you want:
|
|
To the beginning Move column to top. |
|
|
Up Move column one position up. |
|
|
Down Move column one position down. |
|
|
To the end Move column to bottom. |


