
Example for Creating a Rule with the JDF Import Rules Editor
A simple rule will be created in the example below to explain the procedure. Different marks are to be used for perfect binding and wire-stitching during the JDF import.
This requires the following steps:
1.Define the product part templates that will be used during the import (see Defining the product part templates)
2.Create the import rules with the JDF Import Rules Editor (see Creating the Rules).
3.Enable the rules in the Rules Editor and, if necessary, in the Preferences
Defining the product part templates
In this case, setup of the appropriate product part templates is the key groundwork for creating rules in the JDF Import Rules Editor.
1.Create a suitable folder for these product part templates in "Resources > Product Part Templates", for example, "JDF-PP Templates".
2.Create a new product part template with the settings that will be used on booklets with perfect binding. Go to "Jobs & Resources > Resources > Product Part Templates" and select "New Product Part Template..." in the context-sensitive menu.
3.In the "Product Part" step, specify the name of the product part template (e.g. "PP Perfect Binding") and enter any page total (the actual page total will be determined later from the JDF; you only have to enter a value greater than zero in this box).
4.The settings in the "Master Pages" step can stay as they are in most cases (the actual page size will be determined later from the JDF; you can simply leave the default page size as it is).
Note: Special case for bleed and trim: If the JDF files from the MIS you used have no data regarding bleed and/or trim, you can specify the values for your shop in the product part template.
Attention: The values entered by the MIS are usually used if deviating values for bleed and trim are set in the JDF file!
5.Select "Perfect Binding" in the "Binding" step and set the correct values for your company (or the ones most frequently used) for perfect binding (e.g. "First Folding Sheet is Cover", "Pages in Cover" are "First", etc.).
6.In the "Marks" step, enable the marks wanted for perfect binding (e.g. collating marks) and set their parameters.
7.Leave the "Printing Plates" and "Folding Schemes" steps as they are. All the data on the selection of the plate template and the folding schemes are determined from the imposition parameters of the JDF file.

Note: This contrasts greatly to the product part templates that you would create for Web2Print automation.
8.Click "Save" and then "Close".
9.Create another new product part template named "PP Wirestitching" for the settings that will be used on booklets with wire stitching. Proceed as in "PP Perfect Binding", except that you select "Saddlestitching" in the "Binding Methods" tab and no collating marks in the "Marks" tab.
1.Open the JDF Import Rules Editor with this command in the "Tools" menu.
2.Start the Assistant by clicking the "Create new rule" button. The following dialog displays:

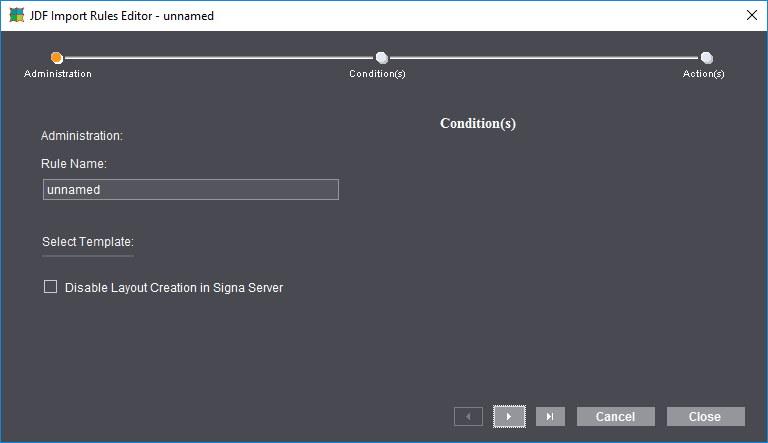

Note: The right part of the dialog is empty after a restart of Prinect Signa Station and when a rule is first created. The actions of the last rule are always used automatically if rules were already defined. This makes it simpler for you to create similar rules (= different condition but same or similar actions).
3.Give the rule a name, e.g. "Perfect Binding PP".
(4).Select a template if required. When you select a template, its conditions and actions are automatically used, but you can edit and extend them afterwards.
5.Go to the next tab, "Condition(s)", in the Assistant with the "Next" button.
6.Select "Binding" as a condition on the left of the window.

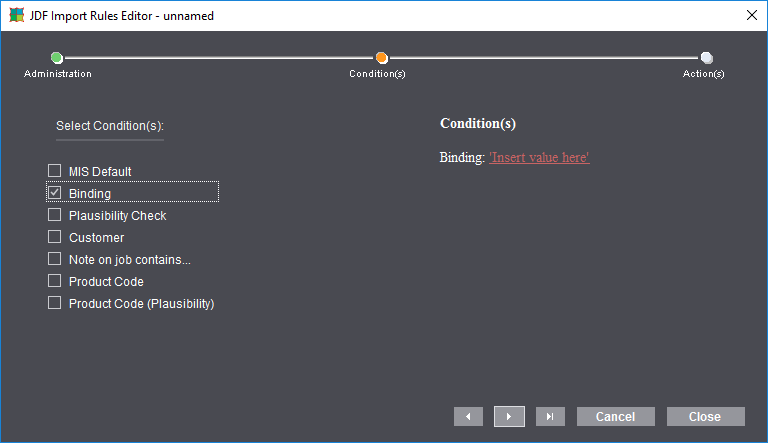
7.Click "Insert values here" in the window that displays on the right. The following dialog displays:

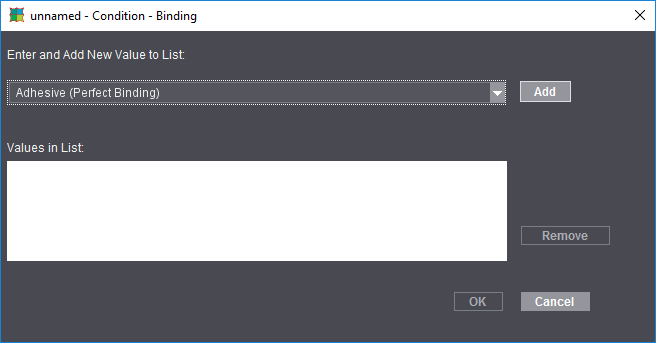
8.Select all binding types that have perfect binding in the list box and confirm your selection each time by clicking "Add". In the end, the dialog is something like this:

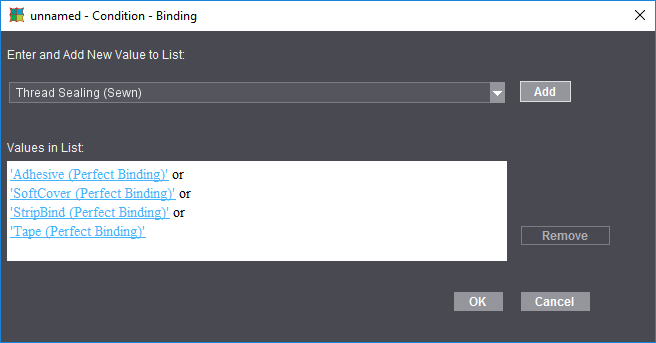

Note: The term "Adhesive" describes the attribute in the JDF.
9.Confirm the window by clicking "OK".
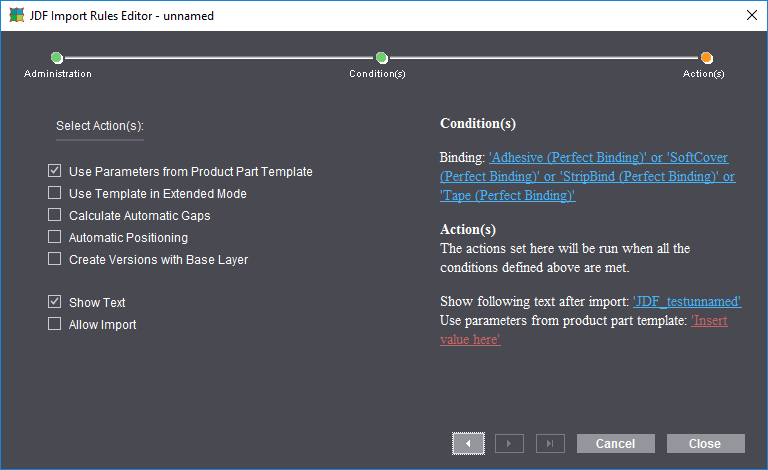
10.Go to the next tab, "Action(s)", in the Assistant with "Next" and enable "Use Parameters from Product Part Template" and "Show Text".

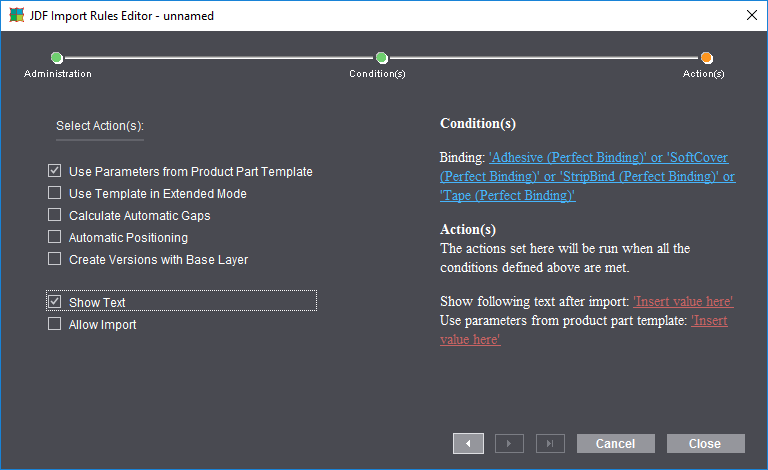
11.On the right of the window, click "Insert value here" next to "Show following text after import":

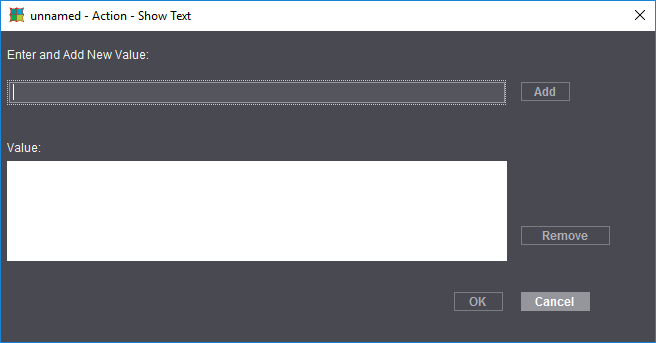
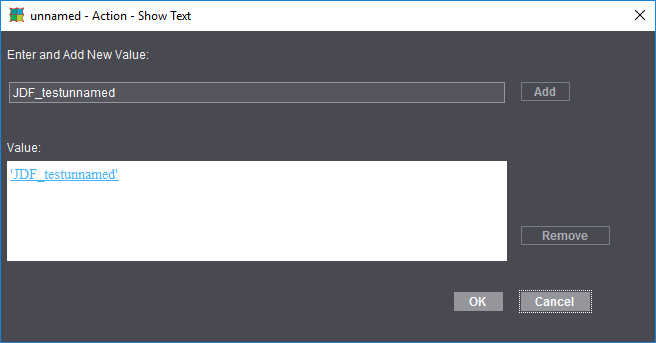
12.Enter the text you want and then click "Add".
13.Confirm the window by clicking "OK".
14.On the right of the window, click "Insert value here" next to "Use parameters from product part template":
15.Click the folder button and select the "PP Perfect Binding" product part template that you created for this.
16.Click "Add" if the value is not used automatically and confirm the window with "OK".

The result then looks like this:
17.Quit the Assistant by clicking "Close".

Note: The rule you created is defined only after you finish by saving your data in the "JDF Import Rules Editor" window.
The rule appears in the Rules Editor:
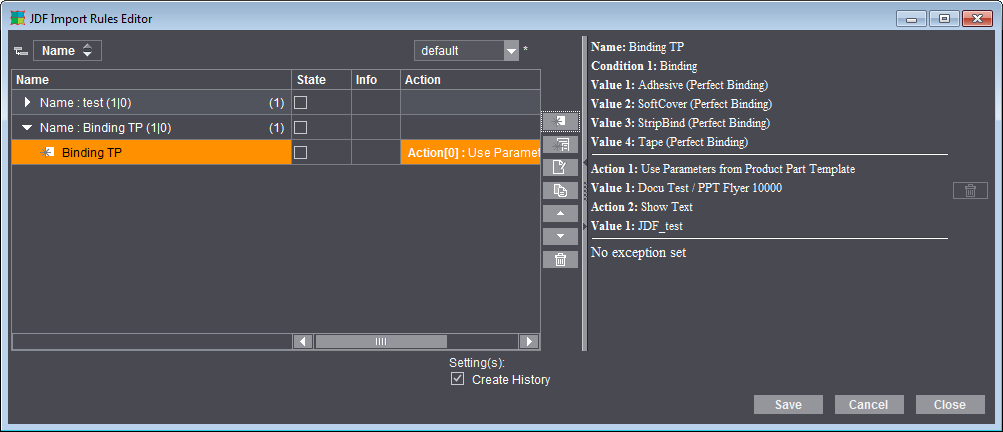
18.Save the rule by clicking "Save".
19.Create the rule for wire-stitching in the same way ("Binding Type" = "Saddlestitching", "Use Parameters from Product Part Template" = PP Wirestitching").
20.Enable the rules in the "State" column so that the rules will be applied the next time a JDF file is imported.

Note: The rules are applied only if their "state" is active and "Use Rules" is enabled in the Preferences in the "JDF Import" tab. A warning is issued in the caption bar of the Rules Editor if this is not set in the Preferences. If you use the Macintosh version of Prinect Signa Station, make sure that this function is enabled on the Prinect Signa Station Server!