Privacy Policy | Imprint | Prinect Know How | Prinect Release Notes ![]()
Connecting a Calibration File with a Paper Profile
"Connect Profiles" links a calibration file (.epl file) with its paper profile (ICC profile). In this way, Color Proof Pro automatically finds the ICC profile that matches a calibration file. This link lets you select the ICC profile using the paper name, the resolution and the ink in Prinect Cockpit.

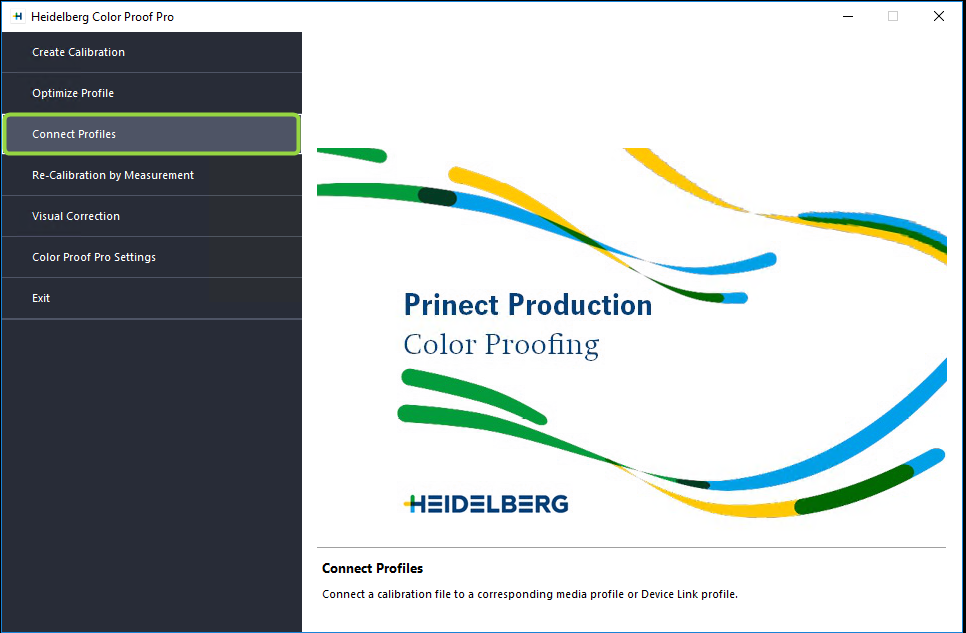
1.Click "Connect Profiles" in the Color Proof Pro Start window.
The window where you can set up the "Connect Profiles" module displays:
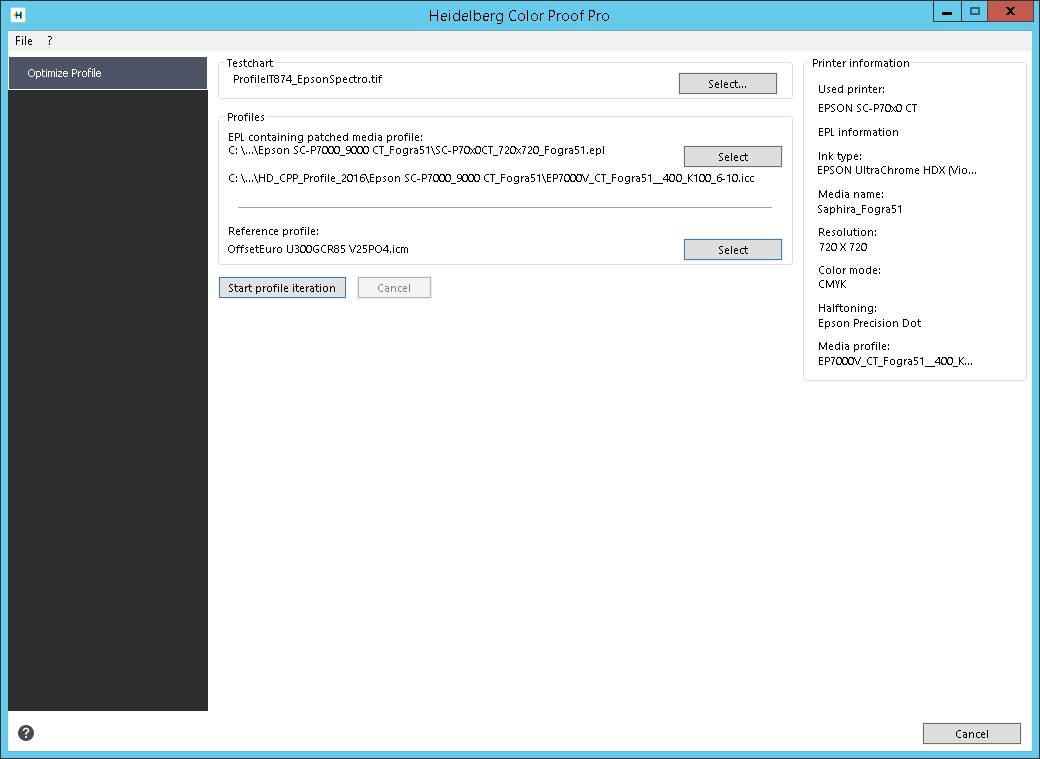
2.In "Calibration", select the calibration file (.epl file) to be linked to the ICC profile.
 Note: You find the calibration files in the "Working" folder (Windows as of version 7: C:\Program Data\Heidelberg\Color Proof Pro\Client\Working). This is where the calibration and profile files are stored in subfolders.
The window displays the path to the calibration file and the file name.
3.If necessary, correct the media length in the "Actual" box (see Determine and Set Media Length Correction for details about determining length correction).
4.If necessary, edit the name of the media, the "Print unidirectional" option and the total ink limit.
5.In "Connect to profiles", select the profile file (.ICC file) which is to be linked to the calibration file.
6.Click "OK" to make the connection. The calibration file (.epl) is linked (patched) to the ICC profile. The existing calibration file remains unchanged, the modified EPL file and the ICC profile are copied to the Color Proof Pro profile folder in "MyProfiles". Prinect will detect the new profile automatically and display it in the respective selection dialogs after a short delay.
Determine and Set Media Length Correction
Using Color Proof Pro, you can compensate differences in the length feed of printers depending on the print medium used by correcting the length. The result is written to the EPL files, resulting in the printout always having the same length on different media.
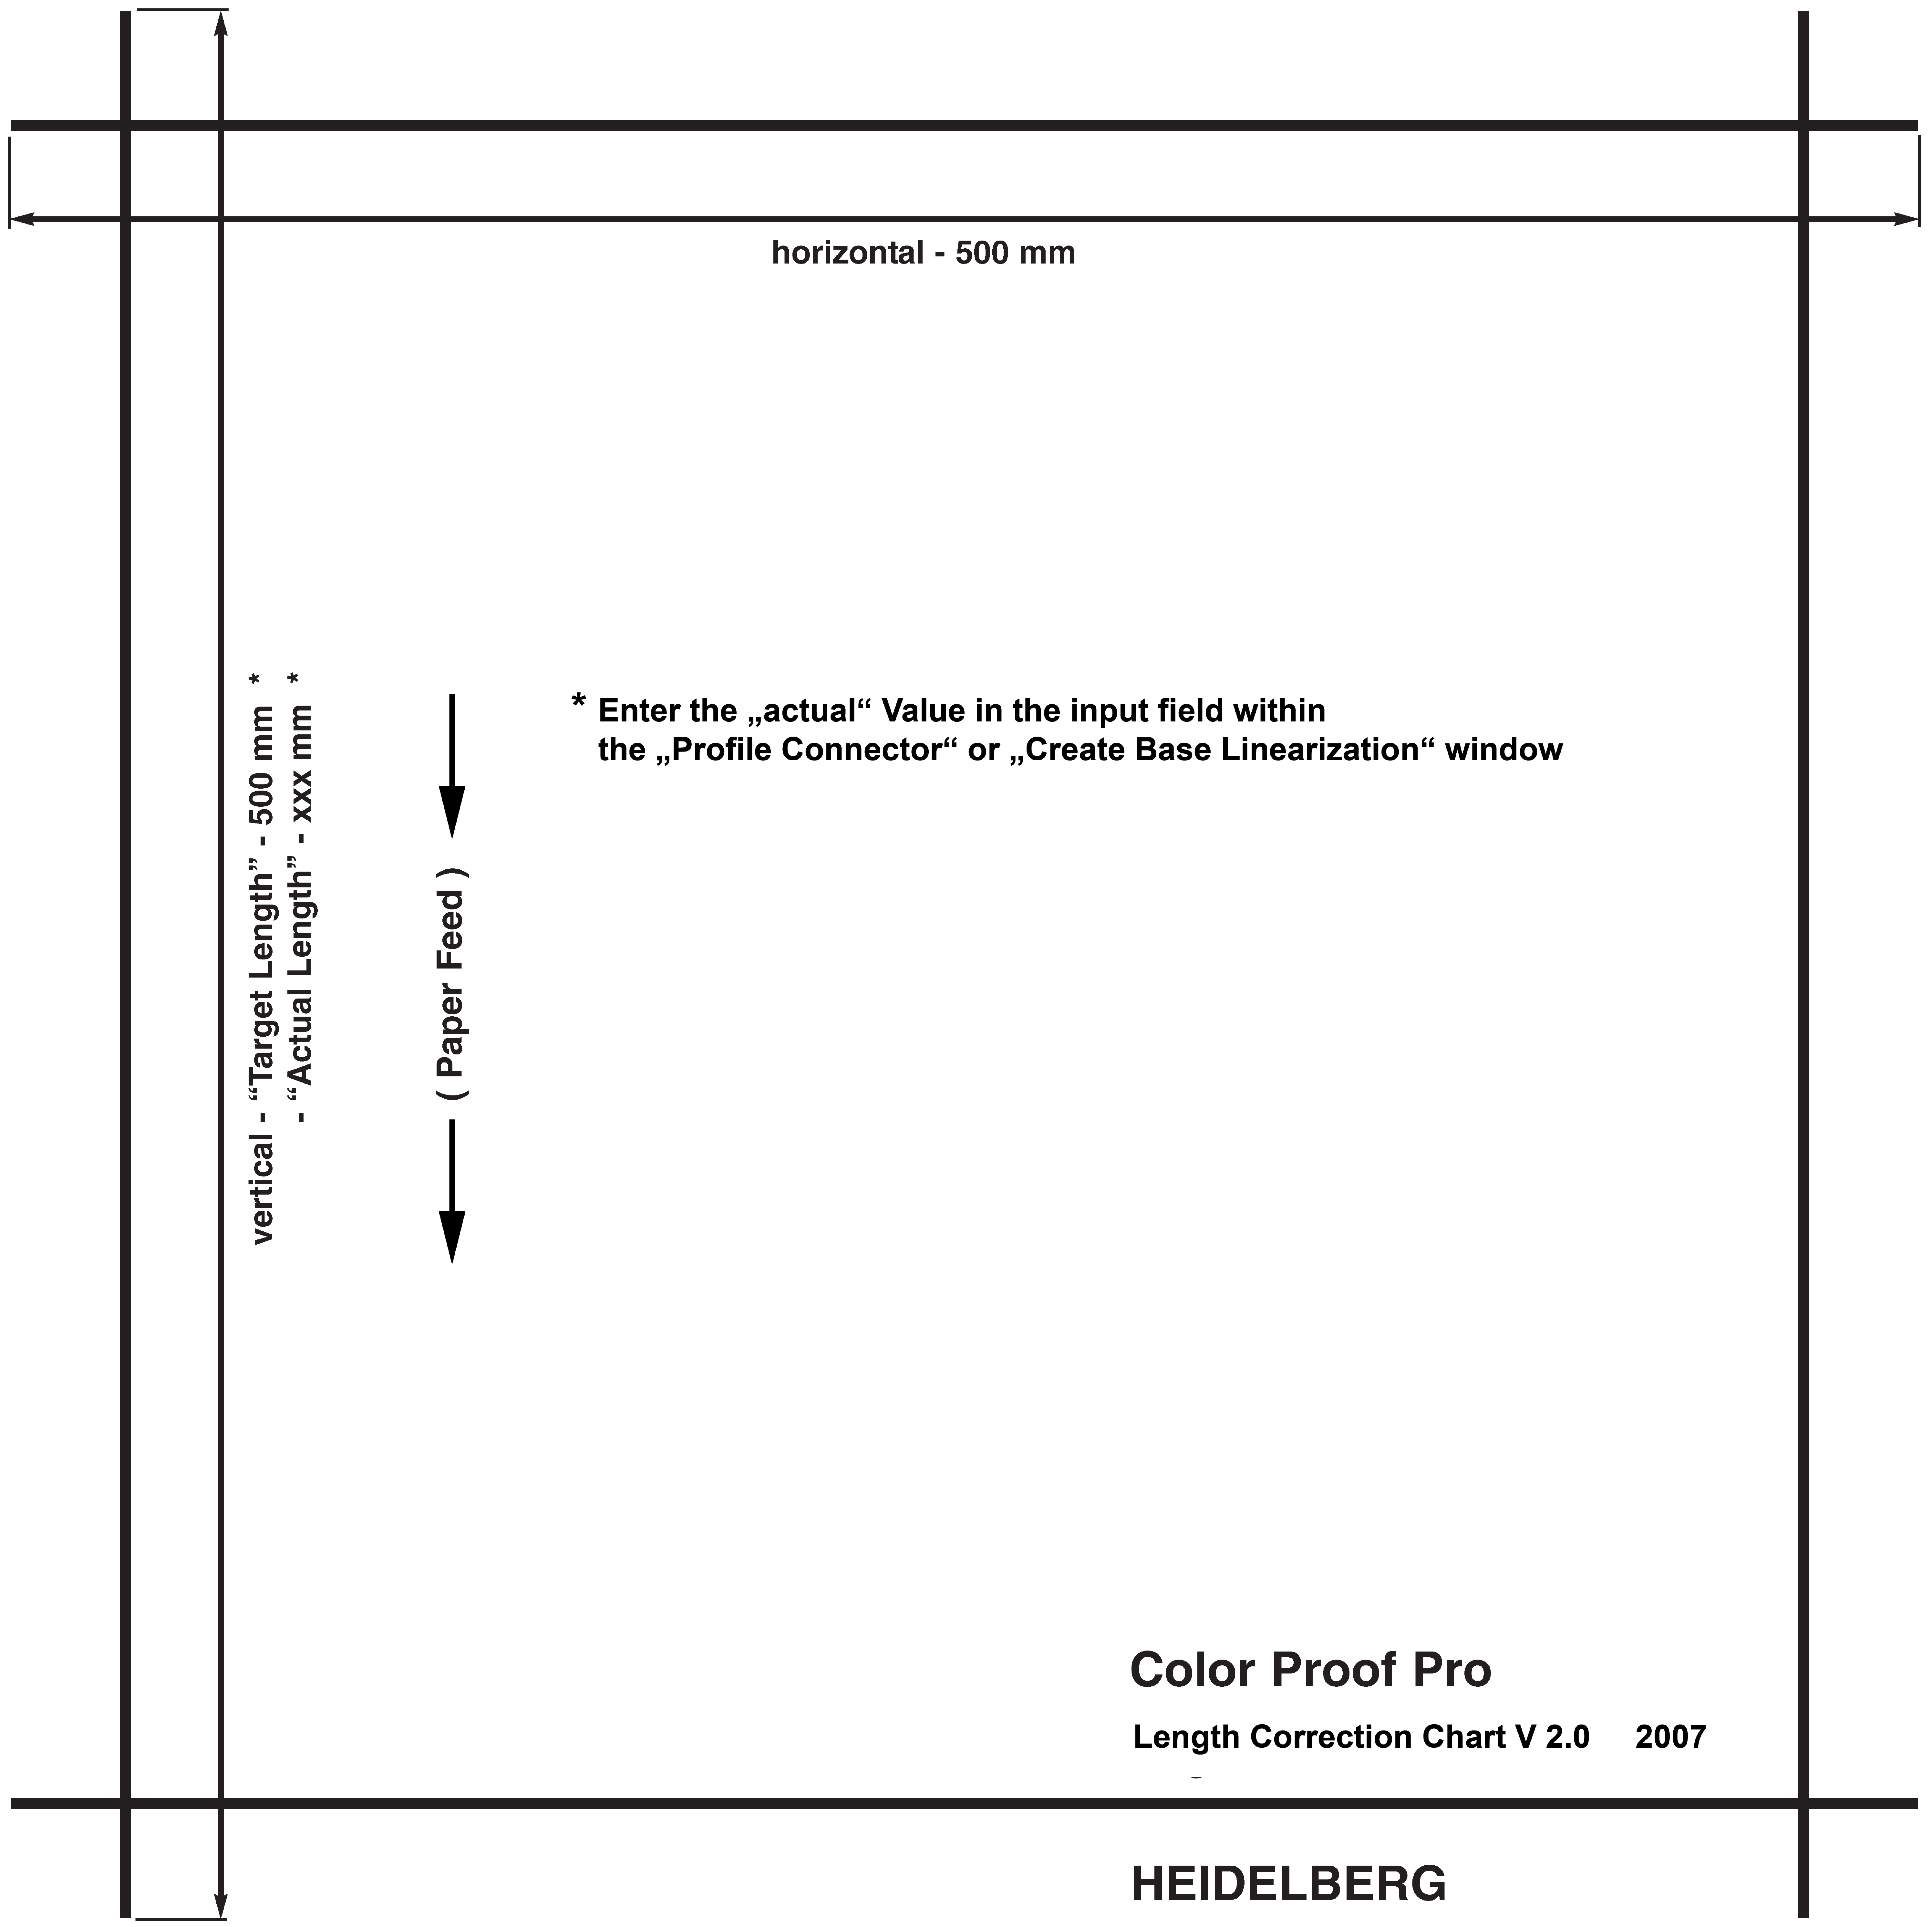
To this end, you must print one of the test chart files "LengthCorrection_V2.pdf" or "LengthCorrection_V2.tif" in their own Prinect print job and then measure the printout with a ruler. You will find these files in the Color Proof Pro application folder (CPPro) in the "Testcharts" subfolder (e.g. in "C:\Program Files (x86)\Heidelberg\Renderer\HighRes\CPPro\Testcharts"). The test chart looks like this:
Proceed as follows to determine the length:
1.In the Prinect Cockpit, create a new Qualify and a new PageProof sequence for this test print. When doing so, make sure that the preflight settings of the Qualify sequence are very "tolerant". In other words, that there are no strict verifications (on an image resolution that is low, etc.) that will prevent error-free processing. Save the sequence, giving it a name that is clearly identifiable, e.g. "Qualify_Length_Test".
Take note of the following items when setting up the PageProof sequence:
•The "Color Conversion" option and/or Proof Color Management can be (but do not have to be) enabled. The CMM settings are not relevant because it is a pure geometry measurement.
•Leave the "Split Document", "InRIP Trapping" and "Layout Preparation" options disabled or as they are with the default values.
•Make sure that scaling is set to 100% in the "Imposition" option. Leave the other parameters disabled or as they are.
•In the "Rendering" option, set the proofer planned for output in the"on" list box. In "Device", select the paper size and in the "Material" list box select the designated media. Now select the ICC profile matching the media and ink in the "Proofer Profile" list box. This profile must be the one that you want to link to the EPL file. Leave the other options as they are. Save the sequence, giving it a name that is clearly identifiable, e.g. "PageProof_Length_Test".
2.Create a new print job in the Prinect Cockpit and assign the two new sequences to it.
3.Add the ""LengthCorrection_V2.pdf" file to the print job and wait until the "Quality" sequence has finished running.
4.Submit the test page to the PageProof sequence for output.
5.Now measure the 500 mm length in feed direction on the printed test chart with a ruler. You now have the value for media length correction.
6.Enter this value into the "Actual" box in the "Connect Profiles" view or in "Calibration > Settings" (see "Settings" Group).
Verification of the media length correction
After the ELP file is linked to the ICC profile, you can check the impact of correction by reprinting the test chart with the modified profile. To do this, you can re-use the job already created. You only have to re-load the modified proofer profile in the PageProof sequence.
Privacy Policy | Imprint | Prinect Know How | Prinect Release Notes