The "Time types" tab shows all standard time types as well as time types created manually. Standard time types are identified by the yellow tag in the "Changeable" column.
Time types are relevant for Analyze Point. Like time categories, they are used there for scheduling in the "Time evaluation", "Operation evaluation" and "Shift evaluation" reports.
Contrary to the time categories that provide a rough timing, the time types are necessary for detailed scheduling.
Button "Create"
With this button, you create a new time type. See Editing/creating a time type.
"Edit" button
With this button, you edit an existing time type. See Editing/creating a time type.
"Copy" button
With this button, you copy an existing time type. A window opens where you can edit this time type. See Editing/creating a time type. Other than the "Edit" function, you create a new time type when clicking "OK" or "Apply".
"Delete" button
With this button, you delete a time type ultimately. This function is only available for time types created manually.
For correct time capturing in Analyze Point, actions reported at the machine must be allocated to a time type. These in turn must be allocated to a time category. For more detailed information, please refer to Interdependency between Operation, Action, Time Type and Time Category.
The default assignment is as follows:
|
Time category |
Time type |
Operation |
|---|---|---|
|
Production time |
Setup time |
•Basic makeready |
|
Execution time |
•Good production |
|
|
Miscellaneous production time |
•- |
|
|
Auxiliary time |
Auxiliary time |
•- |
|
Down time |
Down time |
•Pause |
Basically, there is no need to change the standard configuration in case of a new installation. Make changes only after having consulted the project manager if you need another schedule or if existing actions are not yet allocated.
Proceed as follows to edit/create a time type:
1.Go to "Administration > Device configuration > Time type".
2.To edit an existing time type, select it in the list box.
3.Click "Edit".
(4).To create a new time type, click "Create".
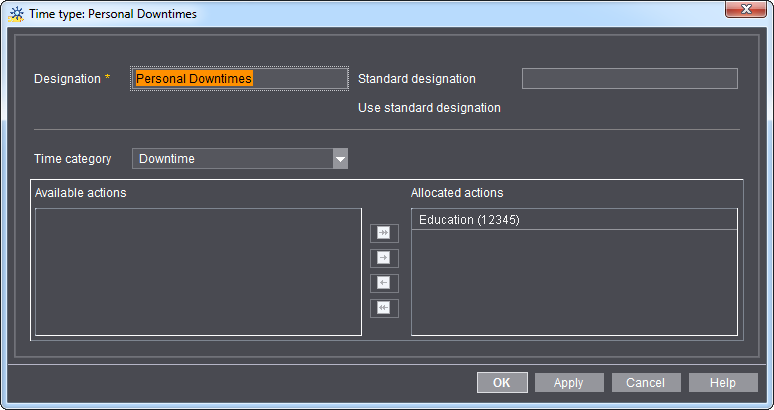
The "Time type: <name of time type>" window displays.
"Time type: <name of time type>" window
Box "Designation"
Type a name for a new time type here.
You can edit the designation here if this is an already existing time type. Changes only take effect if you disable the option "Use standard designation" additionally. We recommend keeping the preset designations for standard time types in Germany. They are based on the BVDM guidelines.
"Use standard designation" option
This option is only available for standard time types.
When you enable this option, the internal designation of the time type specified in the "Standard designation" box is used. Manual entries in the "Designation" box are ignored.
"Time category" list box
Select the time category to which to allocate the time type here. A description of time categories can be found in Explanation of Time Categories and Time Types.
Allocation area for actions
Here, you allocate one or several actions to a time type. The "Available actions" list box shows all actions that are not yet assigned to a time category. Use the arrow buttons to perform allocations. You can also perform the allocation when creating a new action. See Defining a New Action.