
During production, the printed sheets are prepared on pallets for further processing (for example cutting, folding or external processes). In order to ensure that these pallets can always be uniquely identified, pallet sheets are attached to the pallets.
The "Create pallet sheet" function allows the pallet sheet to be generated in a partially automated manner. This means that once the function has been manually initiated (PDC message) on the printing press, all information needed for the further processes is automatically saved. After that the pallet sheet is sent to a printer
•Which job data is printed out?
•Setup for output of a pallet sheet
•Printing pallet sheets on the Prinect Press Center
•Print Pallet Sheet at the Data Terminal
The following prerequisites must be met before you can use the "Print Pallet Sheet" function on the machine.
•A database must be installed on the Prinect Server.
•When setting up the device in the CDM, you must choose one of the connection types "Direct connection of the press", "Data Terminal", "Data Terminal with counter box" or "Data Terminal with machine direct".
Which job data is printed out?
Pallet sheet for sheetfed presses without InsertStar
The pallet sheet template you are using determines the job data to be printed. "Classic" accompanying papers templates have less information than templates without this label.
The following table shows the job data that can be printed with the respective templates:
|
Job data |
Templates |
Templates |
|---|---|---|
|
Logo •Logo you allocated to the pallet sheet. See Editing accompanying paper templates. |
Yes |
Yes |
|
Preview |
Yes |
Yes |
|
Job Number |
Yes |
Yes |
|
Job number as a barcode |
Yes |
Yes |
|
Job Name |
Yes |
Yes |
|
Press Sheet •Sheet name. |
Yes |
Yes |
|
Customer |
Yes |
Yes |
|
The pallet number with the number of sheets on the pallet. |
Yes |
Yes |
|
Delivery address •A delivery address is only printed if supplied with the job by the Management Information System |
Yes |
Yes |
|
Delivery quantity •Delivery quantity of the product |
Yes |
Yes |
|
Quantity •The required quantity, including scheduled waste |
Yes |
Yes |
|
The date and time at which the pallet sheet was printed |
Yes |
Yes |
|
Comment •Comments/notes the print job manager has entered when submitting the pallet sheet at the machine. |
Yes |
Yes |
|
Machine from which the pallet sheet was printed |
Yes |
- |
|
Print job manager who submitted the pallet sheet at the machine |
Yes |
- |
|
Versions if this is a versioned job |
Yes |
- |
|
Due date |
Yes |
- |
|
Next operation if the information is available |
Yes |
- |
|
Scheduled machine for the next operation if the information is available |
Yes |
- |
|
Scheduled quantity if the information is available •Scheduled quantity that must be available for the next operation. This includes good production and waste sheets |
Yes |
- |
Pallet sheet for sheetfed presses with InsertStar

Prerequisite: Slip sheet inserter details on the pallet sheet are available as of the Press Center version S14A. Make sure that the correct machine version is selected when setting up the sheetfed press on the CDM. See Additional general device configuration for device class "Sheet-fed press".
Pallet sheet templates with additional details are available for sheetfed presses with Heidelberg's integrated InsertStar slip sheet inserter. InsertStar combines a counter function for the production run and a tag function for waste sheets. The pallet sheets for InsertStar contain details for finishing such as a list of sheets with pultrusion faults.
A total of four templates are available for sheetfed presses with InsertStar: two for Prinect Inspection Control (PIC) and two for Prinect Inspection Control 2 (PIC2). In contrast to PIC2, PIC can transfer defective 1ups and write them to the pallet sheet.
The difference between Classic and non-Classic templates is that non-Classic templates display more details such as the scheduled machine and the next operation.
Example of a pallet sheet for tagging
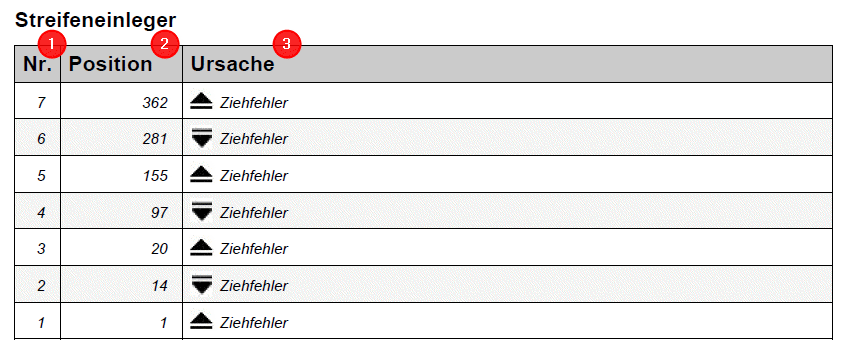
No. (1)
Shows the slip sheet number. No. 1 corresponds to the slip sheet first inserted. It is located lowest down in the pallet.
Position (2)
Specifies the sheet number for an event. Position 1 corresponds to the bottommost sheet on the pallet.
Cause (3)
Indicates the cause for the slip sheet (e.g. pultrusion fault).
|
Icon |
Explanation |
|---|---|

|
Start slip sheet for an error event In combination with the position, this icon indicates as of which sheet an error starts. The machine operator can see from the slip sheet in the pallet that the sheets as of that point up to the slip sheet have an error. |

|
End slip sheet for an error event In combination with the position, this icon indicates where the error ends. The machine operator can see from the slip sheet in the pallet that the sheets up to this point have an error. Consequently, all sheets between the start slip sheet and the end slip sheet are faulty. |

|
Intermediate slip sheet for an error event In combination with the position, this icon indicates at what point in the pallet an intermediate slip sheet is inserted. The intermediate slip sheet is inserted between the start slip sheet and end slip sheet after a set number of faulty sheets. The number of faulty sheets following which an intermediate slip sheet is inserted must have been set up beforehand in the Prinect Press Center. |
Setup for output of a pallet sheet
1.A Windows printer (only DIN A4 printer) must be set up on the Prinect server (Defining Windows printers on the Prinect server).
2.If required, a new logo can be defined for the standard template (Editing accompanying paper templates).
3.The device must be set up in the CDM (Connecting Machines)
Pay attention to the Prinect Press Center version when using the InsertStar pallet sheet. See Pallet sheet for sheetfed presses with InsertStar.
4.A pallet sheet template must be assigned to the respective device (Assign an accompanying paper/time sheet template to a device).
5.Automatic printing of a pallet sheet can be disabled if an automatic pallet changer is used. See Disable automatic pallet sheet printing for pallet change.
6.The counter function and/or tag function of the InsertStar must be enabled on the Prinect Press Center for the pallet sheet with additional details for InsertStar. Read the user's guide of your Prinect Press Center for details.
Defining Windows printers on the Prinect server
Install the printer on your Prinect Server computer.
We recommend choosing a printer near to the press for which you want to print the pallet sheet.

Note: You must be logged in to Prinect Server as user "prinect" when setting up the printer.
Procedure:
1.At your Prinect Server, choose "Start > Devices and Printers > Add a Printer".

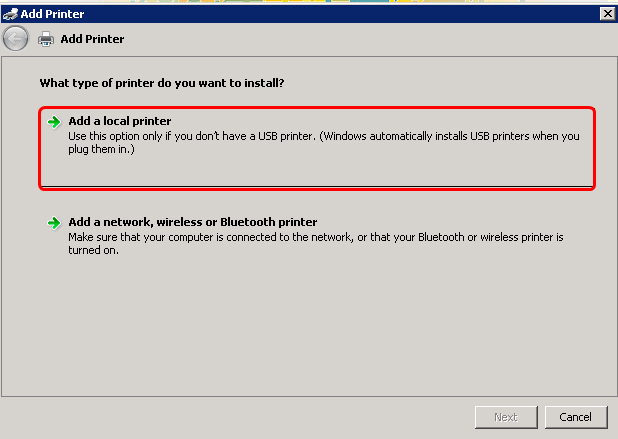
2.Choose "Add a local printer".

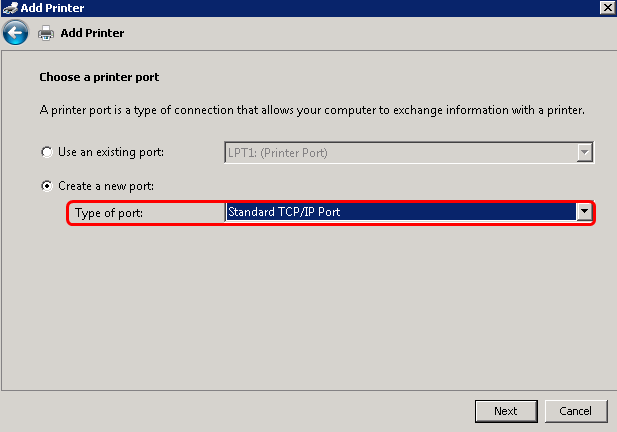
3.Choose "Standard TCP/IP Port" as Port type.
4.Click "Next".

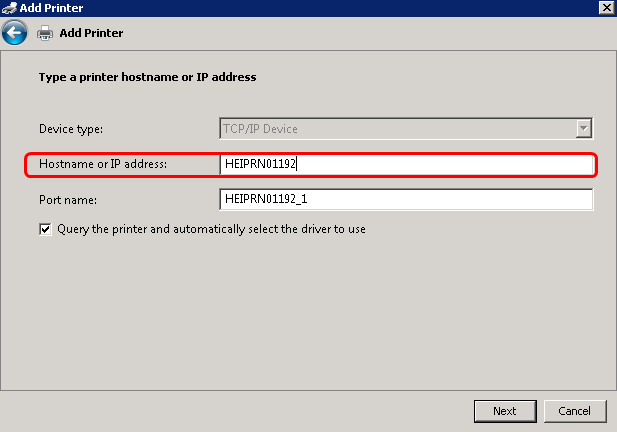
5.Type the name or IP address of the printer.
6.Click "Next".


7.Select the printer manufacturer (1) and the printer model (2).
When the driver is not in the list, please contact the manufacturer of your printer, or download the driver in question form the website of the manufacturer.
8.Click "Next".

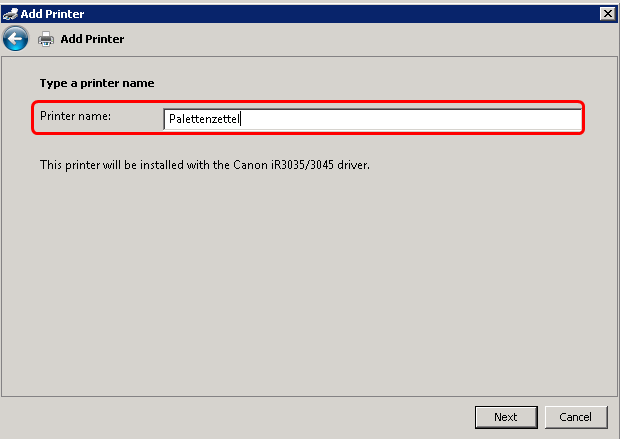
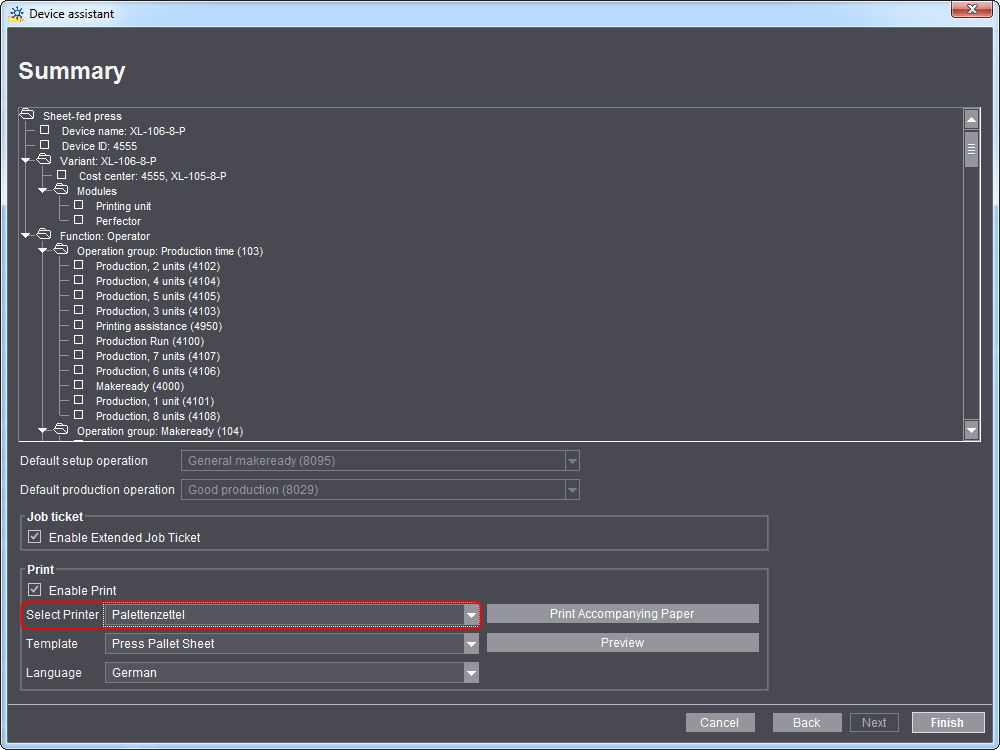
9.Enter a printer name. This name will appear in your Prinect Cockpit later when you run the Device assistant to set up a press.

10.Click "Next".

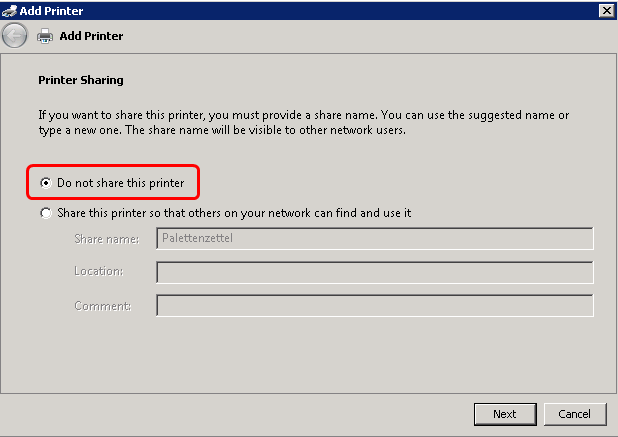
11.Enable the "Do not share this printer" option.
12.Click "Next".

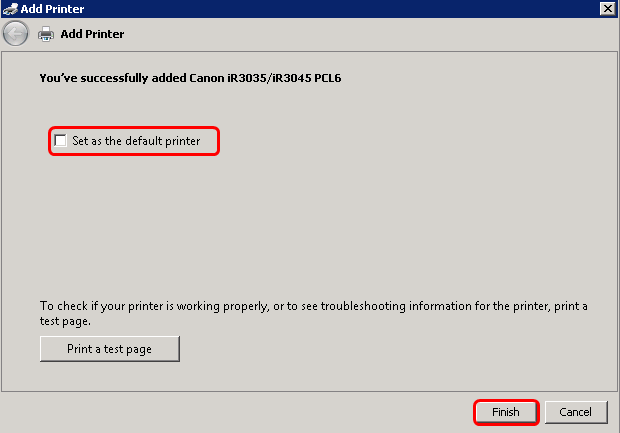
13.If applicable, enable "Set as Default Printer".
14.Click "Finish".
The printer is available in your Prinect system. When the printer is not present in the list box, restart the "Prinect Services" with the Supervisor and, if applicable, check the permissions of the printer you set up.
15.To check the permissions, select the printer you set up before in the "Printers" applet of the Windows Control Panel and choose "Properties" in the context menu.

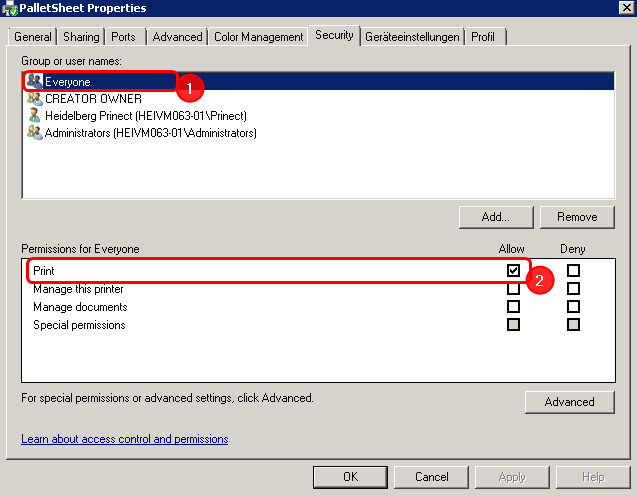
16.In the "Security" tab, at least the "Print" (2) permission must be allowed for the "Everybody" (1) group.
Disable automatic pallet sheet printing for pallet change
When an automatic pallet changer is used, a pallet sheet is printed by default after every pallet change. This function is not always wanted and can be disabled.
Proceed as follows:
1.Go to "Administration > System".
2.Select the Prinect server in the left column.
3.Scroll to "Central Device Manager" on the right.
4.Click the "Properties" button.
5.Disable the "Print pallet sheet automatically after pallet change" option.
The pallet sheet is no longer printed automatically after the pallet change. The pallet sheet is only printed manually via a PDC message.
Printing pallet sheets on the Prinect Press Center
To ensure that the manual PDC message "Print Pallet Sheet" appears on the corresponding press, you have to synchronize the Master Data Store (MDS) and the Prinect Press Center presses. See Synchronization of the PDC configuration with the press for details on how to do this synchronization.
After synchronization of the PDC configuration, you can load a job at Prinect Press Center and print a pallet sheet. The general procedure is as follows:

1.In your Prinect Press Center, go to the "Production data collection" menu (1).
2.Log in as machine operator (2).
3.Click the "Load Job" button (3).

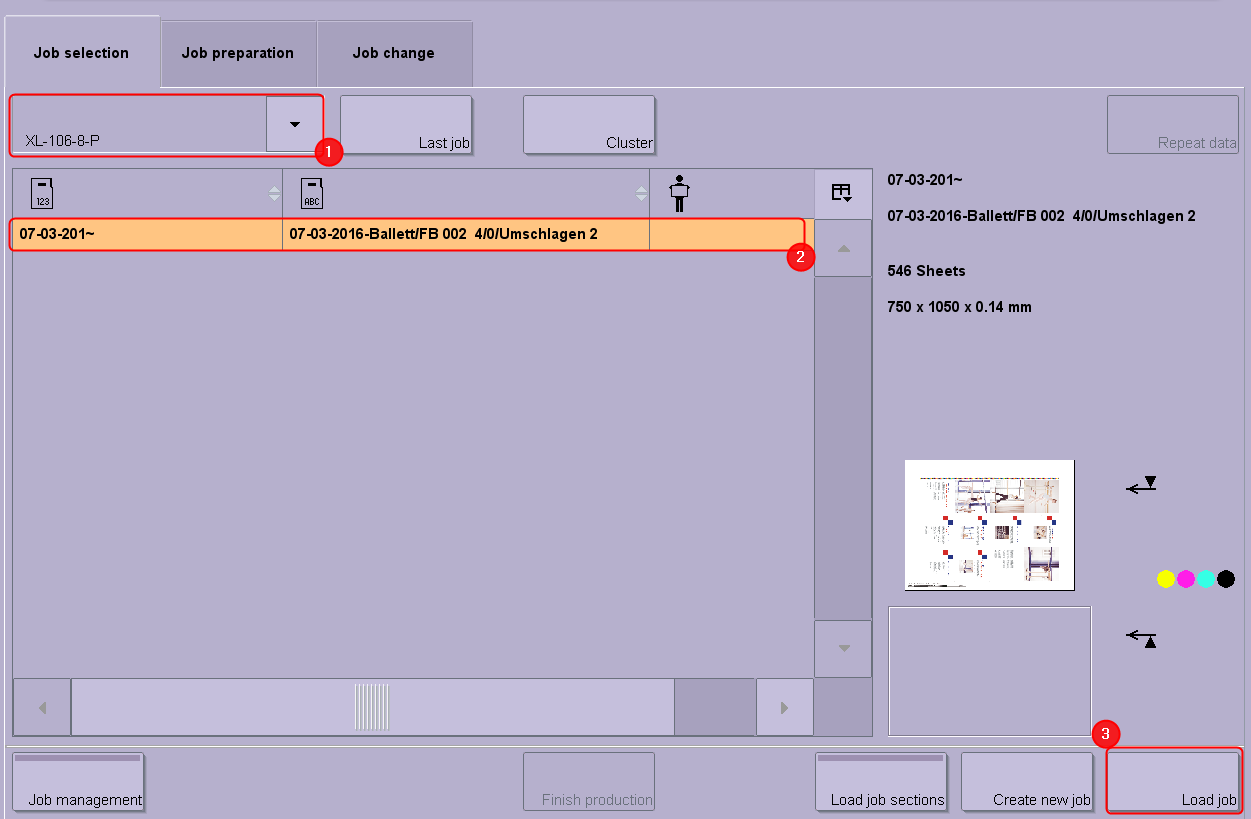
1.Select the data storage of your press (1).
2.Choose the job you want to print (2).
3.Load the job (3).
4.Click the "Release job" button and start the printing operation with the following button:


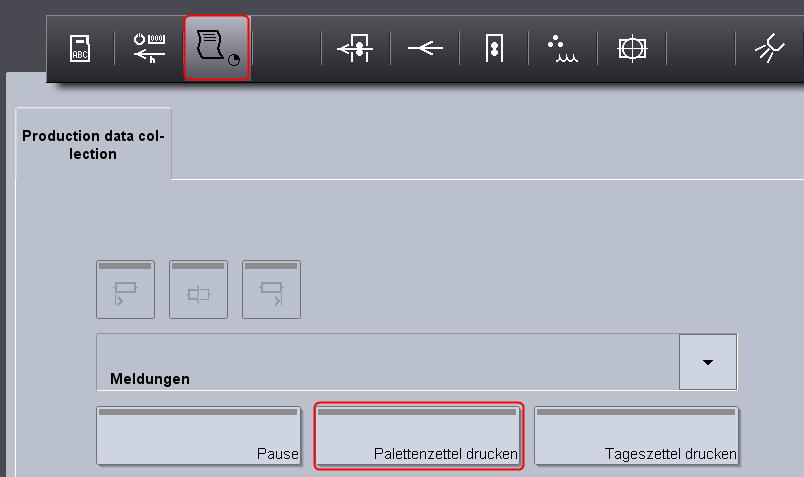
5.In "Production data collection" (1), you can now trigger the operation (PDC message) "Printing pallet sheet" (2) as soon as printing starts.
The pallet sheet is now printed on the printer you selected beforehand.
6.Next, remove the pallet from the delivery and place the printed pallet sheet onto the pallet.
7.Slide a new pallet into the delivery and continue the print job.
Print Pallet Sheet at the Data Terminal

You must select the respective work station (press) in Data Terminal to have the manual PDC message "Printing pallet sheet" displayed on the respective press.
1.Start Data Terminal and press the button "Workplace settings" to select the press where you want to print the pallet sheet (1).
The press then appears in the Workplace list (2).
2.Highlight the workplace (2) and select the machine operator in the Users list (3).
3.Log in the user (4).
4.The "Job selection" window appears. Select a job.
5.You then go to the Production data collection.

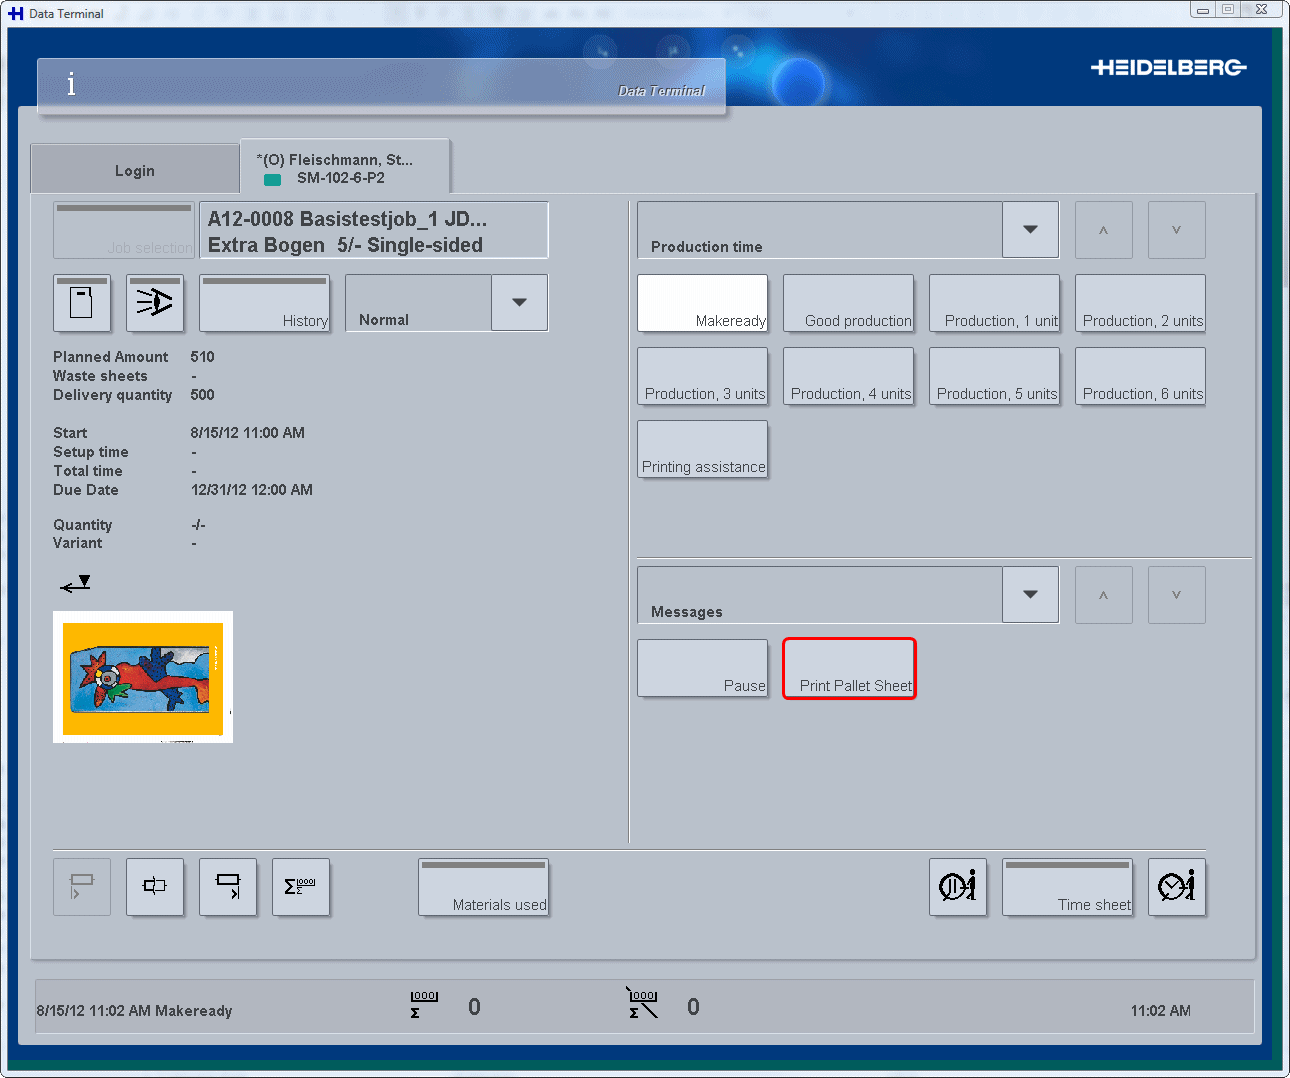
6.Here, you can print a pallet sheet.
The pallet sheet is then printed on the printer you selected beforehand.