
Creating a repeat job in Prinect Integration Manager with a MIS (Prinect Business Manager)
The repeat job is generated by the MIS (Prinect Business Manager) and imported into the Prinect Integration Manager (called "Prinect Manager" below). The predecessor job was already produced and the press presets saved. The JDF-PPF workflow was configured so that the job starts automatically in the Prinect Manager.
•The press presets are to be copied automatically
•The press presets are to be copied manually
The press presets are to be copied automatically
•JDF import for automatic use of the press presets must be configured on the Prinect Manager.
At this point, we will describe only the configuration for copying the press presets automatically. You can find a detailed description of the configuration of JDF import in Management Information System (JDF) PPF Workflow.
•A repeat job must be created and a JDF file must be generated in the Prinect Business Manager. The repeat job will then be automatically imported into the Prinect Manager.
1.On the Prinect Manager, go to "Administration > JDF Import" and there to the "Related Job" tab.
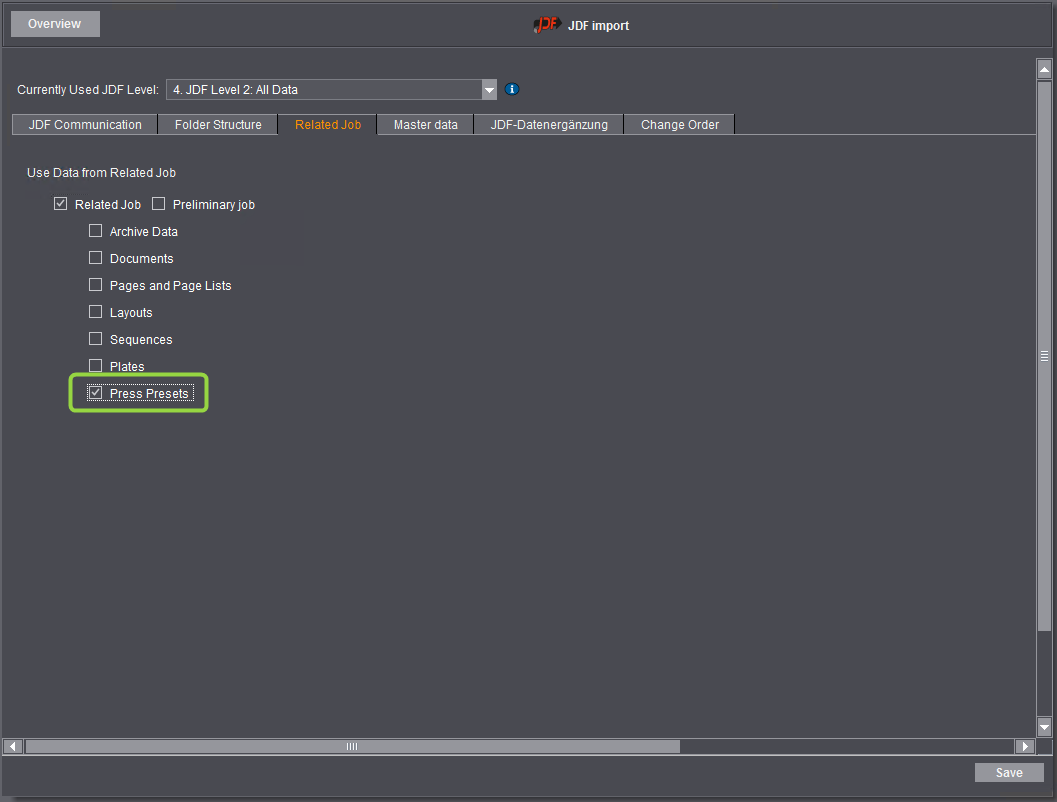
2.Enable the "Related Job" option.
Only when you set this will the press presets be copied automatically.
3.Enable the “Press Presets” option.
4.Click "Save".
Close the "JDF Import" section by clicking ”Overview". You must now generate the repeat job in the Prinect Business Manager. To do this, you must copy the predecessor job to a new job.


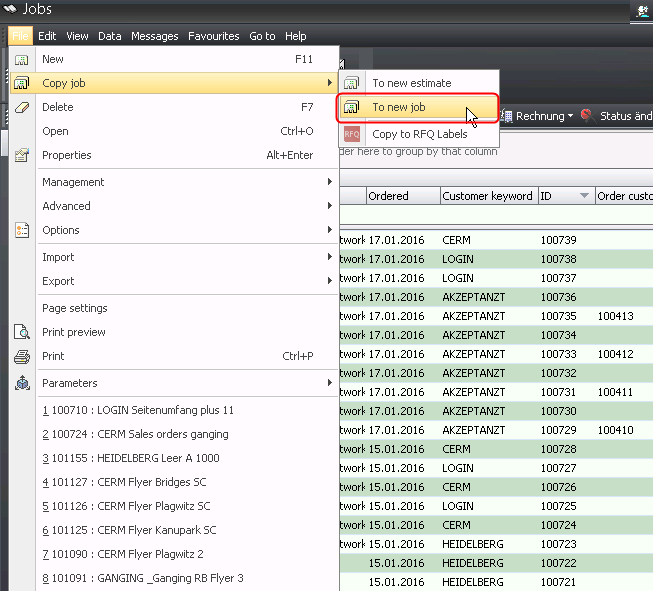
5.Select "File > Copy Job > To new job" in the Prinect Business Manager.
The "Copy job to job" dialog opens.

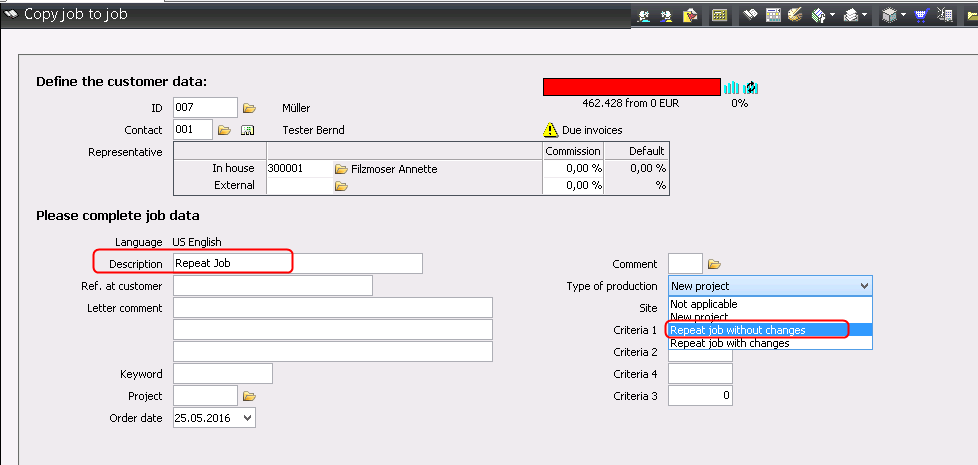
6.Enter a new job name in "Description" (1).
7.Select "Repeat job without changes" in the “Type of production" list box (2).
8.Move on through the dialog with "Next (F9)>>".
9.Exit the dialog with "Finish (F9)".
You must now send the repeat job to the Prinect Cockpit.

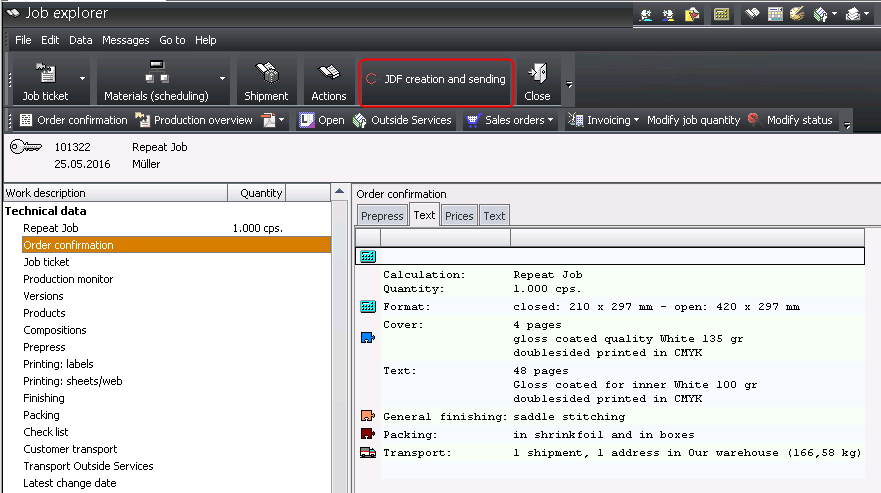
10.To do this, click the "JDF creation and sending" button.
11.Click "Finish (F9)".
The job is now sent to the Prinect Cockpit.
12.Go to "Jobs" on the Prinect Cockpit.
The job is tagged in the job list as a repeat job with inherited data by the icon below:


The press presets are to be copied manually
•JDF import for manual use of the press presets must be configured on the Prinect Manager.
At this point, we will describe only the configuration for copying the press presets manually. You can find a detailed description of the configuration of JDF import in the Management Information System (JDF) PPF Workflow.
•A repeat job must be created and a job ticket must be generated in the Prinect Business Manager. The repeat job will then be automatically imported into the Prinect Manager.
1.In the Prinect Cockpit, go to "Administration > JDF Import".
2.Go to the "Related Job" tab.

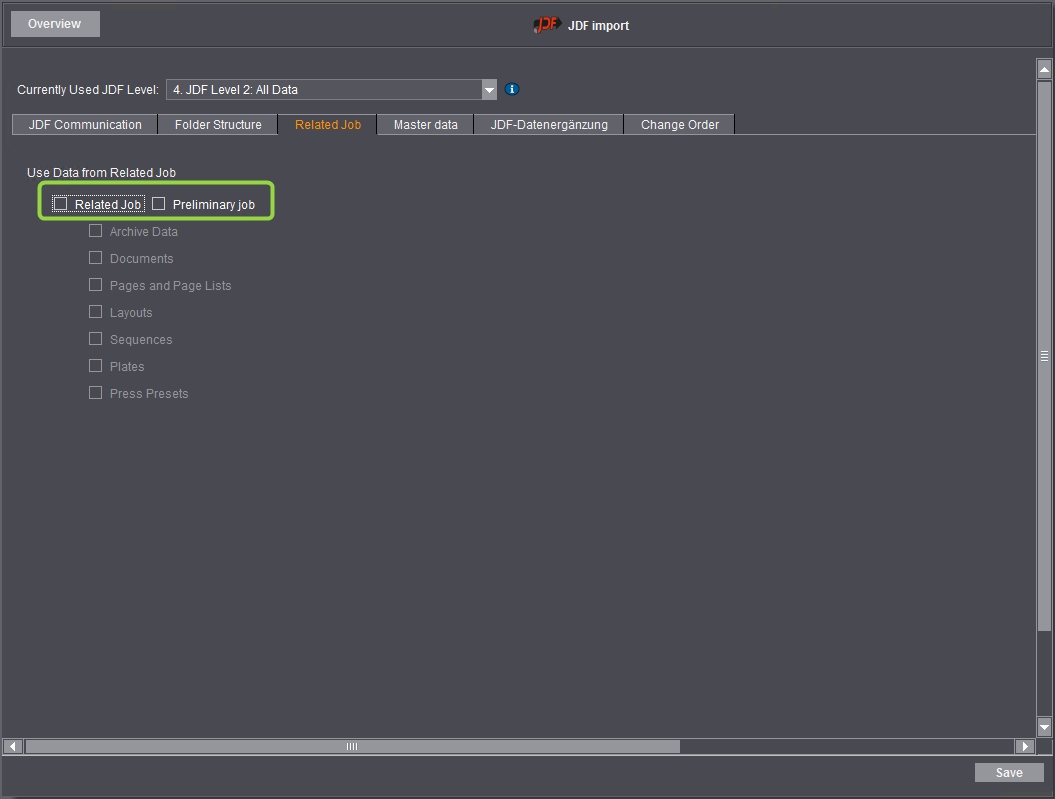
3.Disable the "Related Job" option.
Only when you select this will no press presets be used. You will then have to copy the press presets later manually in the Prinect Cockpit.
4.Click "Save".
Close the "JDF Import" section by clicking ”Overview". You must now generate the repeat job in the Prinect Business Manager. To do this, you must copy the predecessor job to a new job.

5.Invoke "File > Copy job > To new job" in the Prinect Business Manager.
The "Copy job to job" dialog opens.


6.Enter a new job name in "Description" (1).
7.Select "Repeat job without changes" in the “Type of production" list box (2).
8.Move on through the dialog with "Next (F9)>>".
9.Exit the dialog with "Finish (F9)".
You must now send the repeat job to the Prinect Cockpit.


10.Click "Actions" (1).
The "Actions" dialog displays.
11.Click "OK" (2).
The job is now sent to the Prinect Cockpit.
12.Go to "Jobs" on the Prinect Cockpit.
The job is identified as a repeat job in the job list by the icon below. No press presets were copied yet, however.


13.Double-click the repeat job.

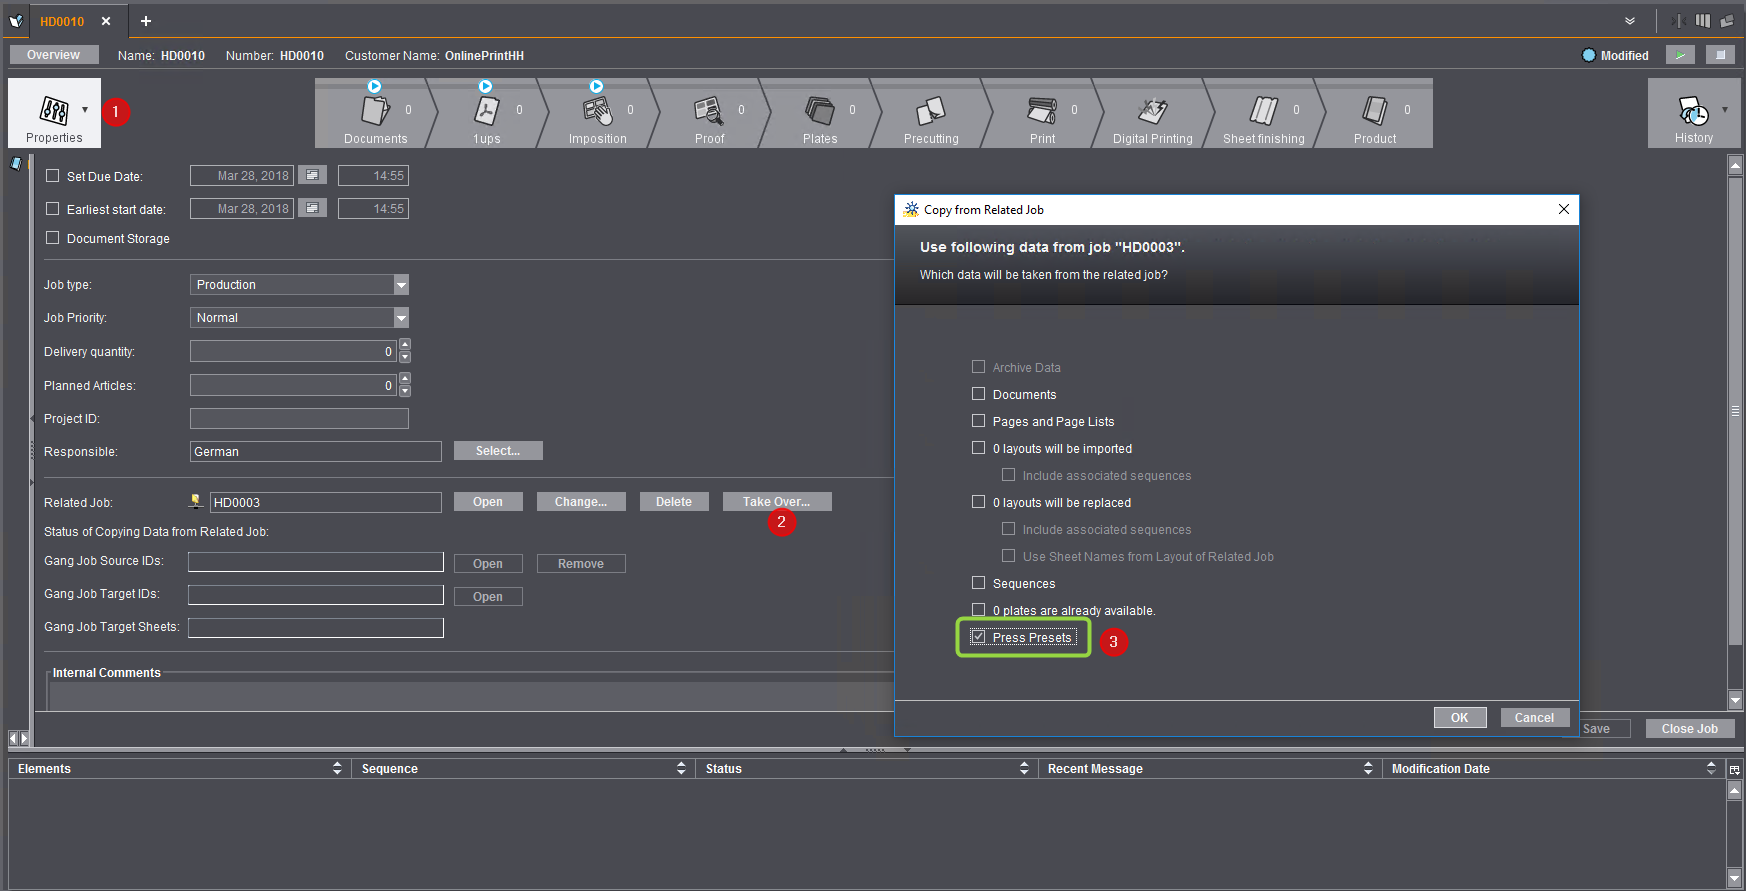
14.Go to the "Properties" area (1).
15.Click "Apply" (2).
The "Copy from related job" window appears.

Caution: You can apply the data only once. Once you click "OK", you cannot open the dialog again.
16.Enable the “Press Presets” option (3).
17.Click "OK".
If data transfer is successful, the "Apply" button is now dimmed.