
"Layout settings" tab for Labelfire 340 (or DCS 340) presses
The options available in this tab are matched to the Labelfire 340 press. This means that options that do not suit this press model are not offered for selection. Other options are matched accordingly.
Note: For Labelfire 340 presses, the trimmed size is generally taken from the PDF.
"Substrate" list box
Selection of the substrate (web).
"Width" list box
You can select a web width for the substrate in this list box. If a substrate has several widths, you can specify the one you want by selecting it in this list box.
"Output Condition" list box
This is where you select the output condition defined for the paper used (see Machine setup using output conditions).
"Columns / Rows" options
This is where you define the number of subjects on the press sheet.
The "Repeat" option only has an effect if the "Rows" or "Columns" box contains a number equal to or greater than "2".
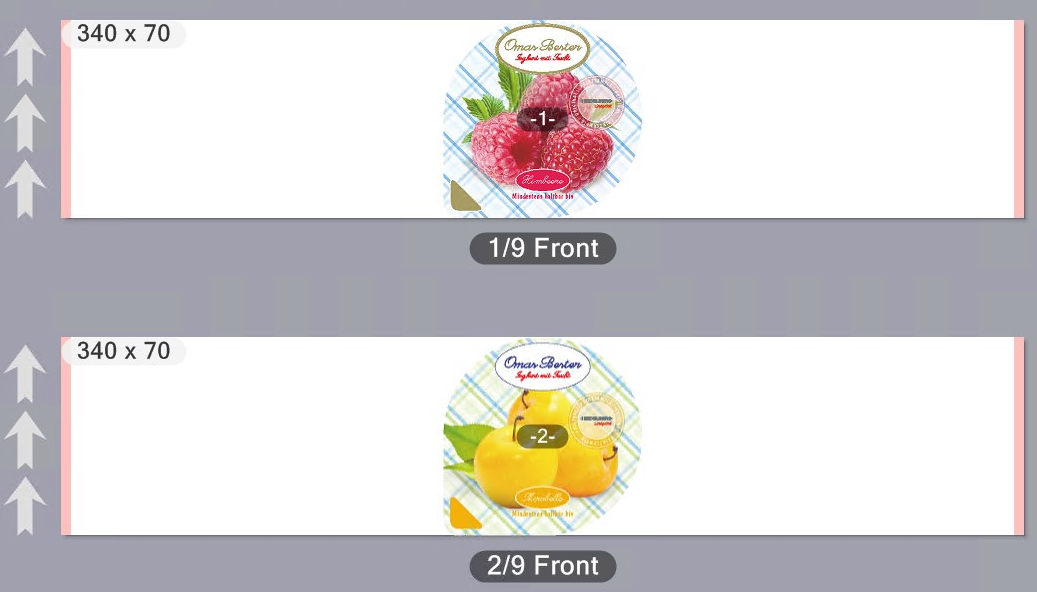
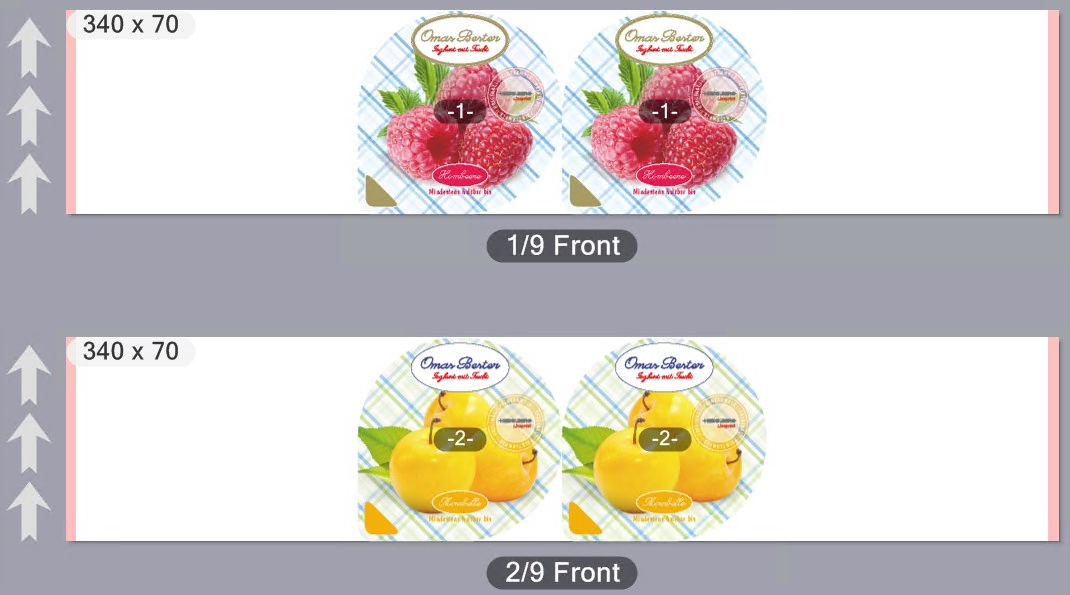
•"Rows" without "Repeat"
Enter a "1" in each case in the "Rows" and "Columns" boxes. The "Repeat" options are not enabled.
A different subject is placed on each sheet:

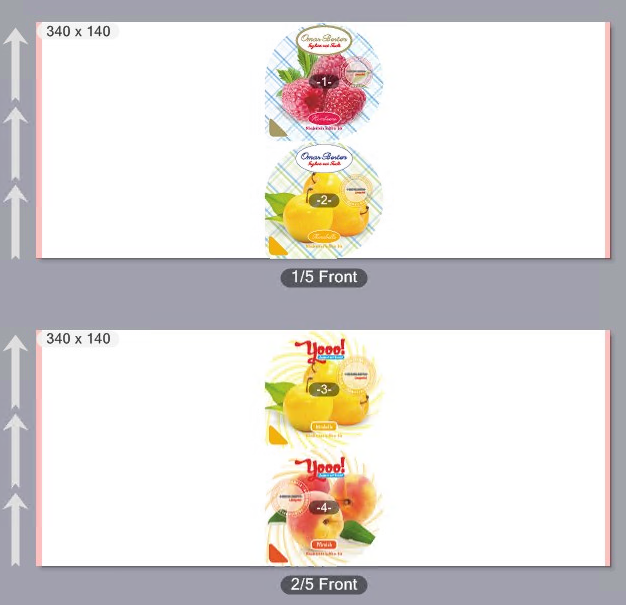
Now enter a "2" in the "Rows" box.
Two different subjects are now placed one below the other on a sheet:

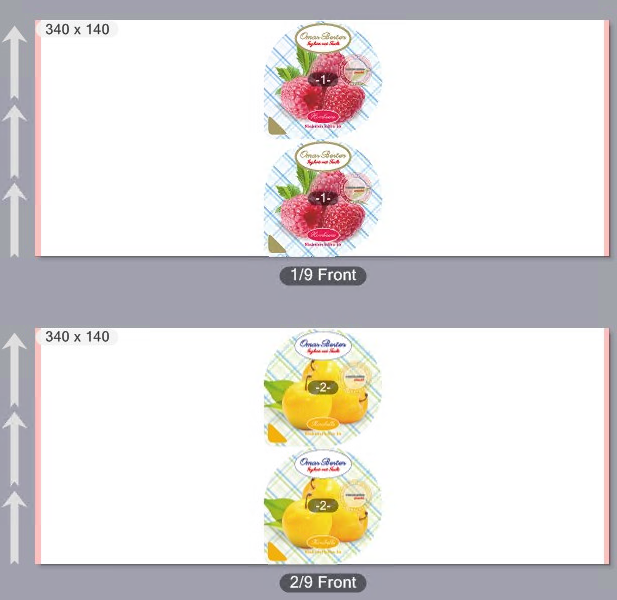
•"Rows" with "Repeat"
Enter a "2" in the "Rows" box. The "Repeat" option is enabled. A "1" is in the "Columns" box and "Repeat" is disabled in this case.
A subject is placed repeatedly one below the other on each sheet:

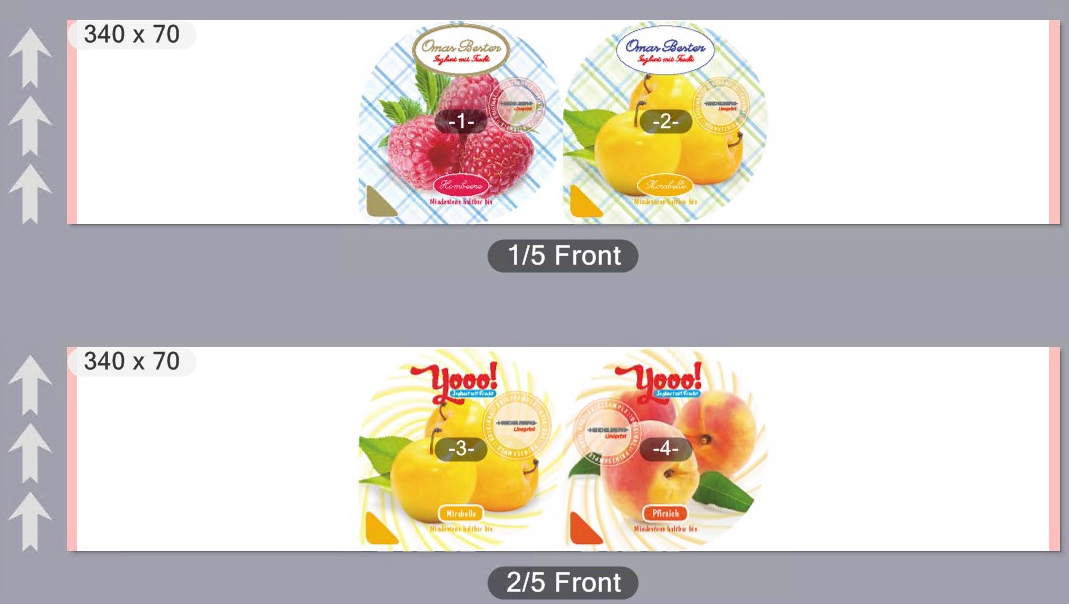
•"Columns" with/without "Repeat"
Enter a "2" in the "Columns" box. A "1" is in the "Rows" box and "Repeat" is disabled.
Two different subjects are placed side by side on each sheet:

Enable "Repeat" beside "Columns".
Two subjects of the same kind are placed side by side on each sheet:

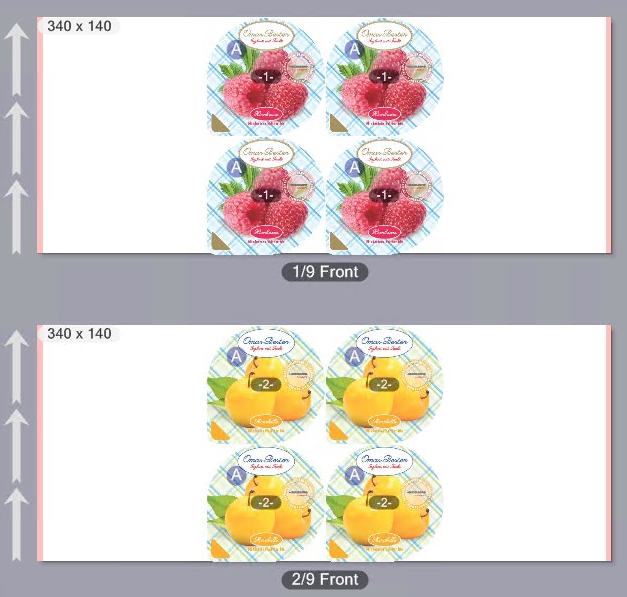
•Rows and columns with Repeat.
Enter a "2" in each case in the "Columns" and "Rows" boxes. Enable both "Repeat" options.
Four subjects of the same kind are placed on each sheet.

"Sort Order" option

Prerequisite: This option is available only if a job with PDF/VT documents (several data records) is being processed and if such a document is selected.
For some finishing processes, the sorting order of the data records in label printing must be defined in advance. You can select between the following sorting orders in the list box:
|
|
from top left to bottom right, horizontal |
|
|
from top right to bottom left, horizontal |
|
|
from top left to bottom right, vertical |
|
|
from bottom left to top right, vertical |
"Rotation" option (angle sign)
In this list box, you can set a rotation angle for all subjects placed on the substrate.
If only one subject is placed on a sheet, the rotation angles 0°, 90°, 180° or 270° clockwise are available.
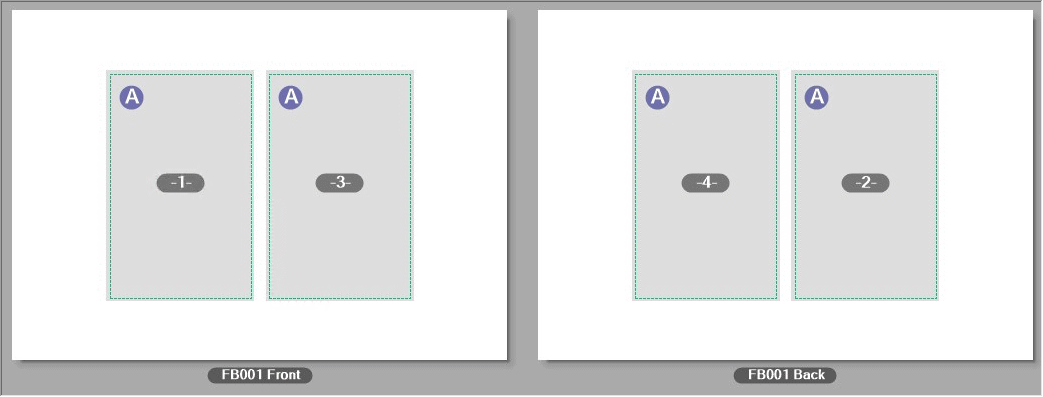
Example: Two subjects are placed on a sheet. Parameters: Columns = 2, Repeat = Off.
The angle of rotation is set to "0°":
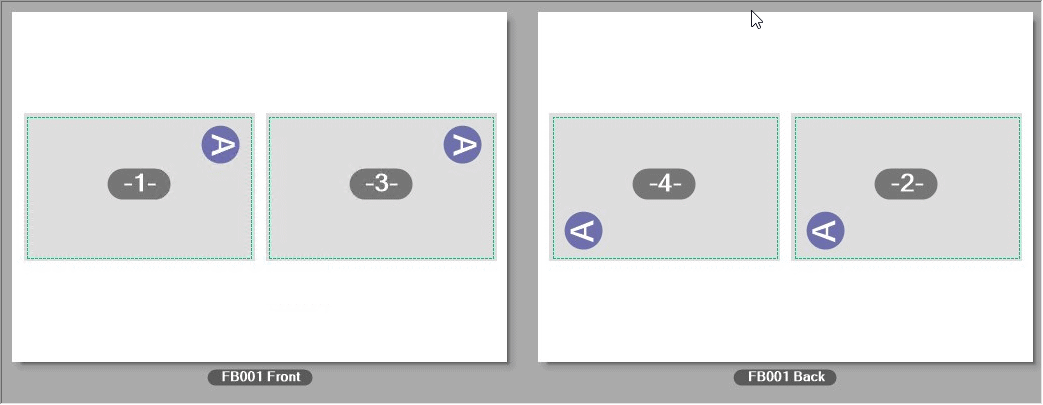
Now the rotation angle is set to "90°":
If two or more subjects are placed on the substrate, the angles ">< 0°", ">< 90°", ">< 180°" and ">< 270°" are also available as settings. With these settings, the subjects are counter-rotated. In addition, the subjects are oriented as per the set angle.
Example: Two subjects are placed. Parameters: Columns = 2, Repeat = Off.
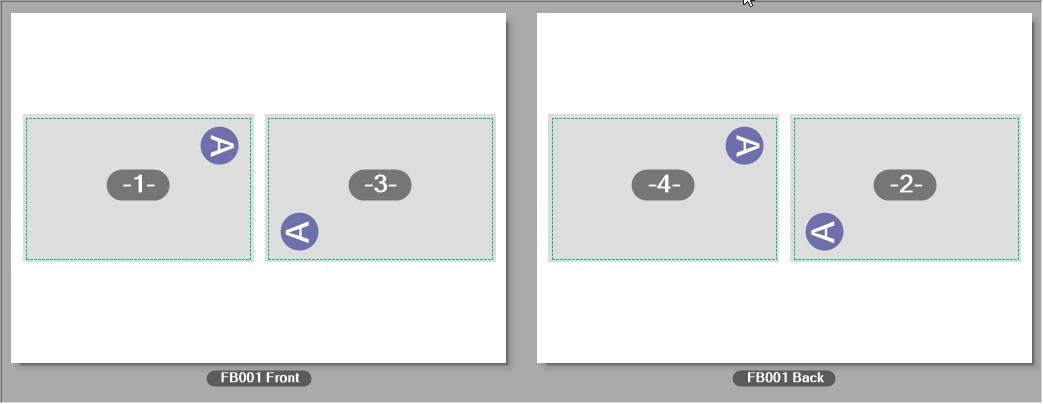
With a rotation angle of ">< 0°", the subjects are rotated to each other so that they are counter-rotated, with the first subject unrotated and the second subject rotated by 180°.
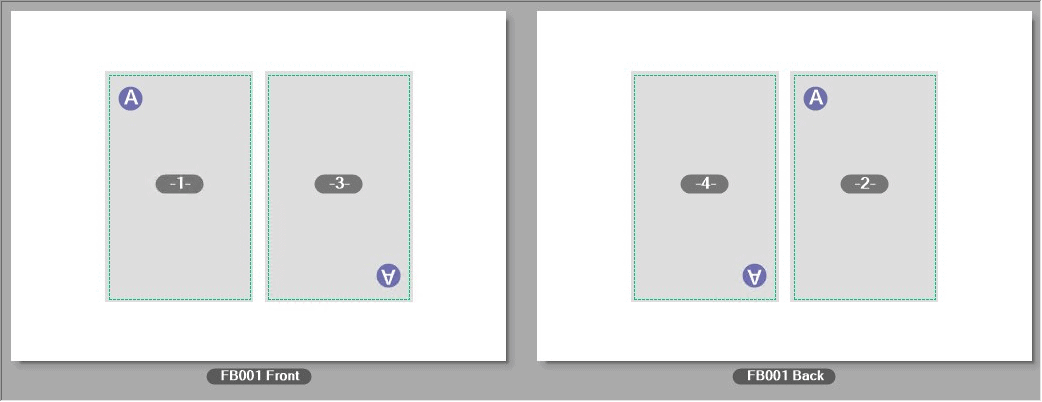
With a rotation angle setting of ">< 90°", the subjects are rotated to each other so that the top edges face each other:
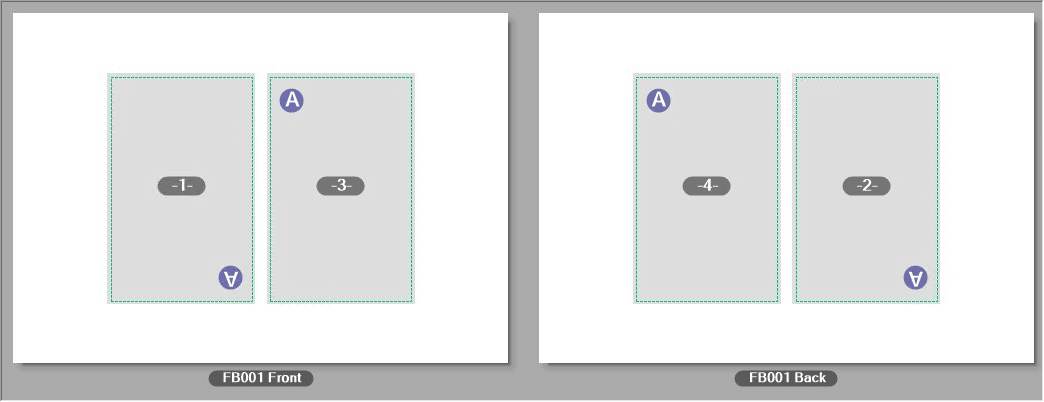
Accordingly, with a rotation angle setting of ">< 270°" the bottom edges of the subjects face each other:
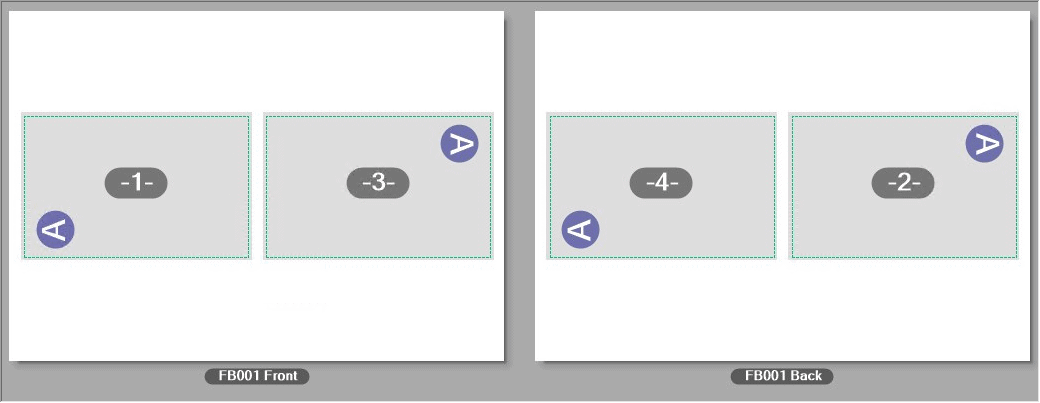
With a rotation angle of ">< 180°", the subjects are rotated to each other so that they are counter-rotated, with the first subject rotated by 180° and the second subject unrotated.
"Spacing between single folding sheets" option

Prerequisite: More than one page/folding sheet are placed in horizontal and/or vertical direction on the sheet layout.
With these options you can set up the vertical and/or horizontal gap between the pages or folding sheets.
|
|
Vertical gap between folding sheets.
|
|
|
Horizontal gap between folding sheets. |
"Subject Offset in X direction" option
|
|
Subject offset in X direction Use this parameter to set the left offset (in feed direction) of the printed content to the paper edge. Placement of the objects and display in the preview window are matched automatically and, consequently, the objects of the subject are positioned on the substrate as defined in the settings. |

Note: The grain direction of web material in the press is indicated by arrows in the preview. The page trim boxes of the subjects are shown when you select "Show > Boxes" in the context-sensitive menu in the layout section, visualizing the subject offset of the page trim boxes to the left substrate margin.
"Centered" option
The same offset to the printed content is set on both sides of the web substrate if you enable this option.
"Bleed" option
You can define a dimension for the bleed in the "Bleed" box.
The "Bleed" dimension determines the maximum width that will still be printed outside the page trim box. For example, if a bleed of 3 mm is set, a border 3 mm wide will be printed outside the page trim box, even if a larger content area outside the trim box is defined in the PDF.
The print mark settings differ, depending on the press that the PagePrint sequence is set up for:
•"Print mark settings" tab for toner-based digital presses (Heidelberg Versafire) and CTP devices
•"Print marks settings" tab for Primefire 106 presses and
•"Print marks settings" tab for Labelfire 340 presses.

Note: The print marks display as icons in in the preview in the layout view and in the sheet view.


