
You can use the Scheme Editor to define custom gang run forms or folding schemes.
The "Scheme" window opens after you click the "Scheme Editor" button. At the same time the custom scheme is selected and assigned to the current job.

Note: When you invoke the Scheme Editor, the number of columns and rows set beforehand are automatically reset to '1' and only the values of the Scheme Editor are active.

Note: The settings for rows and columns, for orientation and for the back display immediately in the Scheme Editor.
Proceed as follows to define a new gang run form or a new folding scheme:
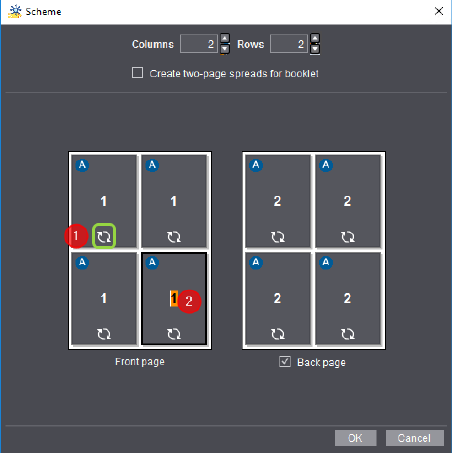
1.Enter the number you want in the "Columns" and "Rows" boxes.
2.Leave "Back page" enabled if you want to define a scheme for double-sided printing. Disable this option if only the front page will be used.
3.If desired, set the orientation (0° or 180°) of each page separately by clicking the rotation icon (1) in each case. Orientation is shown by the letter "A". Normally, orientation of a front page is applied automatically to the relevant page for the back. You can change the orientation of the back pages separately.
4.If desired, assign page numbers to the single pages by overwriting the page numbers shown (2).
5.Like with the other layout types, the gaps between the pages are defined using the trim allowance of the single pages (see "Bleed" and "Trim Allowance" group). You can enter different values for the horizontal and vertical page gap. You can enable "Create two-page spreads for booklet" if you want to define a scheme for booklet printing. Then no trim allowance is inserted between the two-page spreads. Instead, the settings for Creeping, Back Margin, Binding and Gripper for Saddlestitcher (Collator) (see "Creeping" option, "Back Margin" box, "Gripper for Saddlestitcher (Collator)" option) impact the scheme.
6.Click "OK" to close the "Scheme" window.