To make the job list easier to read you can define a folder structure by linking an existing job list structure with the JDF import. See also Effect of the folder structure on the job list.
In a first step, choose for which Workflow Profiles (imported via JDF import) folder structures are to be configured. See also Select Profiles.
"Job Location" list box

Prerequisite: This list box is visible only if at least one job location was set up in addition to the default location. See Defining a new job location:.
This is where you choose the job location that affects the folder structure.
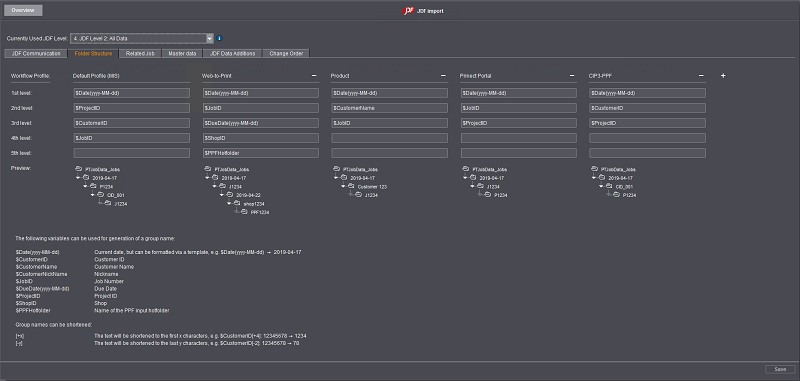
Folder structure levels
For each activated profile, enter the attributes you want in levels 1 to 5.

Note: We recommend that you highlight the desired structure variables (with preceding dollar sign) in the description at the bottom of the window (click with the mouse), copy them with Command key + C, and paste them in the text box with Command key + V. In this way, typing errors can be avoided.
You can also add one or several letters as prefix in a text box to tag or distinguish the respective folders.
You must always enter an attribute for the first level. Levels 2 thru 5 are optional. The pertaining folder structure affects the job list, depending on the workflow profile the jobs are imported with.
The levels later represent a folder structure in the job list. Refer to the descriptions at the bottom of the window to find out about the possible folder structures.
"Preview" gives you an instant overview of the new folder structure in the job list after the entries have been made. However, you must have grouped the job list in "Jobs" by the "Job group" column (see Grouping the job list).
Click "Apply" once you have finished all your entries.

Note: The configuration of the folder structure only takes effect for newly imported jobs.
Effect of the folder structure on the job list
Let's assume you are processing 50 jobs a day from several customers. If you apply the standard configuration here, all 50 jobs for this day are listed one after the other. This will become unmanageable over time. That is why you can structure the job list in five levels. In a JDF-PPF workflow, the folder structures are always configured via the JDF import configuration. You can customize the job list at any time by clicking "Column set". You can find a detailed description in the section Customize list view.
In order that the job list in "Jobs" also displays as previously configured, the job list has to be grouped accordingly. This grouping is described briefly in the following example.
The following graphic shows a possible configuration by month and day.
Example
To configure the job list in "Jobs" for MIS import:
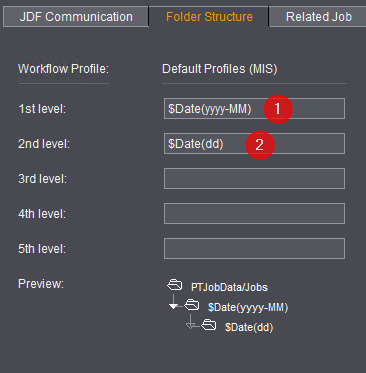
1.Level: Month (1)
2.Level: Day (2)
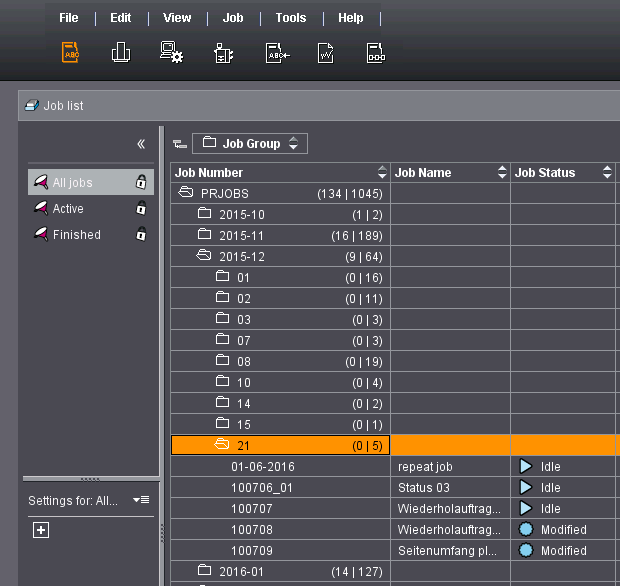
If the job list in "Jobs" was not grouped, the newly imported jobs are displayed as shown below. In this example, five customer jobs were imported on different days.
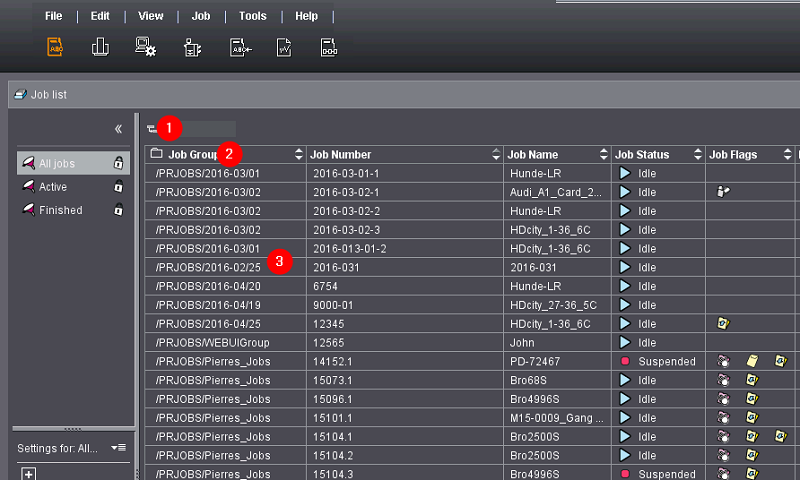
You can see that the newly imported customer jobs are shown separately in the job list (3). This is because you have not yet used the "Job group" column (2) for grouping the job list (1). We shall now carry out this grouping.
Drag the "Job Group" column (2) to the grouping icon (1).
If the "Job Group" column does not display, you have to add it (see Customize list view).
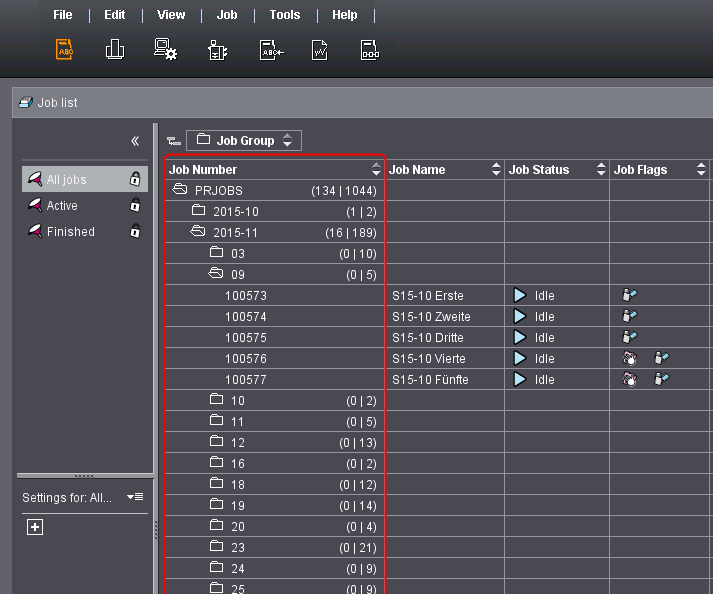
After that, the list displays as configured in the JDF import settings.