
In reverse scheduling, all the operations of a print job are scheduled backwards, starting with the target date and going back to the start date ("Date for reverse scheduling").
Proceed as follows for reverse scheduling:
1.In the operation and job list (see List of Operations and Jobs), mark one or more print jobs and then select "Reverse scheduling" in the context-sensitive menu.
The "Reverse scheduling" dialog opens:
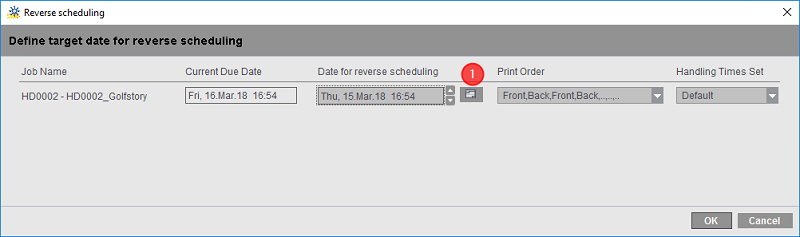
The due date defined in the job settings displays in its box.
2.In "Date for reverse scheduling", enter the date on which job processing is to start. You can select the date from a calender with the "Choose date" button (1).
3.Select the print order in the print order list box.
4.Select the set you want in the "Handling Times Set" list box. By selecting a set, you set the processing times for each operation in scheduling (see "Handling Time Sets" Section).
5.Confirm the dialog with "OK".
The dialog box closes. The "Transfer status: Number of loaded jobs / Total number of jobs" box (see Display of "Transfer status: Number of loaded jobs / Total number of jobs") is red. This indicates that changes were made to scheduling but scheduling was not yet activated.
6.If necessary, define other scheduling steps.
7.You can use the "Undo last scheduling activity" button to undo single scheduling steps or the "Reject" button to undo all scheduling steps made since you last clicked "Activate" (see "Reject" button).
8.Then enable scheduling by clicking "Activate" (see "Activate" button). The "Transfer status: Number of loaded jobs / Total number of jobs" box is green. The modified scheduling data are now transmitted to the Prinect Manager and the connected devices.