"Layout settings" tab for non-digital label presses
The options available in this tab are matched to label presses that are connected to Prinect Production in the hotfolder mode. See also Connect Non-Digital Long Grain Label Presses. This means that options that do not suit this press model are not offered for selection. Other options are matched accordingly.
 Note: No machine-specific data can be called up because there is no direct connection to the press in this case. For that reason, you must check whether parameters set in this tab, for example, web width, match the settings on the press.
"Paper" list box
Only predefined kinds of paper (web) display in this box. The papers are pre-installed during setup of the press.
"Width" list box
The web width depends on the set kind of paper.
Note: The printing material set up by default is defined with a web width of 340 mm. You can manually set up printing materials with a web width up to 755 mm and a maximum segment length of 1270 mm.
If this option is enabled and a label document and matching CFF2 cutting die file are open, you can use only the "Repeat" options in "Layout".
With this setting, you can import cutting dies as CFF2 files for labels and cartons and assign them to the 1ups found in the PDF files. You can select a CFF2 file in the file system of the Prinect server by clicking the "Browse" button. The 1ups in the PDF files are assigned automatically to the cutting dies. Combinations of 1ups and cutting dies can be arranged automatically on the substrate in different ways.
 Prerequisite: To use CFF2 files, you must pay attention to the following general conditions:
•The 1ups in the PDF must match the cutting die in the CFF2 file with regard to the trim box shape, its size and orientation. If necessary, you can customize the data in the PDF Toolbox using "Assemble Pages".
•The CFF2 file may only have one shape. This can be used several times.
•The layout of the CFF2 file must have the same number of 1ups in every row. Likewise, each column must have the same number of 1ups.
Note: The trim boxes of the 1ups must fit into the cutting dies exactly. If necessary, you can correct this using the options in "1up position" by moving the 1up in relation to the cutting die. See "1up position" section.
You can set up repeats with the "Repeat" options. See "Columns / Rows" options.
You can also set the horizontal subject offset to the printing material margin and positioning of the 1ups. See "Subject offset in X direction" option and "1up position" section.
"Use CFF2 File" is not enabled
If this option is not enabled and/or if no CFF2 cutting die file is loaded, the parameters for defining the sheet layout differ compared to the workflow with cutting dies.
This is where you define the number of 1ups on the press sheet.
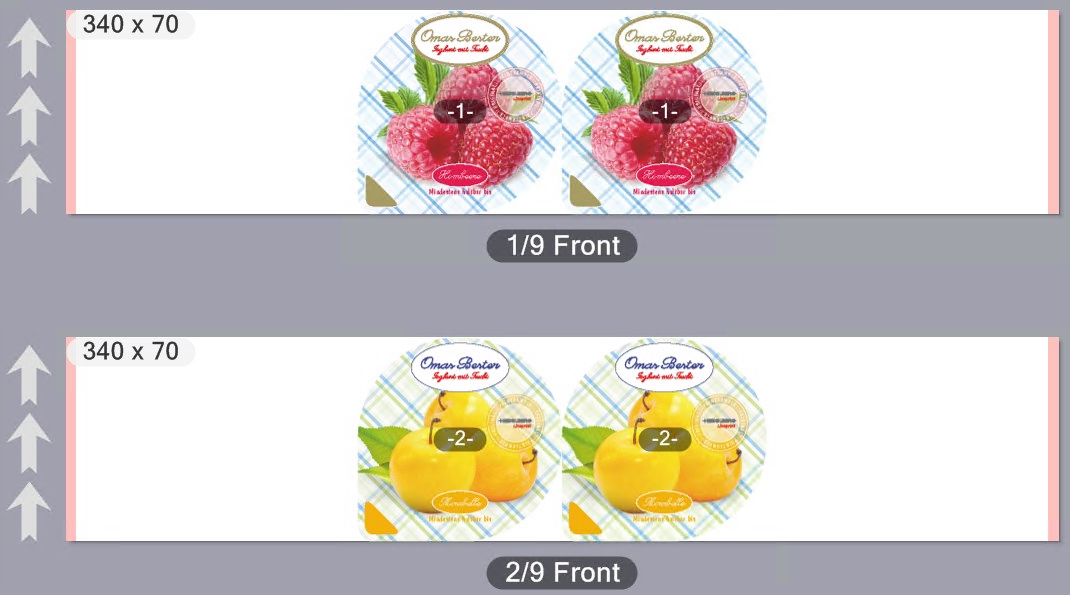
The "Repeat" option only has an effect if the "Rows" or "Columns" box contains a number equal to or greater than "2". In the example below, the PDF document used has a number of different 1ups.
•"Rows" without "Repeat"
Enter a "1" in each case in the "Rows" and "Columns" boxes. The "Repeat" options are not enabled.
A different 1up is placed on each sheet:

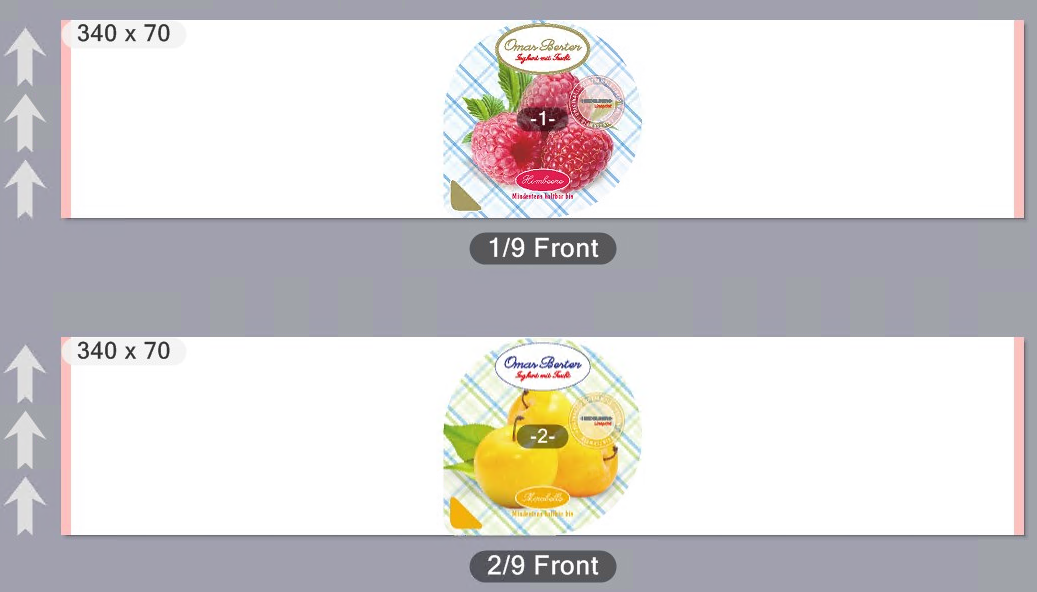
Now enter a "2" in the "Rows" box.
Two different 1ups are now placed one below the other on a sheet:
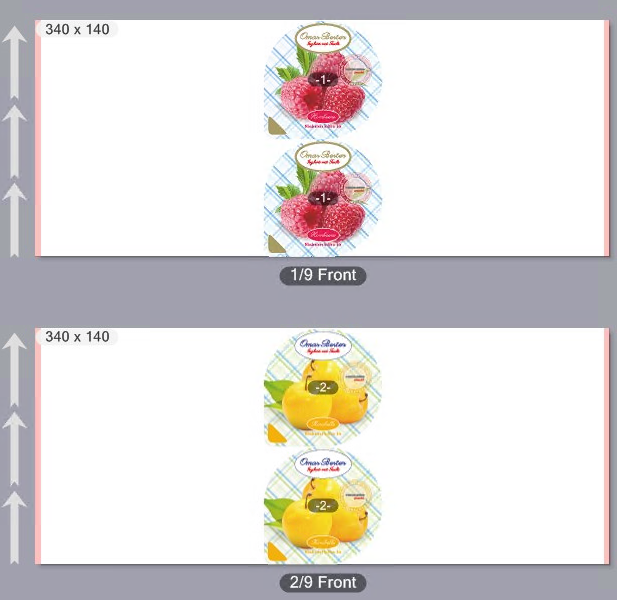
•"Rows" with "Repeat"
Enter a "2" in the "Rows" box. The "Repeat" option is enabled. A "1" is in the "Columns" box and "Repeat" is disabled in this case.
A 1up is placed repeatedly one below the other on each sheet:
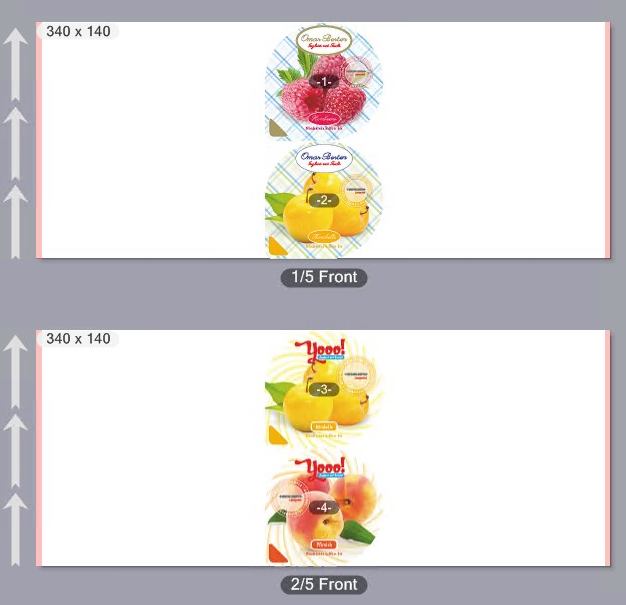
•"Columns" with/without "Repeat"
Enter a "2" in the "Columns" box. A "1" is in the "Rows" box and "Repeat" is disabled.
Two different 1ups are placed side by side on each sheet:
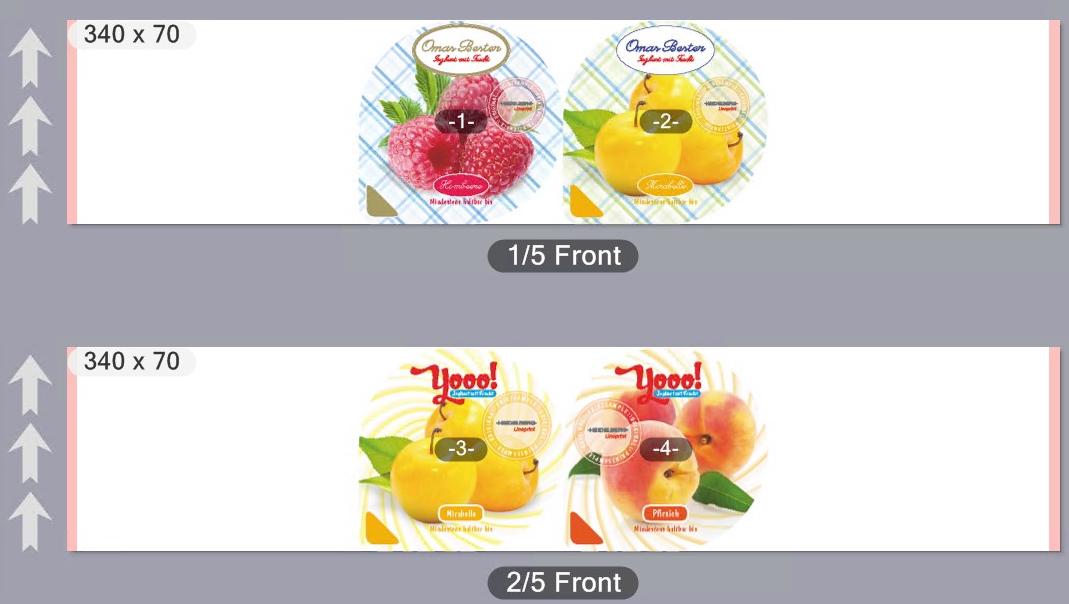
Enable "Repeat" beside "Columns".
Two 1ups of the same kind are placed side by side on each sheet:
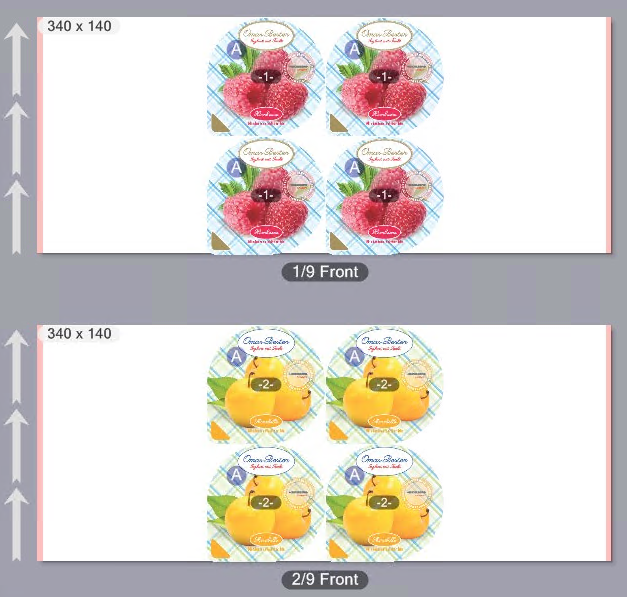
•Rows and columns with Repeat.
Enter a "2" in each case in the "Columns" and "Rows" boxes. Enable both "Repeat" options.
Four 1ups of the same kind are placed on each sheet.
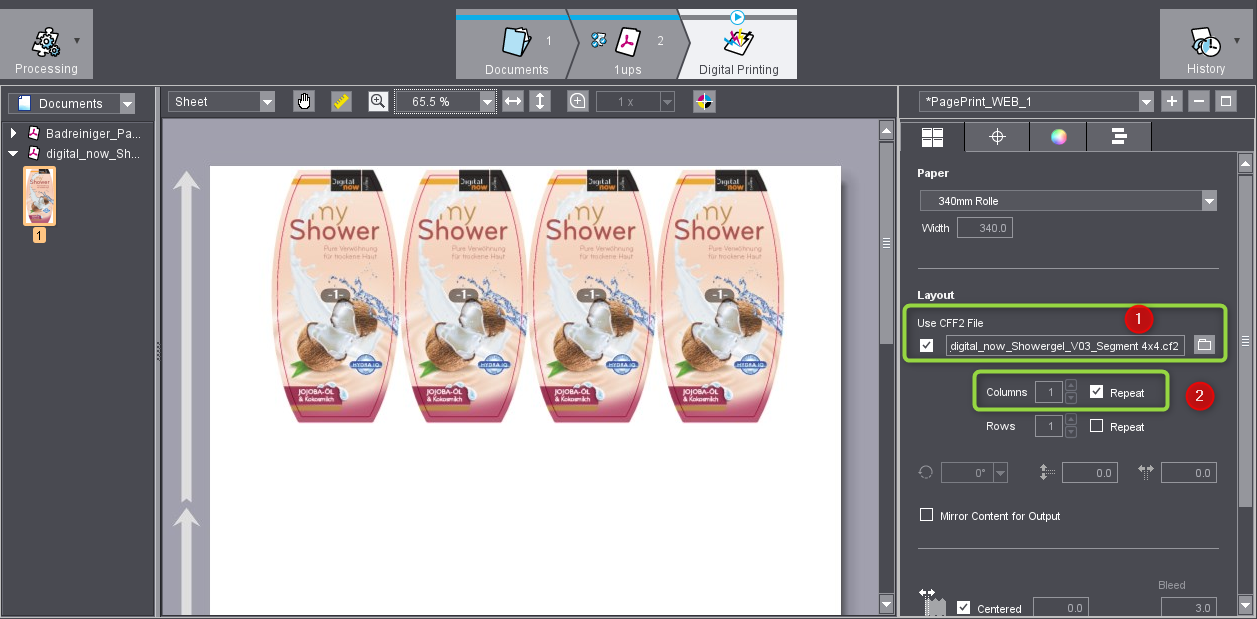
"Columns / Rows" options for press sheets with CFF2 cutting dies
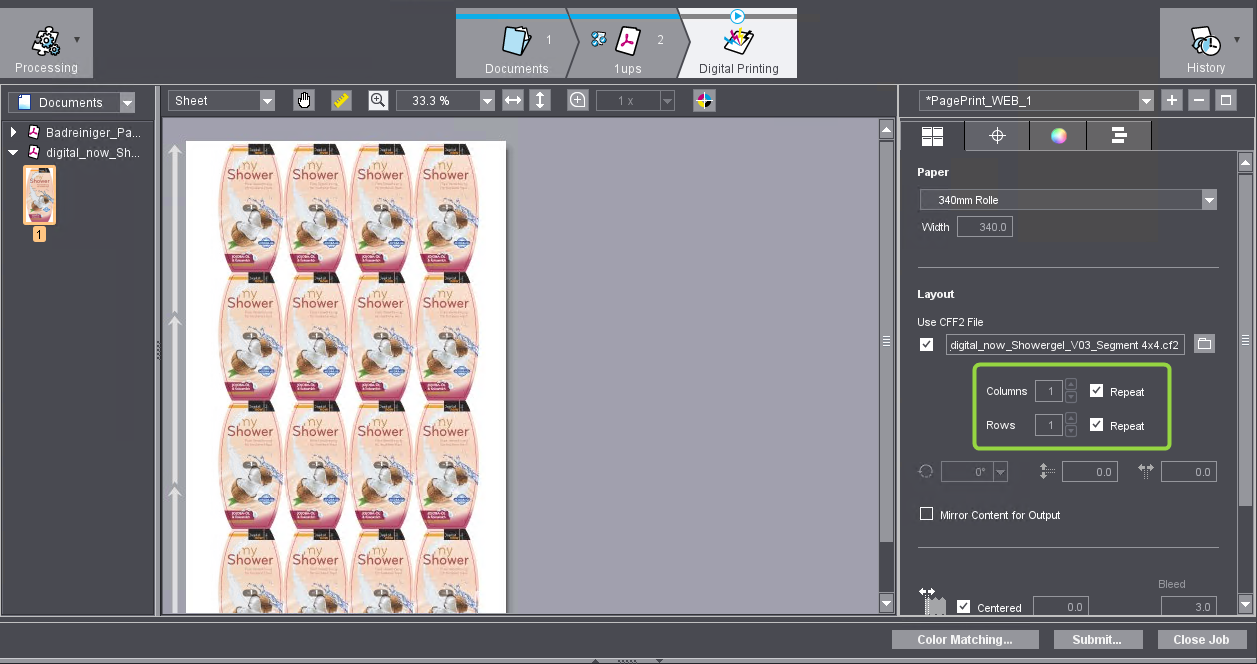
If the "Use CFF2 File" option is enabled and a label document and matching CFF2 cutting die file are open (1), you can use only the "Repeat" options in "Layout".
When you enable "Repeat" for columns (2), the substrate is filled automatically with objects (e.g. labels) in horizontal direction, with as many objects placed as fit on the substrate width.
If only "Repeat" for rows is enabled, objects are placed likewise automatically in vertical direction.
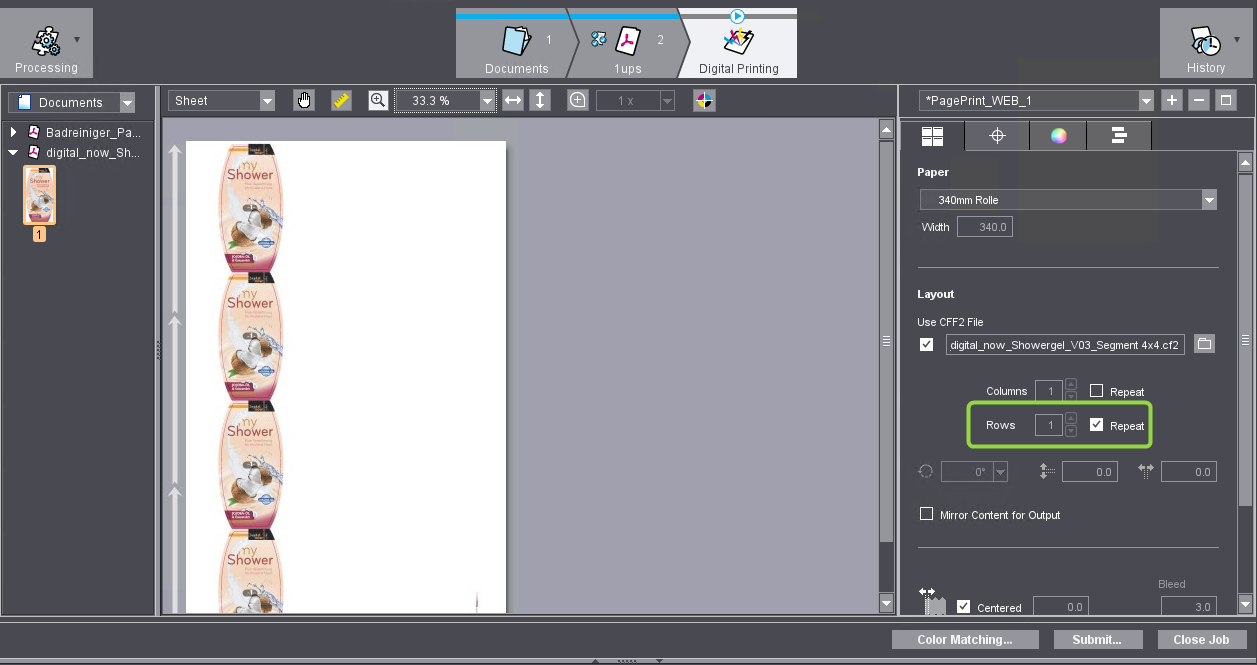
The substrate is filled completely if both "Repeat" options are enabled.
Note: For example, you can have different labels that match the loaded cutting die arranged automatically. The PDF document must contain the labels or suitable PDF documents must be added to the job. Then create a page list with different labels and select the page list in the "Digital Printing" step. See "Create Page List" Window and "Display format" list box.
"Rotation" option (angle sign)
In this list box, you can set a rotation angle for all objects (pages, labels, folding sheets, cutting dies) placed on the surfaces. In doing so, the 1up content is rotated too.
Rotation angles 0°, 90°, 180° or 270° in clockwise direction are available.
Note: Orientation of the 1ups is tagged by "A" icons if you select the "Layout" view in the preview.
"Mirror Content for Output" option
You can enable "Mirror Content for Output" for printing transparent films, especially shrink-wrap films, on the back. The contents are then output mirrored. All marks are not mirrored in this process, for example, Sensotec marks and register marks must be printed right-reading.
"Vertical/horizontal distance" options
Prerequisite: More than one 1up/folding sheet is placed in horizontal and/or vertical direction on the sheet layout.
With these options you can set up the vertical and/or horizontal gap between the 1ups or folding sheets.
| Vertical spacing between folding sheets. |
| Horizontal spacing between folding sheets. |


"Subject offset in X direction" option
Subject offset in X direction Use this parameter to set the left offset (in feed direction) of the printed content to the paper edge. Placement of the objects and display in the preview window are matched automatically and, consequently, the objects of the subject are positioned on the substrate as defined in the settings. |
Note: The grain direction of web material in the press is indicated by arrows in the preview. The 1up trim boxes of the subjects are shown when you select "Show > Boxes" in the context menu in the layout section, visualizing the subject offset of the 1up trim boxes to the left substrate margin.
"Centered" option
The same offset to the printed content is set on both sides of the web substrate if you enable this option.
In this section, you can orientate the position of a 1up (e.g. a label) precisely in relation to a cutting die. In this process, the trim box of the 1up is matched to the cutting die.
Prerequisite: The "Use CFF2 File" option is enabled and a suitable cutting die file is loaded.
Editing this is necessary only if the 1up positions do not exactly match the cutting dies. Proceed as follows:
1.Select the "Sheet" view in the preview and select a zoom factor that lets you detect the details of the objects accurately enough.
2.Select "Show > Cutting Die / Dimensioning" in the context menu above the preview pane.
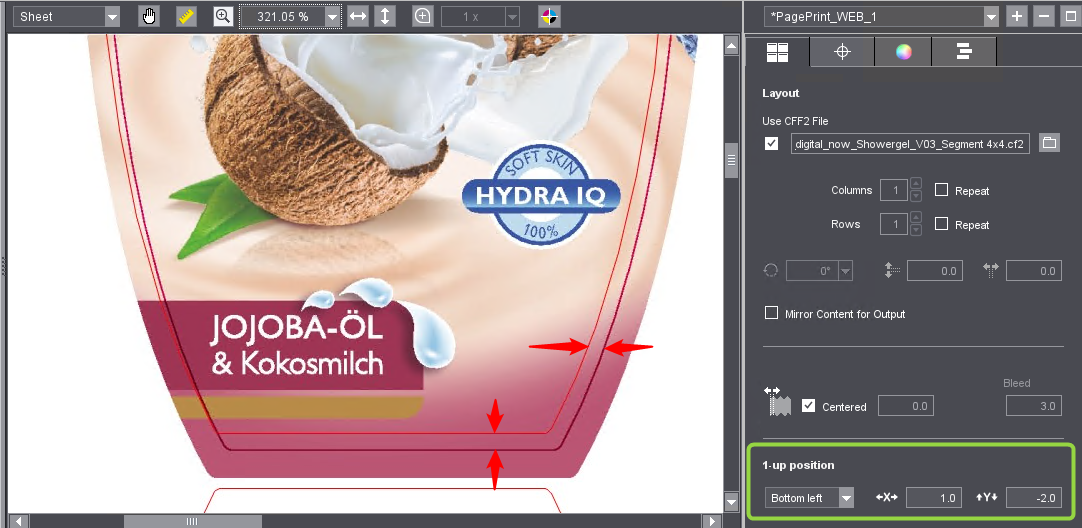
3.Now in the list box in "1up position" select whether you wish to orientate the 1up centered or on the bottom left corner of the cutting die.
4.In the boxes for offset in X and Y direction, now enter offset values until the orientation of the 1ups exactly matches the center of the cutting die. You can also enter negative values in the boxes. The change displays in the preview when you change your input focus or hit the Tab key.
Privacy Policy | Imprint | Prinect Know How | Prinect Release Notes