In "Administration > E-Mail", you can set up all e-mail templates that will be used for sending e-mails to your customer (in other words, from you as the printer to your customer, the print buyer).
All e-mail templates are located in this folder:
"PTConfig\SysConfig\Resources\MessagesTextFiles"
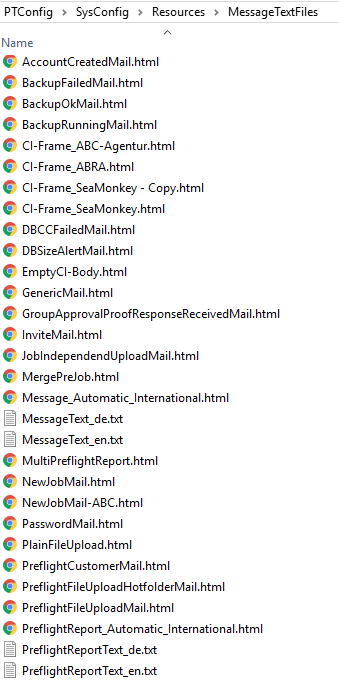
All of these e-mail templates are available to you as defaults. You can customize all the e-mail templates to suit your needs, i.e. overwrite these defaults. Before you do this, we recommend that you copy the whole "ResourcesMessagesTextFiles" folder to a different location in the file system to make a backup of the defaults.
To customize the e-mail templates, you must edit the HTML files with a suitable editor (e.g. Notepad).
 Note: With text editors like Notepad, you can edit the templates only in the HTML source code. To edit the templates in a WYSIWYG preview, you can also use professional web editors such as Adobe Dreamweaver or freeware HTML editors like the NVU editor.
Note: The "PTConfig" share may be write-protected. To be able to edit the base templates, you need either the relevant administrator permissions in the Windows system or write-protect must be inactive for editing. For example, all Windows users belonging to the “Prinect Operators” user group have the corresponding write permissions. See also Security.
Basic structure of all e-mail templates
All e-mails are structured alike. Each e-mail is based on what is known as a base template. The default base template is "CI-Frame_SeaMonkey.html". You can modify the default base template. You can create various custom base templates based on the default base template and save them under different names. In "Configuration > Select Base Template" you must select which of the available base templates is to be used. In this case, the default base template "CI-Frame_SeaMonkey.html" is entered.
In each e-mail, the selected base template is combined with a further e-mail template that we will call insert e-mail template below. This insert e-mail template is inserted so to speak as a text module into the base template. In the screenshot above, you see a number of these kinds of insert e-mail templates, for example, "NewJobMail.html" or "PreflightCustomerMail.html". For different types of e-mail, the base template is combined with an insert e-mail template matching the type of e-mail. For example, if a new job was created, the inhouse employee receives a notification e-mail in which the base template and "NewJobMail.html" were combined. If a preflight was created during an upload, the inhouse employee receives an e-mail in which the base template and "PreflightCustomerMail.html" were combined.
In this way, all e-mails have a general part, the base template, and a part that is specific to the e-mail type, the insert e-mail template.
You will find the e-mail types and e-mail templates relevant for outgoing e-mails to the print buyer in: List of e-mail types and insert e-mail templates for sending e-mails to the print buyer.
"CI-Frame_SeaMonkey.html" base template
In the header, the base template contains the address and, if available, the logo of the print shop. In the middle, there is the placeholder for the text module of the insert e-mail template. In the footer, you can see a dummy text that you can replace with your text.
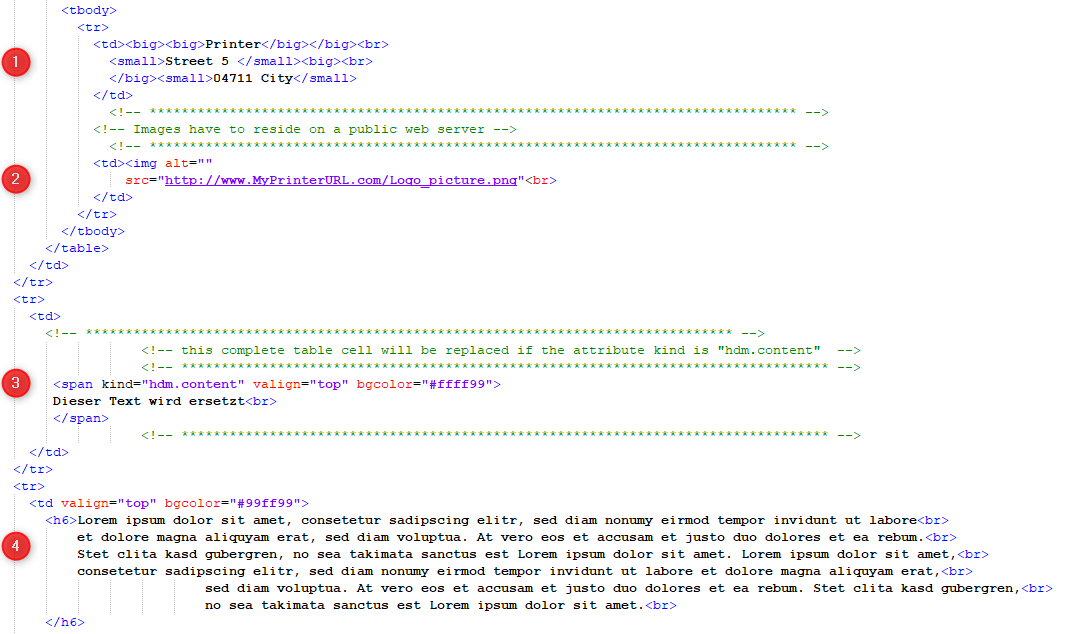
You can see the key extract of the HTML code in the screenshot below.
•(1) In black font, you see a dummy text for the address of the print shop:
Printer
Street 5
04711 City
Overwrite the text with the address of the print shop you want.
•(2) A little below that, you see this dummy URL for the logo:
"http://www.MyPrinterURL.com/Logo_picture.png"
This is where you can enter a URL via which a logo, if any, in the network of the print shop will be addressed. The URL must be accessible to the external user. The logo then displays at the top right of the e-mail. This requires that the e-mail client is capable of HTML.
•(3) In the middle, you see the "hdm.content" placeholder for the text modules of the insert e-mail template.
•(4) The text area in the footer is intended for your text. Replace this text with your details or delete it.
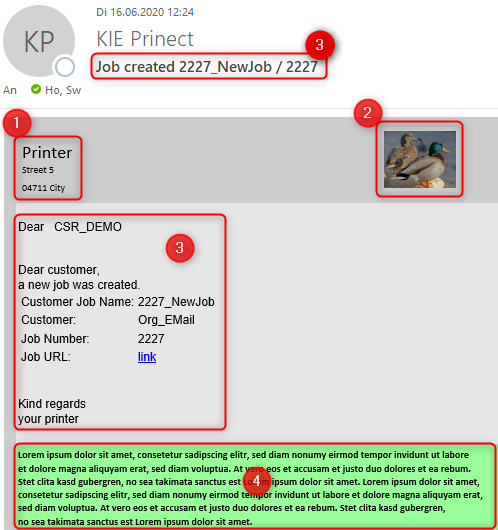
In the screenshot below you will see an e-mail in which the base template was combined with the "NewJobMail.html" insert e-mail template.
Matching the HTML code (screenshot above), text modules (1), (2) and (4) are part of the base template.
Text modules (3) are part of the "NewJobMail.html" insert e-mail template. See the section below.
Insert e-mail template with "NewJobMail.html" as an example
If a new job was created, the inhouse employee receives a notification e-mail in which the base template and "NewJobMail.html" were combined.
Based on the "NewJobMail.html" insert e-mail template, we will now explain how you can work with the variables for text modules.
All the text modules that you can use through variables are located in the following place:
"E-mail > Snippets" > tab for the language.
The "Placeholders" column shows you all available placeholders that you can use in your e-mail templates. The placeholder is replaced by the text in the "Text" column when the e-mail is sent. The various tabs "de", "en", "es" etc. contain the language versions for the texts. In all the listed languages, there is a translation for all of the placeholders like, for example, "approval.accepted.no".
The language version that is used when sending the e-mail depends on the language set for the user in "Administration > Users" > "User" section > "User Properties > Language". If the user selects a different language during the login to the Prinect Portal, this language overwrites his/her user properties. Then the language selected during the login is used in the e-mail texts.
In the screenshot above you can see an e-mail in which the base template and the "NewJobMail.html" were combined. Text modules (3) are part of the "NewJobMail.html" insert e-mail template."
The placeholders of the following two tables are used in "NewJobMail.html". You can define the contents of the placeholders of the first table yourself in "E-mail > Snippets". The contents for the placeholders of the second table are determined and inserted automatically.
You can define these texts yourself in "E-mail > Snippets". | |
|---|---|
"Placeholder" | "Text" |
newjob.subject | Job created |
common.label.dear | Dear |
newjob.head | Dear Customer, A new job was created. |
common.label.customer.jobname | Customer Job Name |
common.label.customer.name | Customer |
common.label.job.number | Job Number |
common.label.href | Job URL |
newjob.tail | Best regards Your company |
The contents for these placeholders are determined and inserted automatically | |
|---|---|
"Placeholder" | Automatically determined placeholder content |
HdmPrCustomerJobName | Job Name |
HdmCustomerName | Customer Name |
HdmCustomerOrderID | Job Number |
HdmPrJobWebUrl | "link", link to job processing |
Customer-specific setup (for agencies) of the e-mail types and e-mail templates
In principle, we make a difference between e-mail types and e-mail templates.
The e-mail templates are HTML files that you can customize. We have already explained these in detail in the preceding sections. See Basic structure of all e-mail templates, "CI-Frame_SeaMonkey.html" base template, Insert e-mail template with "NewJobMail.html" as an example.
E-mail types are categories of e-mails and their names cannot be changed. The system decides automatically which e-mail type will be used when sending an-email. For example, the "SendNewJobMail" e-mail type is always used when creating a job.
One or more specific e-mail templates are assigned to each e-mail type. You will find the default assignment at the following point: List of e-mail types and insert e-mail templates for sending e-mails to the print buyer. You can modify this assignment. This lets you customize the design of an e-mail by changing the required e-mail templates to suit your needs and then assigning them to the correct e-mail type.
We have already shown you how to customize the e-mail templates. In this section, we will explain how to assign a customized e-mail template to the e-mail type. We will show you how to create a set of e-mail types / templates for each of your customers and to have them available to be sent automatically with outgoing e-mails.
Normally, you will use this workflow when one or more agencies are assigned to the customer. Then it should be clear that the e-mails come from agencies. See also Agencies.
This means that you must customize the "CI-Frame_SeaMonkey.html" base template in all cases because it contains the address, company logo, etc.
We recommend the following procedure for you:
1.Go to the folder with the default e-mail templates:
"PTConfig\SysConfig\Resources\MessagesTextFiles"
2.In this folder, create a folder for the agency desired where you can gather all the e-mail templates that you want to create for this agency.
For example, the folder name could be "DEMO_Customer" and would then be located here:
"PTConfig\SysConfig\Resources\MessagesTextFiles\DEMO_Customer"
3.Copy the e-mail templates that you want to customize for this agency to this folder and rename these templates.
This includes the "CI-Frame_SeaMonkey.html" base template on all accounts. But perhaps you would also like to modify, for example, the "NewJobMail.html" insert e-mail template that will be used in the notification e-mail when a job is created.
Both templates could be named, for example, "DEMO_CI-Frame_SeaMonkey.html" and "DEMO_NewJobMail.html" and then would be located in the folder
"PTConfig\SysConfig\Resources\MessagesTextFiles\DEMO_Customer".
4.Customize these e-mail templates designed for the agency to suit your needs. This procedure is described in detail at the following points: "CI-Frame_SeaMonkey.html" base template and Insert e-mail template with "NewJobMail.html" as an example.
5.Now go to the "E-mail -> E-Mail Templates" tab.
6.In the list box beside "Customer" select the customer or agency for whom you want to customize the e-mail types.
7.Click "New". The "Select E-Mail Template" dialog displays.
8.Beside "Template Type" you will see a list of all available e-mail types. Those e-mail types that will be used for sending e-mails to the print buyer are of interest for us. You will find these at the following point: List of e-mail types and insert e-mail templates for sending e-mails to the print buyer.
To customize the base template, select the "BASETEMPLATE" e-mail type in the list box beside "Template Type".
9.After that, click "Select" beside "File" and navigate in the browser window to the folder that you created for your agency, in our example
"PTConfig\SysConfig\Resources\MessagesTextFiles\DEMO_Customer".
Make sure that you set either "Message Text File (.html)" or "All Files" beside "Files of Type" so that you can select the HTML file.
10.Select the base template customized for the agency, in our example this is
"DEMO_CI-Frame_SeaMonkey.html", and save your selection.
11.Now we want to assign another e-mail template, in our example "DEMO_NewJobMail.html".
12.Click "New" again.
13.In the "Template Type" list box, select the e-mail type that uses the customized insert e-mail template. You will find the assignment at the following point: List of e-mail types and insert e-mail templates for sending e-mails to the print buyer.
In our example, the related e-mail type is called "SendNewJobMail".
14.Click "Select" beside "File" and navigate in the browser window to the folder that you created for your agency, in our example
"PTConfig\SysConfig\Resources\MessagesTextFiles\DEMO_Customer".
15.Select the insert e-mail template customized for the agency, in our example this is
"DEMO_NewJobMail.html", and save your selection.
16.In the "E-mail Templates" tab, you will see a list of your customer-specific assignments.
To delete an assignment, mark the item and click "Delete".
17.To test the outgoing e-mail with the customized e-mail types, click the "Test E-Mail" button. In the "Test E-Mail Templates" dialog, select the e-mail type for the customized e-mail template (in our example, "SendNewJobMail"), enter the addressee you want and click "Send". Check whether the appearance of the sent e-mail matches your expectations.
The settings you defined have the effect that the customized e-mail template "DEMO_CI-Frame_SeaMonkey.html" is always used for the "DEMO_Customer" when the "BASETEMPLATE" e-mail type is used. This affects each e-mail of this customer. In addition, the customized e-mail template "DEMO_NewJobMail.html" is always used for the "DEMO_Customer" when the "NewJobMail" e-mail type is used.
You can now create e-mail templates for other customers or agencies following the procedure described above and assign them to the e-mail types. Then, for example, several base templates from different agencies could be assigned to the "BASETEMPLATE" e-mail type. Although it is the same e-mail type, the system automatically recognizes in the outgoing e-mail which e-mail template must be used for that customer.
Note: Two important customer-specific settings are not done using the procedure described above. In this case, it has to do with notification e-mails for a pending approval. The "ProofMessage-Automatic_International.html" (notification) and "Reminder_Automatic_International_New.html" (reminder) e-mail templates are selected in the relevant proof sequences. For example, in the PageProof sequence the setting is done in "Administration > Templates" > opened PageProof sequence > "Messaging > Message Text".
List of e-mail types and insert e-mail templates for sending e-mails to the print buyer
The e-mail types listed below are relevant for sending e-mails to the print buyer. The following insert e-mail templates are assigned to the e-mail types by default:
•"SendNewJobMail": The recipient (print buyer) is notified that a new job was created for him/her. Insert e-mail template used:
•"NewJobMail.html"
•"SendAccountCreatedMail": The recipient is notified that a new user account was created for him/her. Insert e-mail template used:
•"AccountCreateMail.html"
•"SendPasswordMail": The recipient receives the password of this new user account. Insert e-mail template used:
•"PasswordMail.html"
•"SendPreflightCustomerMail": The recipient is notified that a preflight was created after the upload. Insert e-mail template used:
•"PreflightCustomerMail.html"
•"SendInvitationMail": An invitation to contribute is sent to the recipient. Insert e-mail template used:
•"InviteMail.html"
Note: The "ProofMessage-Automatic_International.html" (notification) and "Reminder_Automatic_International_New.html" (reminder) e-mail templates are selected in the relevant proof sequences. For example, in the PageProof sequence the setting is done in "Administration > Templates" > opened PageProof sequence > "Messaging > Message Text".
Privacy Policy | Imprint | Prinect Know How | Prinect Release Notes