Privacy Policy | Imprint | Prinect Know How | Prinect Release Notes ![]()
You can select between the following view formats in this list:
•Sheet
In this view, the press sheet and – if assigned – the original page content is depicted. The imposition page number (not the page number defined in the PDF) of each document page is shown in white letters on a gray box above each page, in order to be able to check the page layout on the sheet. If the pages contain images, these are displayed in full color (all color separations). In this view you get an advance view of the print result and you can apply the dimension, magnifying glass and information tools on the separate page areas. When changing the sheet configuration or the magnification scale, the view is recalculated, so it may take some time until the view is fully represented.
•Layout
This view provides a quick view of the sheet layout, without the page content being shown. The pages are only displayed as gray areas which differ in color from the underlying surface of the substrate. The page numbers are displayed in gray boxes. The direction of rotation of the pages is displayed in each case with a letter "A".
You can use this view to quickly view the page and sheet parameters and to correct them where necessary. Unlike the sheet view, there are no significant computation times when calculating the view.
•Separations
In this view, all the color separations defined in the pages are displayed as adjacent sheets. If, for example, the four process colors are defined in a print job, the separations display in the order in which they were printed on the press. If the set magnification does not allow the simultaneous display of all color separations, a horizontal scroll bar is shown that you can use to switch to the corresponding color separations.
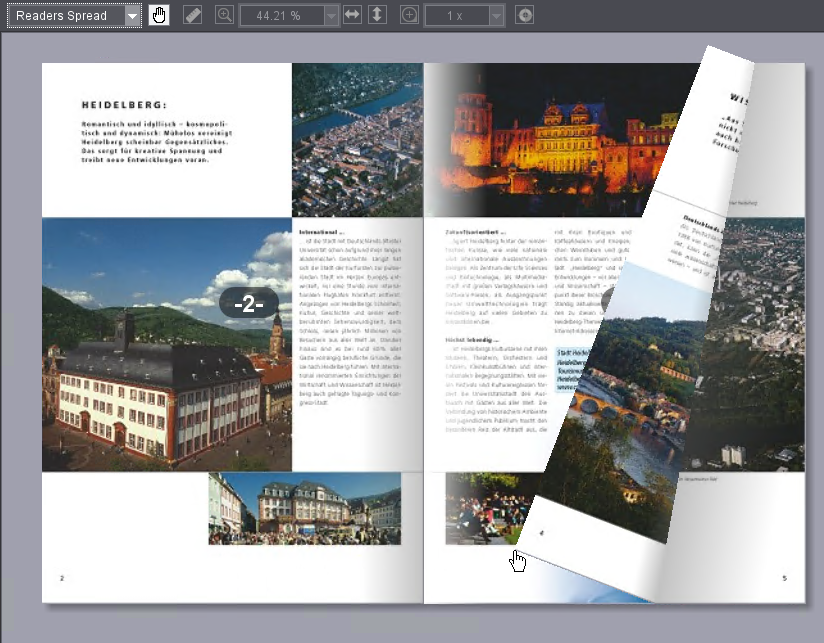
•Reader's Spread
In this view, you can look at the document pages as a "virtual booklet" on the screen. The document pages display in a 2-page layout, like an open booklet. Clicking and dragging while holding down the left mouse button on the left and/or right outer edge of the brochure scrolls forwards or backwards through the brochure. None of the tools of the preview area are available in this view.
| You can use this tool to move the visible image content with the mouse if a zoom factor is set that allows only a partial view of the sheet. Once you position the mouse pointer over the preview and press the left mouse button, the mouse pointer changes into an outstretched hand and you can move the image content while holding down the mouse button. |
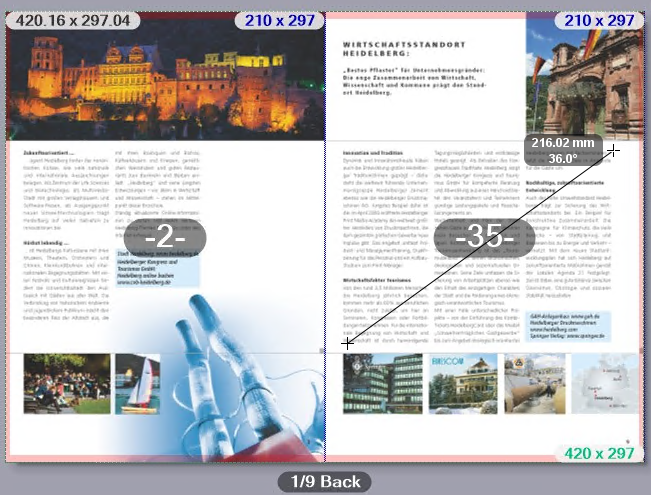
| You can use this tool to measure lengths and angles in the preview area in the "Sheet", "Layout" and "Separations" views. The Dimension Tool is used as follows: |
1.Click the Dimensions icon to enable the tool.
2.Left-click the starting point of the measuring section and hold down the mouse button.
3.Drag the mouse cursor to the end of the measuring section. The length of the distance and the angle relative to the horizontal are displayed in a box next to the mouse cursor. If the angle from the horizontal (x-axis) is measured counterclockwise (upper semicircle), it is counted positively (up to 180°). If the angle is measured clockwise (lower semicircle), it is counted negatively (-180°).
If you hold the Shift key while dragging the measuring line, the possible directions are limited to 90° angles. In this way you can accurately measure horizontal or vertical distances.

| You can use the zoom tool to set the display scale for the "Sheet", "Layout", "Separations" and "Color Coverage" views. You can do this in two ways: |
•Per click: To do this, select the Zoom tool icon and click anywhere in the preview area. Each click doubles the zoom factor, in other words a zoom factor of 33% is increased to 66%. Pressing and holding the Alt key and simultaneously clicking reduces the zoom factor by half. Instead of the plus sign in the mouse cursor, a minus sign is displayed.
•By selecting from the list of zoom factors: You can also select zoom factors in the list box next to the Zoom tool and adjust the magnification directly.
If the list of zoom factors does not open, the currently set zoom factor is displayed directly.
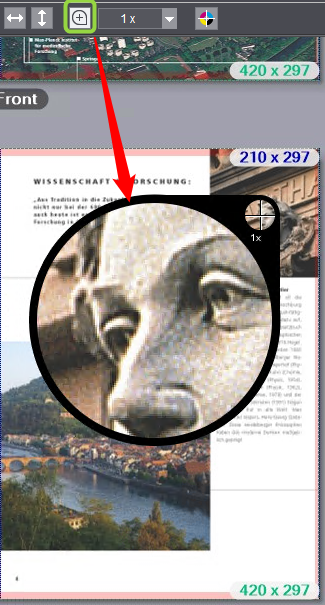
| If you want to examine some details of the illustrated pages more closely, you can use the magnifying glass in the "Sheet", "Layout", "Separations" and "Color Coverage" views. |
1.First, select the desired magnification scale in the list box next to the magnifying glass icon. The largest scale is "1 x", the smallest is "1/16 x".
2.Select the magnifying glass tool and hold the left mouse button pressed over the point that you want to examine. A magnifying glass window is displayed. The center of the crosshairs in the small circle indicates the center of the magnified area. The detail in the selected magnification scale is displayed in the large circle.
| You can use the Info tool to get detailed information about the individual objects on the pages in the "Sheet", "Layout" and "Separations" views. |
1.Enable the Info tool.
2.Click on the object (image, text object) in the preview area for which you want to get information, and hold the left mouse button down. The object is displayed semi-transparent and an information window is displayed over the top.
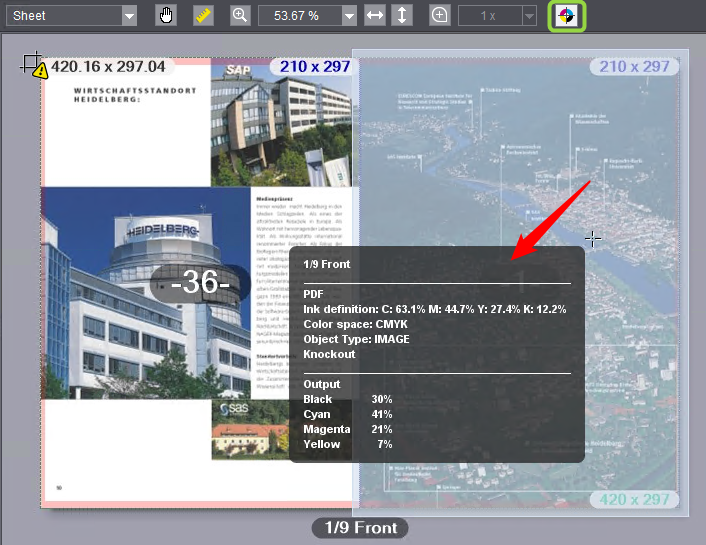
The window is divided into three sections and shows the following information:
Top Part | Sheet name, front or back of the sheet |
Middle part | Information from the PDF file (original): •Ink definition (color separations and their percentages, also spot colors if any) •Color space •Object type (image, text, etc.) •Embedded color profile (if any) •Knockout/overprint information |
Bottom Part | Color data as used for printing (as per output settings): •Color separations and their percentages (also spot colors if any) |
3.Leave the mouse position as it is and click repeatedly with the left mouse button: the object changes with each click and the values are refreshed accordingly in the bottom part. The object currently active is highlighted in the preview. This lets you measure the values of other objects on the page fast and, if necessary, measure and compare the values of overprinting objects separately.
Privacy Policy | Imprint | Prinect Know How | Prinect Release Notes