Licensing options that were hidden display again when you click this button.

The licensing options are hidden when you click this button. This shows you a more clearly structured list of the licenses and lets you find certain licensing items fast.
Elements in the "License Overview"
The tabs in the "License Overview" contain the following elements:
•The controls (see Controls).
The controls consist of a number of elements that you can use to configure the view of the licenses to suit your needs.
•The table of licenses
The table of licenses is divided into the following columns:
·"Workstation" column (see the "Workstation" column)
·"Product / Option" column (see the "Product / Option" column)
·"State" column (see the "State" column)
·"Instances" column (see the "Instances" column)
·"Used" column (see the "Used" column)
The control elements let you, for example, filter the list of the licenses, refresh the license view, go to the edit mode, etc. The following control elements are available:
•Buttons for showing or hiding the licensing options (see page 26)
•"Workstation" list box (see page 26)
•"Product" list box (see page 27)
•LSN display (page 28)
•Button for refreshing the view (see page 28)
•Button for switching to the edit mode (see page 28)
•Button for creating a printable HTML file with the current license overview (see page 29)
Buttons for showing or hiding the licensing options
Use these buttons to show or hide details about the licensing options.
|
|
Licensing options that were hidden display again when you click this button. |
|
|
The licensing options are hidden when you click this button. This shows you a more clearly structured list of the licenses and lets you find certain licensing items fast. |
This list box lets you filter all the licenses of a certain application computer if you manage the licenses of several Prinect products that are installed on different application computers.

Note: The "Workstation" list box only shows application computers that are known to the License Server.
In addition to the names of the single computers, you can select the following items in the list box:
•All
All licenses known to the License Server are shown.
•Unassigned
Only the licenses that are not assigned to any application computer are shown.
•Assigned
Only the licenses that are assigned to an application computer are shown.
This list box lets you filter the table of licenses by Prinect products.

Note: Only products that are known to the License Server are available in the "Product" list box.
The "Workstation" and "Product" list boxes are interactive filters. This means that when you select a certain workstation, only the licenses assigned to this workstation display and that the products that you can select are limited to this filtered list. If you set "All" in the "Workstation" list box, all the products set in the "Product" list box will display. The same applies vice versa if you first restrict your selection to a certain product.
In addition to the various product items, the list box contains the following items:
•All
The licenses of all the registered products display.
•Newest version
Only the licenses of the most recent products display, in other words, the latest version of all registered versions of a product.
The License Server Serial Number (LSN) identifies your installation code or is part of the installation code (online license protection) or it identifies your dongle. A unique LSN is assigned to each installation code or dongle. This number is printed on the dongle. When you order new licenses, you must specify the LSN because each Prinect license is assigned only to one particular LSN. The License Data Store (LDS) where all your licenses are stored is also linked directly to the LSN.
"Refresh license overview" button
|
|
The list of licenses is refreshed when you click this button. When new licenses on the License Server are enabled in the License Manager on another computer, you can run a comparison with the License Server by means of this button and update the licenses displayed. |
"Switch license overview to edit mode" button
|
|
Normally, this button appears as a closed lock. In this state, you can only view the licenses but cannot modify them. |
|
|
The icon changes to an open lock when you click this button. The "edit mode" is enabled in this state. This means that you can modify the licenses. Depending on the configuration of your License Server, a dialog can display at this point, prompting you to enter a password. The user name displayed and the password were assigned during installation of the License Server or set in "Settings > Password". In this case, you can enable the edit mode only after you enter the password. |
For details on the edit mode, see Assign and Release Licenses.
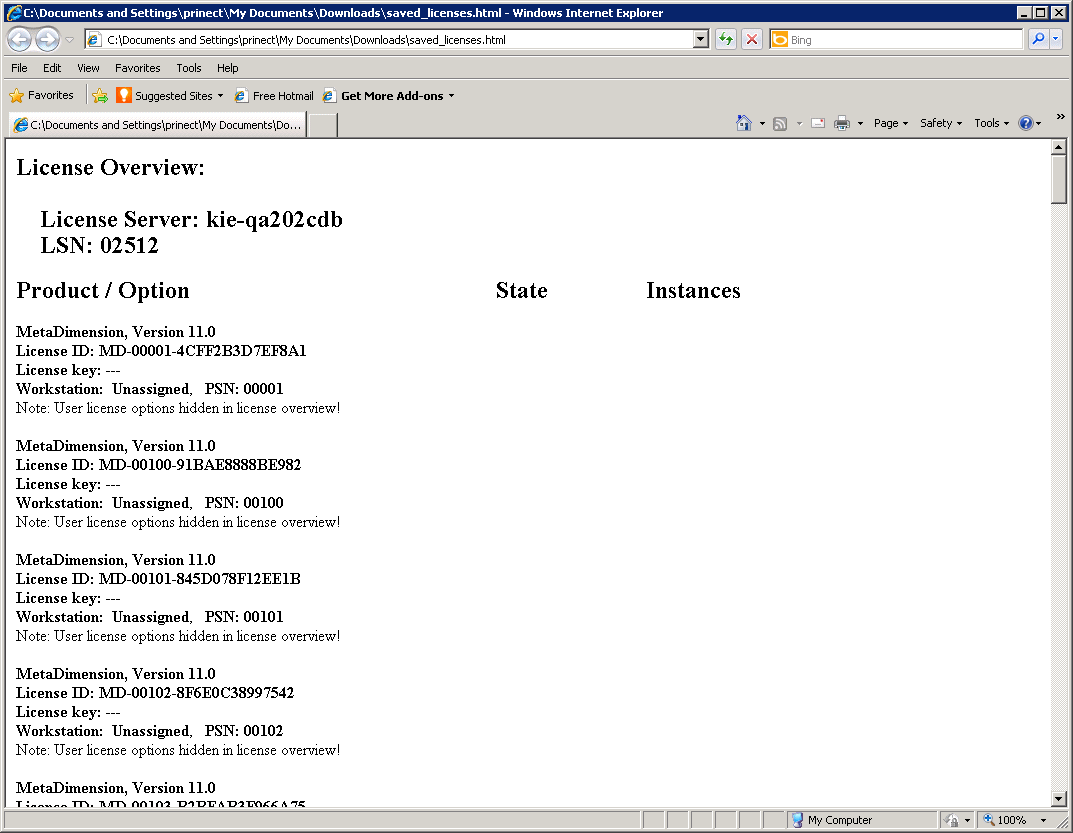
"Store information about the license overview in a printable html file" button
|
|
The "Write current license overview to file" dialog opens when you click this button. |

In this dialog you can select a path on the computer where the License Manager is open to which the HTML file will be filed. Click "Print" to create the HTML file.
The HTML file that is created contains an overview of all the licenses registered on the License Server.