Tabs
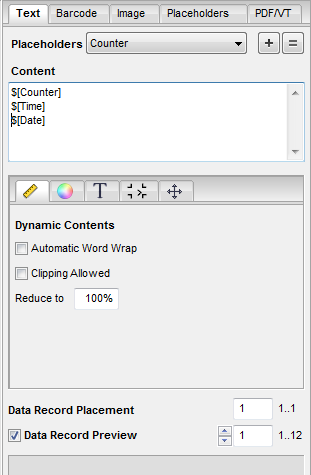
In the "Text" tab, you can define and edit any text in the "Content" section and drag-and-drop it as a text mark from the preview to the document.
Placeholders
If you wish to use a placeholder in the text, select it from the list box. Then click the plus sign to insert it into the "Content" box. You can use the equal sign to replace all of the previous text with this placeholder.
You can define new placeholders in the "Placeholders" tab. See "Placeholders" tab.
Content
Enter the text you want in this box. The preview image changes accordingly.
To position a text mark, click the preview image and drag-and-drop it to the PDF document.
Data Record Placement (not for iVDP)
When you place several placeholders of the same kind on a page, these normally then show the same content. However, if you want to use the next data record for the second placeholder, you can assign this with this option.
1.Place the placeholder by dragging it with the mouse to the position you want.
2.In "Data Record Placement" click into the text box and increase the value by "1".
3.Click the placeholder again to assign the data record.
4.When you place further placeholders, you can assign an existing data record number to them or increase the data record again by "1".
Data Record Preview
When you edit the placeholder, e.g. change its color or size, the final result is not necessarily clear just based on the view of the variables. For that reason, checkmark this box to view a preview of the data records.
Dynamic Contents
You can enable an automatic word wrap if you find that a dynamic text is too long after it is inserted and doesn't fit into the set width and height (see "Position" subtab).
Clipping Allowed
PDF/VT generation usually aborts if a replaced text is still too long despite automatic word wrap and/or scaling down.
Enable this option to automatically clip texts that are too long. In this case, a warning displays if texts are too long but PDF/VT generation no longer stops and supplies all the data records.
Reduce to
You can enable that the font will become smaller (scaling) if you find that a dynamic text is too long after it is inserted and doesn't fit into the set width and height (see "Position" subtab). To do this, in "Reduce to" enter the percentage by which the font size may be reduced at the most. The font size remains unchanged with 100%.
In the "PDF/VT" tab, click "Check" to see the font size to which the longest replacement was reduced. See Check.
Text color
This is where you can select the text color. All the colors in the document and "User-defined" are presented.
|
|
You can select color data from the current document using the pipette tool. |
|
|
This lets you create a custom color. A dialog displays with sliders for setting the color you want. |
Body Color
A body color can be placed beneath the text, for example, for printing to foils. All colors in the document as well as "Transparent" and "Knockout" are presented.
Background Color
This is where you can set a background color. All colors in the document as well as "Transparent", "Knockout" and "User-defined" are presented.
Character set
This is where you select the character set you want.
Font
Select the font you want. The standard fonts, Helvetica, Courier and Times-Roman, are available for selection. In addition, all the fonts embedded in the PDF are listed.

|
Note: Often not all the characters are embedded or correctly defined in PDF-internal fonts. This especially concerns non-ASCII characters or characters that are not used. |
You can also add other fonts installed on your system.
|
|
|
"+": This lets you add another installed font to the list box. "-": This lets you remove a font from the list box. |
Font size
Enter the font size you want in this box.
This is where you enter the line spacing you want as a multiple of the font size.
This is where you can set margins for the text.
Additional Margins
Enter a value for the additional margin at the position you want.
Border Marks
You can add a border or border marks to the text box. To do this, enable the matching checkbox.
Width of Border Marks
This is where you can set the width of the border.
This is where you can customize the position and size of the text and its horizontal and vertical orientation.
A warning is issued in the Info box if the size is too small to display all of the barcode content:

If you enter an invalid value for width or height, the value is reset again to the automatic mode. The automatic mode is not available for iVDP.