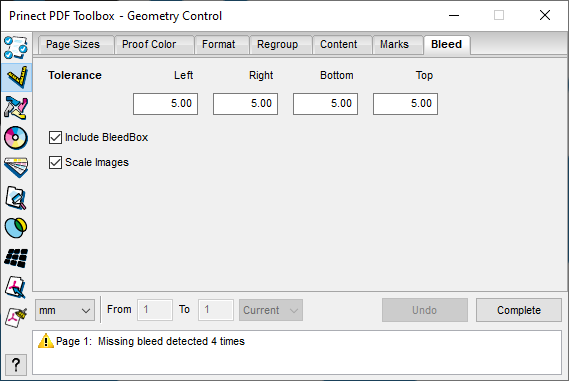
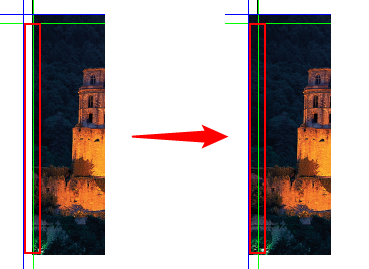
There is not enough space for trimming if the element size ends exactly on the trim box. In this tab, you can set that a missing bleed will be added automatically for both full-size and smaller images. In this process, the Prinect PDF Toolbox primarily uses image parts that cannot be seen to add the bleed. If these are not present, the program calculates the bleed by scaling the image margin.
If you opened the "Bleed" tab and scroll through the pages of the PDF document, the Info window shows you for each page whether a missing bleed was detected. This is then marked by a red frame in the document.
Click the "Complete" button. The missing bleed is added automatically to all pages. You see the result at once. You can return to the original condition by clicking "Undo".
Tolerance
This is where you enter the size of the bleed to be added in mm in horizontal and vertical direction.
Include BleedBox
The check is confined to the bleed box if this option is enabled. This means that the bleed is not expanded beyond the bleed box even if a greater value was set for the tolerance.
When this option is enabled, the whole image is made bigger to fill the bleed area in the case of full-page images without a bleed. However, the position of the various image contents changes as a result. You should disable this option if this is not wanted. The image within the trim box does not change but distortions appear on the margins.
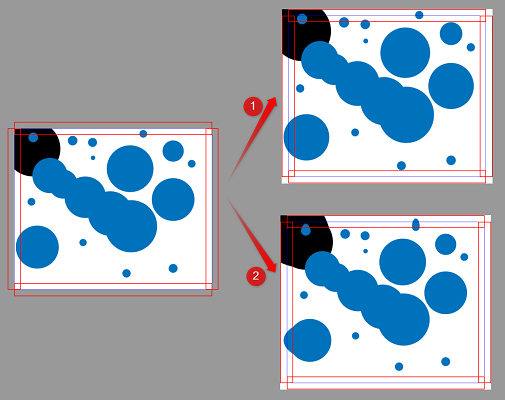
Added trim with "Scale Images" enabled [1] and without [2].