Graphic Area
Tools for Creating Marks
To select several graphic objects, hold down the Alt key and click the relevant objects with the mouse.
|
|
Edit tool: Edits a selected object. Click a handle with this tool to change the object.
|
|
|
Hand tool: Moves selected objects. Click an object with this tool to move the object.
|
|
|
Creates a circle or ellipse.
|
|
|
Creates a straight line.
|
|
|
Creates a square or rectangle.
|
|
|
Colors the object below the mouse pointer black.
|
|
|
Colors the object below the mouse pointer white.
|
|
|
Inserts text. Enables the table for inserting placeholders.
|
|
|
Inserts barcode object. See Barcode Properties (Barcode Object) for details
|
|
|
Deletes selected objects.
|
|
|
Copies selected objects.
|
|
|
Centers selected objects.
|
|
|
Fits canvas to bounding box. The canvas is centered in the bounding box.
|
|
|
Brings selected objects to the front:
The objects are brought to the front in the order they were selected.
|
|
|
Zoom up graphic is set by default. A "+" appears in the magnifying glass. Hold down the "Alt" key to zoom down. A "-" appears in the magnifying glass.
|
Input fields
•"Grid": This option lets you display a grid and hotspot (violet circle) as a visual guide. The hotspot always appears at the center of the grid.
•"Snap lines": Snap lines are seen if you set this option. Snap lines help you position objects. In a defined area, the objects are aligned magnetically to the snap line and remain attached to it.
You can change the shape and size of the object at the snap line if you selected it with the edit cursor (e.g. a circle can become an ellipse). You can only change the object position at the snap line if you selected the object with the hand cursor.
·To create snap lines: Click the ruler with the edit tool and drag the snap line to the graphic holding down the mouse button.
·To delete snap lines: Click the snap line with the edit tool and drag it out of the graphic holding down the mouse button.
·To position snap lines: Click the snap line with the edit tool and position it holding down the mouse button.
•"Line weight": This is where you define the line weight for circles, rectangles and lines.
•List box with all the objects that are found in the graphic. You can select "All" or single objects in this box. The objects are shown in the order they were created.
"Properties" dialog (button)
The properties dialog is context-sensitive, varying according to the object selected. The "Canvas Properties" dialog opens if an object is not selected.
If a graphic or text object is selected, the dialog that opens is "Text Properties", "Circle Properties", "Line Properties" or "Rectangle Properties", depending on what you selected.
You can select an object directly using the list box on the left. You can make changes to the objects by typing in values in the properties dialogs or also manually using the mouse pointer and a click.
The following dialogs with their options are possible:
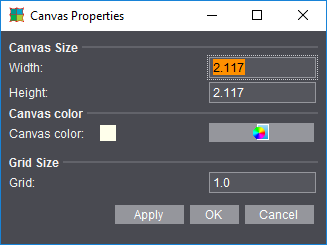
Canvas Properties
The input options are self-explaining.
Click "OK" to apply your data and close the dialog.
Circle, Line and Rectangle Properties
Properties
The input options for the geometric data are self-explanatory.
1.Click "OK" to apply your data and close the dialog.
2.Click "Apply" to apply your data but leave the dialog open.
3.Click "Cancel" to close the dialog without applying the values.
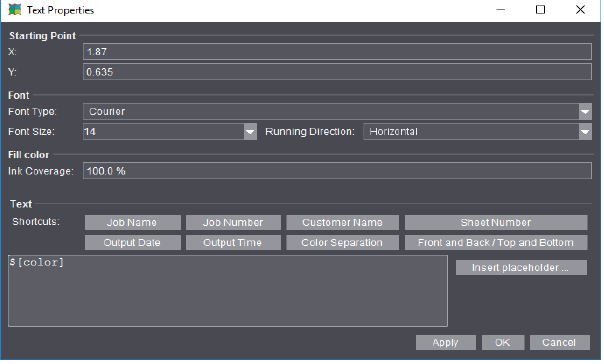
Text Properties
Insert the placeholders directly by clicking the buttons beside Shortcuts or select others with "Insert placeholder...". More details can be found in Insert placeholder .
Click "OK" to apply your data and close the dialog.
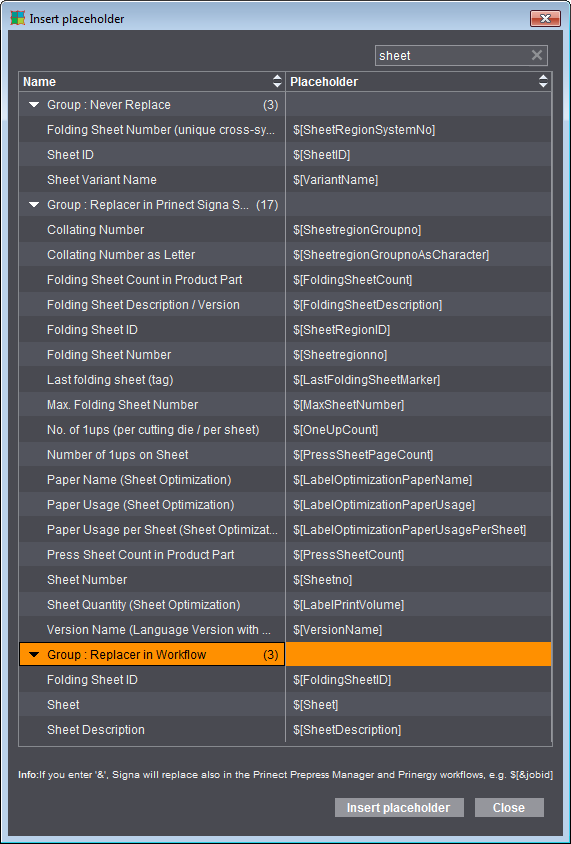
Insert placeholder
Grouping Table
The grouping table shows an overview of the placeholders by replacement mode.
1.Click the arrow on the left to open the group.
You can also sort the table by name and placeholder.
2.Click the "up" and "down" arrows in the respective column.
3.You can insert a placeholder either by double-clicking its name or by selecting it and then clicking "Insert placeholder".
To exit the table:
4.Quit the table by clicking "Close".
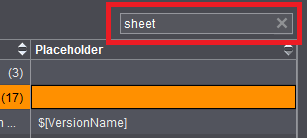
Filter
You can type in a filter criterion in the search box to the right above the table. In the filtering process, the text is looked for in both columns (Name and Placeholder) and the rows filtered accordingly. Uppercase and lowercase are not important. Placeholders that do not have the search text neither in the name nor in the placeholder itself are filtered out and consequently do not display in the table. The filter is revoked by removing the filter criterion from the text box or by clicking the 'x'.
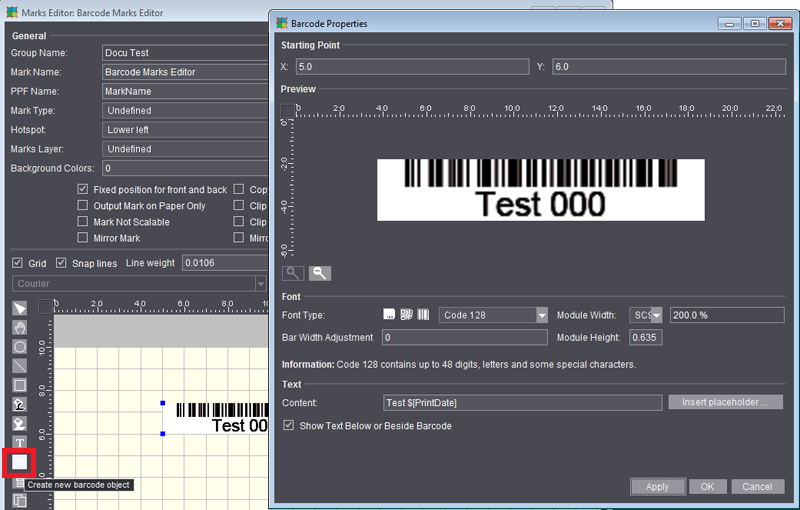
Barcode Properties (Barcode Object)
If you selected the "Barcode Object" tool, the "Barcode Properties" dialog opens after you clicked the canvas to let you define all the properties of the mark. The settings that are possible are equivalent to those in the Barcode Editor. In addition, you can define the starting point (bottom left corner of the barcode) on the canvas analog to the other graphic objects. When the dialog opens, the position on the canvas is indicated which was clicked when creating the barcode. The barcode object lets you define several (similar and different) barcodes within one mark. In this way, for example, you can create ASIR marks where the barcode must be placed three times one after the other without needing the "IDAutomation" font for it.
For a description of the barcode properties, see Barcode Editor