With the Barcode Editor, the common barcode fonts and the code systems for folder-gluers can be generated directly by Prinect Signa Station.
Codes in the adhesive border and/or collating marks are used especially in packaging printing to avoid stock getting mixed up. These are special code systems that you can now generate also using the Barcode Editor.
You can use the Barcode Editor to create barcode marks that will replace any faulty barcodes in the 1up/content.
Use the Barcode Editor if you wish to create/edit a barcode mark that is saved as a resource in "Marks".
You can start the Barcode Editor at the following points:
•In the main menu: "File > Create Resource > New Mark > Barcode Mark... > Source"
•In the main menu: "Jobs & Resources > Marks" > in the context-sensitive menu > "New Mark > Barcode Mark > Source"
•Double-click an existing barcode mark.
For a description, see the "Editors for Marks, Color Control Bars and Ink Pickup Bars" section.
•Loading the 'Marks' Resource to the Job
•"+" magnifying glass: Zoom in graphic display
•"-" magnifying glass: Zoom out graphic display
•Deployment of the font types that are usual in the trade and the code systems for creating/editing a barcode mark.
•Information about the selected barcode font type displays in the lower part of the window.
•You can hide the text of the mark if required.
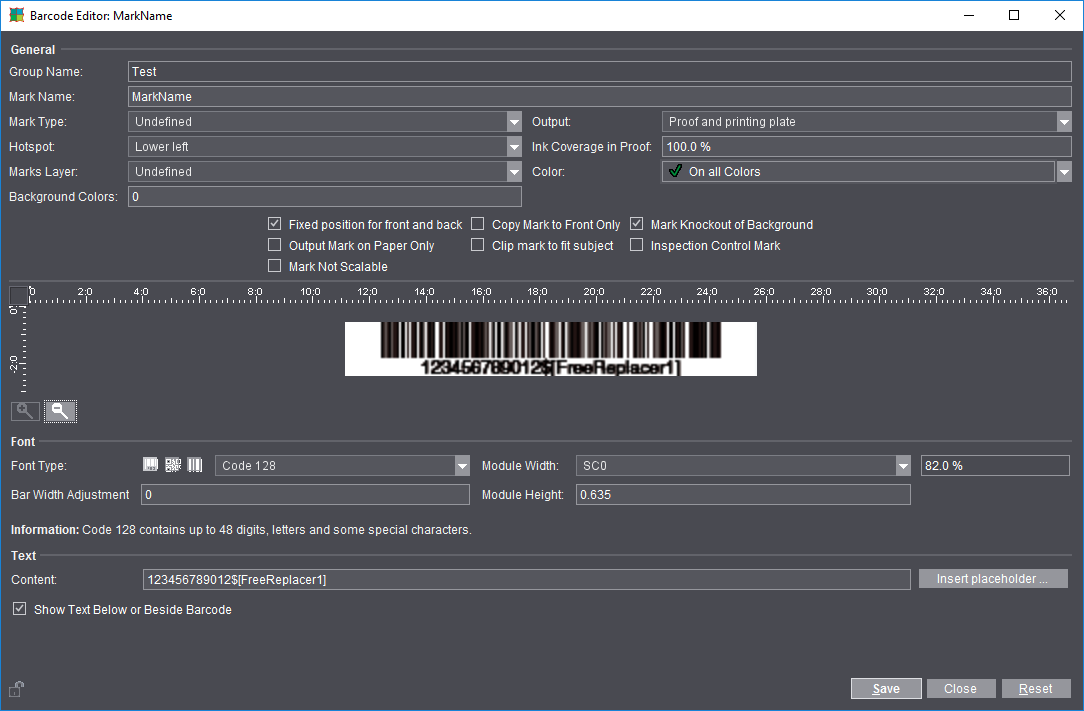
1.Start the Barcode Editor as described above. The Barcode Editor displays.
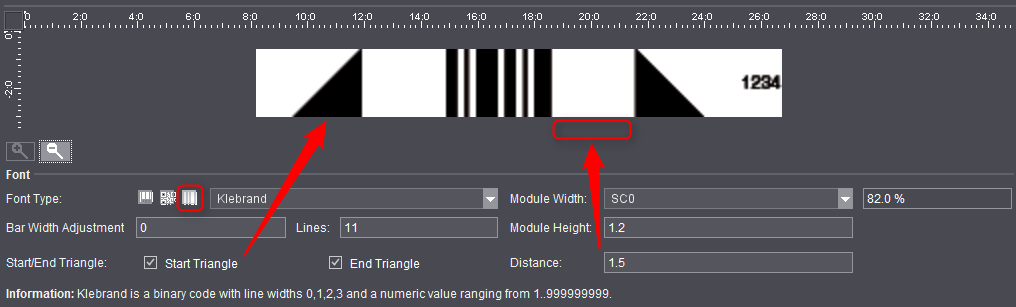
2.First, use the "Font Type" option buttons to select whether you wish to create a barcode, a two-dimensional code (Data Matrix/QR code, see also Explanation of the Data Matrix/QR Code) or a binary code (e.g. Klebrand code mark for glue flaps of folding boxes).
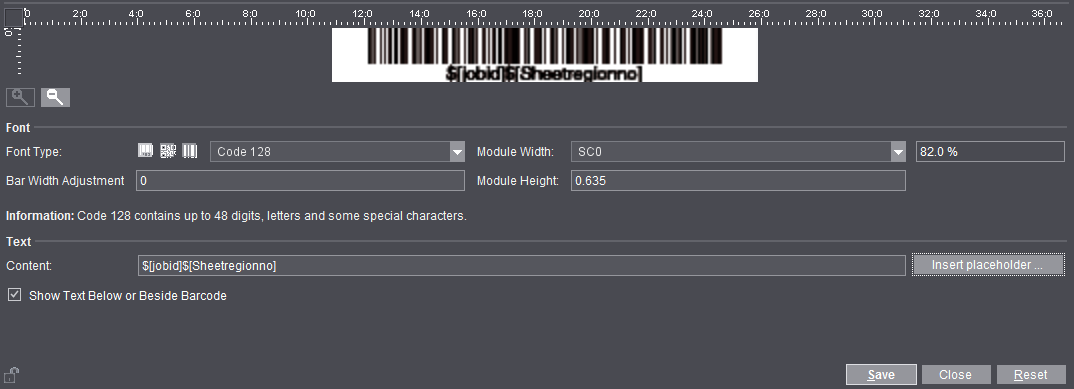
3.Then choose the required barcode type in the list box, e.g. "Code 128".
4.In "Placeholder" in the "Text" group, select, for example, "Job Number (jobid)" and "Folding Sheet Number (Sheetregionno)" placeholders to replace the WST-5 barcode mark.
5.Select the module width, in this example: "SC1". This is equivalent to the resolution of your barcode scanner.

Note: You can scale the mark freely if you select "User-defined" as the "Module Width".
6.Enter the module height (the length of the short bars), in this example: 0.635 cm.
7.Enter, for example, "WST-5_new" in "Mark Name".
8.Click "Save" to save the mark in the resources.
9.The new WST-5 barcode mark can replace the WST-5 barcode mark from the Standard group.
This means that IDAutomation fonts are no longer required if this mark is used.

Note: PZN Code (central pharmaceutical number): As of Jan. 1, 2013 the PZN code has been extended from 7 to 8 digits. Prinect Signa Station offers barcodes for both variants. You can create PZN-7 and also PZN-8 codes. Old PZN codes are automatically displayed as PZN-7 codes.
Explanation of the Data Matrix/QR Code
The Barcode Editor of Prinect Signa Station supports the two-dimensional Data Matrix barcode and the QR barcode. Data Matrix is a two-dimensional code that can be used to encode up to 3116 random characters. You can encode up to 7089 decimals with the QR code. The information is encoded in a very compact, mostly square, sometimes rectangular dot pattern area. Although both codes are more compact than the barcode, reading the image and decoding information are still considerably safer than with a barcode.
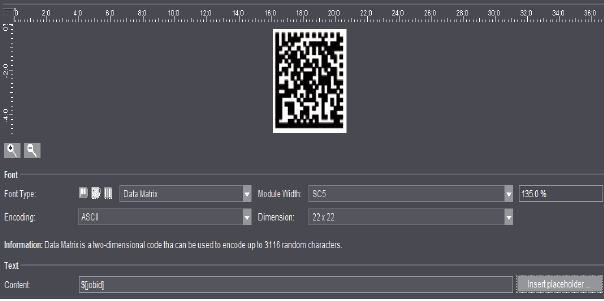
Parameter options are "Dimension" (square with only few exceptions), and "Encoding". At present, the following encodings are offered: ASCII, Base 256, C40 and Text. At present, the following encodings are possible for the QR code: Numeric, Alphanumeric, Byte (Latin-1) and Byte (UTF-8). In addition, you can select a level for error correction.
You can also give binary codes a triangle as a start and/or end mark, for example, for determining register on the folder-gluer. You can set the distance of the triangles to the actual code by entering a value in the relevant box. The height of the triangle adjusts itself to the height of the barcode.