To select an object. Click an object that can be selected. This object then has a yellow frame and you can move it holding down the mouse button.

To select solely folding sheets/assembly blocks.

To zoom up the entire graphic. A "+" appears in the magnifying glass. Hold down the "Alt" key to zoom down. A "-" appears in the magnifying glass.
Hand tool: Lets you move scaled-up objects into the view frame. Hold down the space bar while doing so.

To set a measuring point and create a frame: This tool lets you set measuring points or create a frame and read off the values in the read-only boxes on the left. As an alternative to the tool: "command key + Shift key"

User-defined dimensions:
This tool lets you measure from one defined edge (e.g. paper edge, page edge, etc.) to another defined edge.
Example:
You are going to measure the distance between the paper edge and the beginning of the subject.
•Move the mouse pointer to the paper edge.
•The starting edge is shown as a red bar.
•Hold down the mouse button and drag the mouse pointer to the beginning of the subject.
•The target edge is shown as a green bar.
•Let go of the mouse button.
•The distance from the page edge to the paper edge is shown along a line between the red and green bar.
Note: Dimensioning in the next tool (View properties button) must be enabled.
•Use the shortcut "Alt + click" to delete the dimensions.

You can scale all marks except for the automatically placed cut and fold marks.
Select the mark you wish to scale and hold down "F5". The handles that appear let you scale the mark invariably.
As an alternative to the tool: "F5"
Enable the tool if you wish to scale proportionally. First enable a handle with the mouse pointer and hold down the mouse button. Then press the Shift key and move it using the mouse.

View properties:
You can use this tool to change the graphic display. See View Properties and Enable/Disable Layers .

List box with zoom factors.

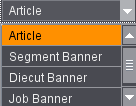
List box with the layers (articles and banners) (digital web press only).