
Prerequisite: The "JDF Import Rules Editor" option must be licensed.
The "Use Rules" option in "File > Preferences > JDF Import" must also be enabled.
The status message "...is disabled" displays at the top of the window if this is not the case. The defined rules are not applied in this case.
The JDF Import Rules Editor lets you define special rules for the import of JDF files. Important cases of application are, for example, different marks per binding type (e.g. collating marks only for perfect binding) or the "First Folding Sheet is Cover" function. You can define such cases of application best of all using special product part templates (see Example for Creating a Rule with the JDF Import Rules Editor for details).
The use of these rules lets you customize even more for JDF import. This minimizes user intervention. The use of the rules can make your data much more reliable when the "Prinect Signa Station Server" basic package is used. The applied rules (and also the press sheet-related subrules) are entered into the comment box of the product part so that you can follow why a rule was used.
You can define job (global) and press sheet-related rules.
The rules are managed in "rule groups" in the Rules Editor. A rule group consists of at least one "global" rule and can have any number of "press sheet-related rules as well.
The following window displays when you start the Editor from the menu using "Tools > JDF Import Rule Editor" or from the Preferences, "JDF Import" tab:

Note: Take note of the following basic principles when creating rules:
- As little rules as possible, just enough as is absolutely necessary.
- The rules in the Prinect Signa Station Server are not to act in a completely different way to those in the interactive Prinect Signa Station.
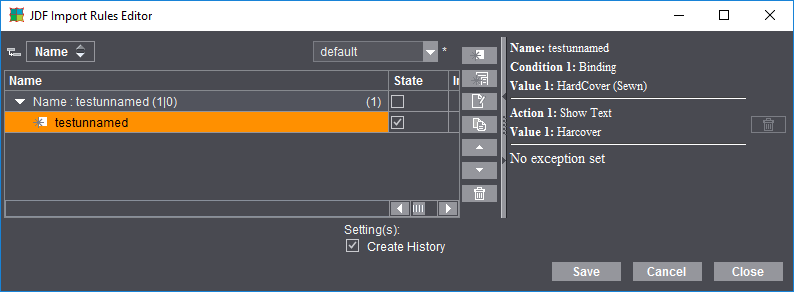
Layout of the window
The defined rules are found on the left of the window. The parameters display as tables; "Name" (name you assigned to the rule), "Status" (active/inactive), "Action" (HTML description of the rule functions) and "Info" (after import, shows which rules were used).
An overview of the conditions of the rules displays on the right.
You can enable the option for creating a record of the rules in the lower part of the window.
In this case, after a rule is applied during a JDF import, a history of the import displays on the right of the window.
Button Description

|
Create a job-related (global) rule. The "JDF Import Rules Editor" Assistant opens. You cannot turn a global rule into a press sheet-related rule. |

|
Create a press sheet-related rule that is then valid for specific presses, work styles or cutting dies. The "JDF Import Rules Editor" Assistant opens. You cannot turn a press sheet-related rule into a global rule. A press sheet-related rule always requires a global rule as its "basis". In other words, a global rule must be selected before you click this button to start the Assistant. |

|
The selected rule is edited. The "JDF Import Rules Editor" Assistant opens. |

|
The selected rule is copied. The "copy", with the rule name marked by "copy", is added to the end of the table. |

|
The selected rule moves up in the table. |

|
The selected rule moves down in the table. |

|
Trashcan button in the middle of the window: To delete the selected rule. |

"Save": Saves all changes and the rules in the editor.
"Cancel": Discards all changes in the editor.
"Close": Saves all changes and rules in the editor after you confirm the message that displays and closes the editor.
To create a rule
Double-click a rule in the left part of the window or click the "Create new rule" button. The Assistant described in the section below displays in both cases.
JDF Import Rules Editor Assistant
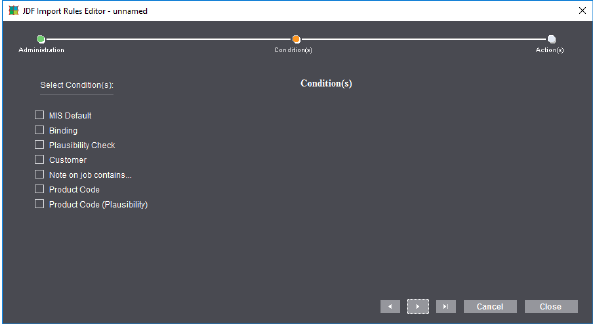
In the first window of the Assistant, you give a global or press sheet-related rule that you selected a name or edit it, if necessary. The second window lists the conditions that you can define accordingly for the rule. The conditions listed in the following screenshots can be set accordingly.
•"Note on job contains...": The respective MIS writes the job description into the job from where it is also available to the Prinect system. This can be any text. Using an appropriate rule, you can, for example, perform JDF import into Signa Station with a specific product part template. During analysis, the job description of the JDF is searched for each defined text in the rule. The condition is met if the defined text appears (anywhere) in the job description of the JDF.
•"Plausibility Check": If major parameters such as MarginLeft, MarginBottom etc. or even RelativeBox or AbsoluteBox are not specified in the JDF or the printable paper area is exceeded, an appropriate rule can run, for example, "Automatic Positioning" during JDF import.
Conditions when a global rule is to be used
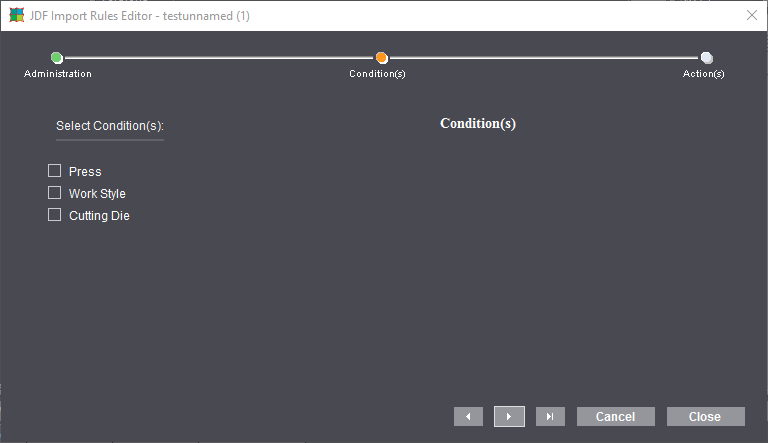
Conditions when a press sheet-related rule is to be used
A faulty rule can result if settings were made in "Actions" for one of the following actions and the resources or designations have changed since the time the rule was defined (e.g. by renaming the group):
•Product Part Template
•Plate Template (Default of Resource Group)
•Scheme (Default of Resource Group)
If the respective rule is activated, an error message will appear when you start Prinect Signa Station. A yellow warning triangle in the "Info" column indicates faulty rules when the JDF Import Rule Editor opens. The faulty rule then bears a red mark in the Assistant.