Points to note for "Plates" in the "Ganging Optimization" mode
Automatic Paper Height Reduction
Signa Station automatically calculates the maximum paper height required of each resulting press sheet.
•"Ganging Optimization without Layout Default": according to the settings, the paper height is reduced automatically to the subject plus set margins.
•"Packaging" and "Ganging Optimization Packaging": the paper height is reduced to make the subject with all the marks fit on the paper and to avoid collisions with press sheet marks.
•Use of sheet paper: In this case, the paper height is trimmed before printing. Possible field of application: Produce more unprinted waste and not printed waste.
Subject Settings
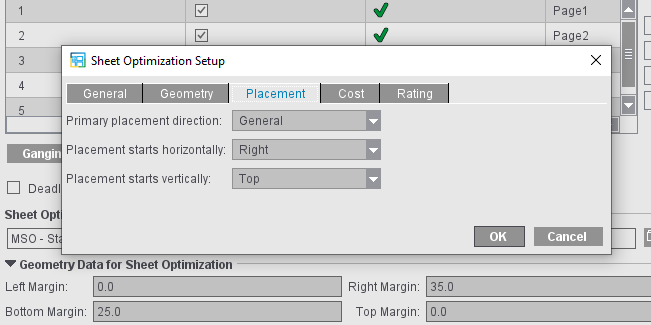
Positioning the subject is possible in four ways. This process refers to the settings for the margins in the "Optimization" step ("Geometry Data for Sheet Optimization") and, where applicable, the placement defaults from "Advanced Settings... > Placement".
The subject settings affect the final optimized result only after the 1ups were placed. This means: Changes to the subject settings do not affect the optimization result but only the placement of the result on the paper.
|
|
The subject is centered on the paper horizontally and vertically, regardless of the placement defaults in "Advanced Settings...>- Sheet Optimization Setup > Placement".
|
|
|
The subject is centered horizontally on the paper.
The vertical position is - according to the placement defaults - within the area defined by "Margin Top" and "Margin Bottom".
|
|
|
The subject is centered vertically on the paper.
The Horizontal position is - according to the placement defaults - within the area defined by "Margin Right" and "Margin Left".
|
|
|
The subject is placed according to the placement defaults defined in "Advanced Settings...>- Sheet Optimization Setup > Placement" within the area specified by the margins.
|
Note: If the result of centering on the paper in one direction or both directions is that the subject extends beyond the margin set under "Geometry Data...", the subject will be moved to this margin accordingly, i.e. the values for the margins will always be taken into account.
You can specify which subject setting is used to insert a plate template by default in Preferences under "Defaults > Subject settings" (see Subject Settings).
If you change the subject settings in the "Plates" step, you must click the "Optimize" button again in the "Optimization" step for the change to take effect.
Examples:
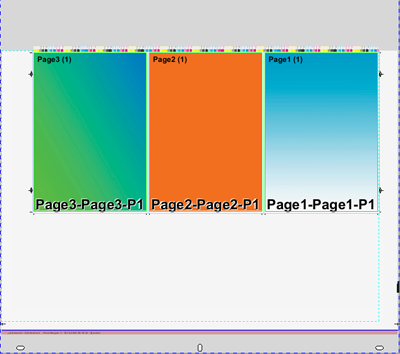
Placement "Right" and "Top", "Right Margin" 35.0, "Margin Bottom" 25.0 (see screenshot above)
The blue dashed line identifies the area set by the margins.
|
|
|
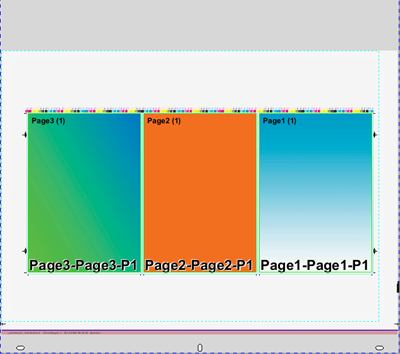
Centered on the paper in both directions, within the margins.
|
|
|
|
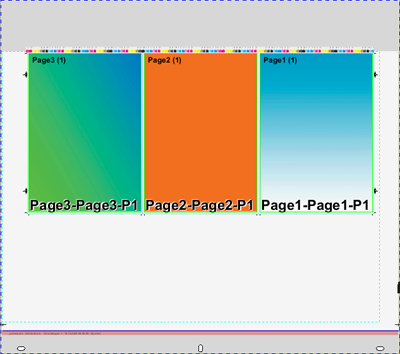
Placement "Top", Top margin= 0, horizontally centered on the paper
|
|
|
|
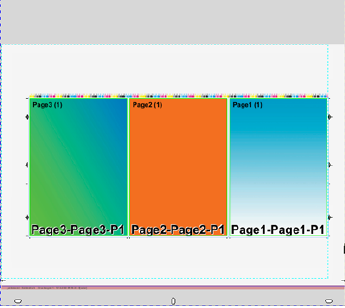
Placement "Right" at the set margin, vertically centered on the paper.
|
|
|
|
Centering switched off: Placement "Top" and "Right" at the set margin, to margin = 0, right margin = 35.0
|
|
|
|
Placement "Top", Top margin= 0, horizontally centered on the paper
Right margin increased to 55.0
therefore no horizontal centered placement on the paper possible, the subject will be placed at the right margin
|