
Replacing Pages Already Assigned
Page Lists View Mode
You can swap pages already assigned to a page list using drag-and-drop.
To do this, press and hold down the "Alt" key before you drag the pages. The page then selected is replaced by the page that you drag-and-drop there.
The use of the "Alt" key pressed for drag-and-drop is also indicated by the mouse pointer changing shape.
Note: This function is also available in the thumbnail view in the "Imposition" step.
When pages in the gang job are approved interactively, a check is then run to see whether the source pages were changed.
You are prompted to refresh the pages if the source pages were changed.
Gang Job: Display of a Modified Page in the Customer Job
A gang job contains copies of the pages of the customer job. If a page in the customer job is modified, this is indicated in the gang job by a warning icon. A tooltip also provides additional information.
|
|
Icon in the list view. |
|
|
Warning on a modified page in the thumbnail view. |
"View Properties (Pages)" Window
In this window, you can define settings for displaying the thumbnails.
Thumbnail Scaling
This is where you can set the size of the thumbnails (in %). You can either type the value directly into the box or use the slider to change the size.

Note: Thumbnails can be scaled up to 500%.
Show Status Icons
Status icons display to the right of each thumbnail if this function is enabled.
Thumbnail status icons
Show Full Page Name
The full page names display if this function is enabled.
Show Trim Box
The trim box displays in the thumbnails if this function is enabled.
Color
This is where you can select the color for the trim box if "Show Trim Box" is enabled.
Show grid
A grid displays between the thumbnails if this function is enabled.
Color
This is where you can select the hue for the grid if "Show grid" is enabled.
Show Source Job Number
When this function is enabled, the number of the job (source) from which the page was copied displays.
Color
This is where you can select the hue for displaying the source job number if "Show Source Job Number" is enabled.
"View Properties" (Thumbnails) Window
In this window, you can define settings for displaying the thumbnails.
Thumbnail Scaling
This is where you can set the size of the thumbnails (in %). You can either type the value directly into the box or use the slider to change the size.

Note: Thumbnails can be scaled up to 500%.
Show Thumbnails as Double Pages
The thumbnails displayed are grouped to double pages if this function is enabled.
Show Article Numbers
The relevant article numbers display if this function is enabled.
Color
This is where you can select the hue for displaying the article numbers if "Show Article Numbers" is enabled.
Show grid
A grid displays between the thumbnails if this function is enabled.
Color
This is where you can select the hue for the grid if "Show grid" is enabled.
You can create a new page list in the "Create Page List" window.
Product
This displays the name of the product.
"Select" button
Click the "Select" button to open a window where you can select the product/version in which the page list will be created.
Name
Enter a name of your choice for the page list. An error message will appear after you click "OK" if there already is a page list with the same name.
Start
After you select "Start", enter the page number the page list is to start with.
Size
Enter the number of pages in the page list in this box.
Range
If you selected "Range", you can enter the first and last position of the pages in the list, separated by a hyphen (e.g. 4-9). The system automatically calculates the number of pages. The page list can also have gaps. If you enter "2, 4, 6, 8, 10" in "Range", a page list with the specified positions will be generated.
"Copy Page Lists from Other Jobs" Window
In this window, you can select page lists from other jobs and copy them including their content. You can filter by "letters" or "numbers" using the search function. The system looks for the related combinations in the "Job Number", "Job Name" and "Project" columns.
Job Number
Displays the job number.
Job Name
Displays the job name.
Project
Displays the project ID.
Job Information
This displays the page lists of the selected job. Click the "+" button to add the selected job to the page list selection.

Note: A message displays if there are no page lists in the selected job.
Page List Selection
This displays the jobs selected with the "+" button. Click this box to remove or set the checkmark for marking a job. Only marked jobs are used by clicking "OK". Click the recycle bin icon to delete the job concerned from the page list selection.
"Select all" check box
Click this box to remove or set the checkmark for marking all jobs in the page list selection.
"OK" button
The marked jobs are used when you click the "OK" button. The window closes and the jobs display in the "Copy Page Lists" Window.
"Select" button (copy page lists from other jobs)
Click "Select" to open the "Copy Page Lists from Other Jobs" Window.
Source Page List(s)
This displays the jobs applied in the "Copy Page Lists from Other Jobs" window.
Target Page List(s)
This lets you select whether or not the target page list will be overwritten, added or ignored.
"Create Versions with Page Lists" Window
This is where you can create versions with page lists. The versions can be assigned to a level. You can create various layers from a combination of version and level.
You can add or remove them from the active table with the shortcuts "Ctrl+Plus" or "Ctrl+Minus".
Use the "Tab" key to go to the next table cell.
Versions
Click the "+" button to create a new version. You can change the default name.
Click the "-" to delete the enabled version.
The master version is the version with the dot in the circle before the name. To make a version the master version, click the circle in front of the version you want.
Enter a description of the generated version in "Description".
In "Pages" you can enter the number of pages in the version.
Click the "-" to delete the enabled version.
Levels
Click the "+" button to create a new level. You can change the default name.

Note: The first level is always the base.
Click the "-" to delete the enabled level.
Click the "up" or "down" button to move the selected row upwards or downwards.
Layers
Click the "+" button to create a new layer. You can change the default name in "Page List".
Click the "-" to delete the enabled layer.
You can filter by the version you want using the filter function.
The version names display in "Versions".
The level names display in "Level".
"Product Part Name" displays what type of product it is (e.g. end product).
"Move Page List Position(s)" Window
Positions
Shows the selected position(s) of a page list that will be moved.
First new Position
Type the value of the first new position. If several positions are selected, use the first value of the new positions.
"Preview" Button
Click this button to check the shift in position that is shown in "Preview". The "OK" button is enabled.

Note: A change is denied if the target position(s) is (are) already available. Any pages assigned to the page positions are retained.
Preview
Shows the position where the selected position(s) of a page list are located.
Name
This displays the name of the page list that will be modified.
Positions
Enter which new position(s) you will insert. The "OK" button is then enabled.

Note: You cannot insert if a position already exists.
This is where you can change the position of the page in its page placeholder.
Apply to
This option lets you select whether your settings will apply to all the pages (All Positions), to even pages (Even Positions) or odd pages (Odd Positions). The number of pages affected displays to the right of this.
Source
Select the source for positioning.
Trim Box
The source is the trim box.
User-defined
The user defines the source. As a result, offset, scale and rotation are enabled and can be used.
Offset
Type in the offset of the currently selected pages in x and y direction.
You can also use +,-, *, / as operators when entering the value. The algorithm of "multiplication and division first, then addition and subtraction" is applied for evaluation of the input.
Inputs nested by parentheses are also supported.

Note: The input is evaluated when you quit the box and is replaced by the corresponding value.
Example:
|
Input |
|
|
Replaced value |
|
Scale
This shows the scale (%) used to position the page on the layout.
Media Box
The media box data (starting position of the corner and size) are shown in this column. The values are for your information and are read-only.
Trim Box
The trim box data (starting position of the corner and size) are shown in this column. The values are for your information and are read-only.
Rotation
Select from the defaults by how many degrees the page will be rotated when positioned on the layout.

Note: Rotation is counterclockwise.
Edit PDF
When "Edit PDF" is enabled, changes to the page geometry are made in the PDF and not in the JDF.
You can delete elements that you selected beforehand in the "Delete Elements" window.
"Open" button
Click "Open" to open another window where you can view details about the selected page position.
"The following elements will be deleted"
This displays the elements that will be deleted when you click "OK".
This shows the page properties. You can choose between the "Properties", "Saved Versions" and "History" tabs.
The properties can display as part of the window and in their own separate window. You can switch between these two displays using the "Detach from main window" and "Attach to main window" buttons.
|
|
"Detach from main window" button |
|
|
"Attach to main window" button |
The page properties are shown in the "Properties" tab. You will find a description of most of the data in the section Columns in the Pages view.
History of Document Versions
This shows the progress of the document revisions (if any) with document name and date.
Saved versions of the sequence are shown in the "Saved Versions" tab.
You can also view history details about the selected documents in the "History" tab.
"Details" button
Any additional details display when you click the "Details" button.
Button bar at bottom
|
Button |
Function |
|---|---|
|
Reset |
Click this button to revert the selected pages to a saved version. You must confirm the procedure in a query. You have a saved version if you selected "Output is saved result" in "Target" in a sequence (e.g. Qualify or Prepare). Note: You can only select this function if you are able to revert to a saved version. |
|
Save |
You can select this button only if inputs or changes can be made in the "Properties". In this case, the change is applied and saved when you click this button. |
|
Close |
Click this button to close the properties and display the dynamic window again in its full size. If you made changes that were not saved, you are prompted to save or discard them before closing the window. |
|
Refresh |
Click this button to refresh the content of the window. |
This shows the page list properties. You can choose between the "Properties", "Colors" and "History" tabs.
The properties can display as part of the window and in their own separate window. You can switch between these two displays using the "Detach from main window" and "Attach to main window" buttons.
|
|
"Detach from main window" button |
|
|
"Attach to main window" button |
You can view page list properties in the "Properties" tab. The data shown are for your information only and can not be changed in this section.
You will find a description of most of the data in the section Columns in the Page Lists view.
In the "Colors" tab, you can view the product colors for page lists, map colors to another color and change the printing order of the colors. You will find more information in the section "Colors" Section.
Color List
You can select between the following view modes in the list box:
•All Colors
All available product colors are shown in "Page List Colors" if you select "All Colors".
•Existing Colors
Only the product colors in the page list are shown in "Page List Colors" if you select "Existing Colors".
You can also view history details about the selected page lists in the "History" tab.
Button bar at bottom
|
Button |
Function |
|---|---|
|
Save |
You can select this button only if inputs or changes can be made in the "Properties". In this case, the change is applied and saved when you click this button. |
|
Close |
Click this button to close the properties and display the dynamic window again in its full size. If you made changes that were not saved, you are prompted to save or discard them before closing the window. |
|
Refresh |
Click this button to refresh the content of the window. |
This shows the page properties (page positions). You can choose between the "Properties" tab and the "Colors" tab.
The properties can display as part of the window and in their own separate window. You can switch between these two displays using the "Detach from main window" and "Attach to main window" buttons.
|
|
"Detach from main window" button |
|
|
"Attach to main window" button |
In the "Properties" tab, you can view page position properties, not only those of the current pages but also of previously assigned pages (history of assigned positions). Besides the page, the date it was assigned and the name of the user who did this also display.
The data shown in the properties are for your information only and can not be changed in this section..
You will find a description of most of the data in the section Columns in the Page Lists view.
In the "Colors" tab, you can view the product colors for page positions, map colors to another color and change the printing order of the colors. You will find more information in the section "Colors" Section.
You can select between the following view modes in the list box:
•All Colors
All available product colors are shown in "Page Position Colors" if you select "All Colors".
•Existing Colors
Only the product colors in the page list are shown in "Page Position Colors" if you select "Existing Colors".
Button bar at bottom
|
Button |
Function |
|---|---|
|
Save |
You can select this button only if inputs or changes can be made in the "Properties". In this case, the change is applied and saved when you click this button. |
|
Close |
Click this button to close the properties and display the dynamic window again in its full size. If you made changes that were not saved, you are prompted to save or discard them before closing the window. |
|
Refresh |
Click this button to refresh the content of the window. |
You can assign the page(s) you selected to a layout or a page list in the "Assign Pages" window.
The main pane of the window is divided into the following panels:
•The top panel shows the page lists of the job. Select a list to display information about the number of positions and those assigned.
•You enter your assign data in the middle panel.
•As a check, the lower panel lists the positions the pages would have after confirmation.
Auto
The list box is enabled when you select "Auto" and you can select one of the following settings:
"Positions" list box
•All Positions
The pages are assigned to the positions right from the starting position. Any existing assigned positions are replaced following a confirmation.
•Even Positions
The pages are assigned only to even positions right from the starting position. Any existing assigned positions are replaced following a confirmation.
•Odd Positions
The pages are assigned only to odd positions right from the starting position. Any existing assigned positions are replaced following a confirmation.
•Unassigned Positions
The pages are assigned only to unassigned positions right from the starting position.
Start at
The first starting position possible displays automatically in this box, depending on the position you selected. This is where you enter the starting position you want if you want a different starting position.
Range
When you check the "Range” option, you can assign pages to specific positions with this function. Click the "Preview" button if you wish to check the positions the pages would have after confirmation.
•Example 1
Input of: 1, 3-5, 7
The first page is assigned to position 1, pages two thru four to positions 3-5, page five to position 7.
•Example 2
Multiple assignment of a page by setting input in parentheses: (2, 7-11, 32)
The page would then be assigned to positions 2, 7, 8, 9, 10, 11 and 32.

Note: Based on this, you can also assign a multiple selection of pages. The values in parentheses only have to be separated by commas.
·Example:
Page X and Y were selected, page X is to go to position 2, 7, 32 and page Y to 1, 5, 17.
Your input is then: (2, 7, 32), (1, 5, 17).
"Preview" Button
Click the "Preview" button if you wish to check in the lower panel of the window the positions the pages would have after confirmation.
"Continue Element Processing" Window
The "Continue Element Processing" window shows you the comments that you may have entered in the sequence settings.
You can enter a comment in the "Comment" box. At the same time, the page is opened in Acrobat. Now do the work you scheduled and save the document. After you close the Acrobat window, you can edit and/or add to the comments in the "Continue Element Processing" window.
The window closes after you click "Continue..." and job processing resumes.
If you did not save any changes to the document in Acrobat, the "Continue Element Processing" window closes automatically when you close the document in Acrobat.

Note: The "Continue Element Processing" window remains open in the background while you are editing the PDF document. Use this window only after you have edited the PDF document and saved your changes.
Button bar at bottom
|
Button |
Function |
|---|---|
|
Continue |
Click "Continue" to continue element processing. Note: You can only use "Continue" after Acrobat is closed. |
|
Cancel |
Click this button to close the window without saving any changes. |
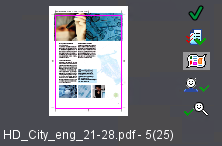
"Approval of Selected Elements" Window
You can set a customer or production approval status for selected pages/sheets/plates/proofs in this window. You can also type a comment, if necessary.

Note: The name of the window tells you what approval is for (pages/sheets/plates/proofs).
The upper part shows the selected elements.
Customer
Select this function if you wish to set a customer approval status.
Production
Select this function if you wish to set a production approval status.
"Approved" button
The selected element will be approved (see icon in Customer or Production Approval).
"Not Approved" button
The selected element will not be approved (see icon in Customer or Production Approval).
"Unchecked" button
The selected element will neither be approved nor not approved. (see icon in Customer or Production Approval).
Comment
This is where you can type in a comment that will display in the "Customer Approval Comment" or "Production Approval Comment" columns of the steps.
Button bar at bottom
|
Button |
Function |
|---|---|
|
OK |
Click this button if you wish to set the selected approval status and to enter a comment if desired. |
|
Cancel |
Click this button to close the window without saving any changes. Any settings or inputs you made will be lost. |


