"Print marks settings" tab for Primefire 106 presses
Note: The print mark settings differ, depending on the press that the PagePrint sequence is set up for. See also:
·"Print mark settings" tab for toner-based digital presses (Hei-delberg Versafire) and CTP devices and
·"Print marks settings" tab for Labelfire 340 presses.
The available marks options are matched to the Primefire 106 press. This means that only "PQC Strip" and "Info Text" types of marks are offered for selection.
"PQC Strip" mark type
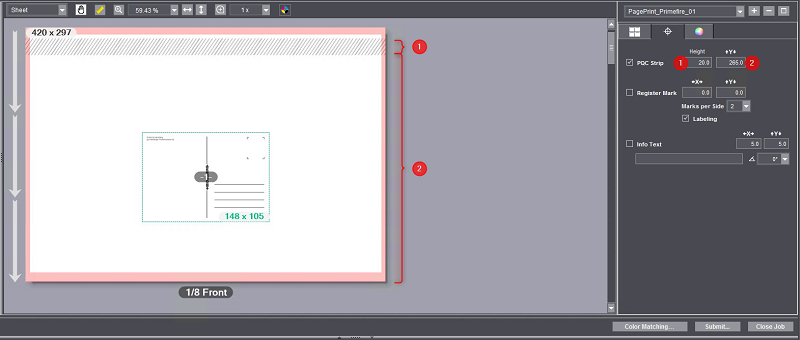
PQC (Print Quality Control) strips are special quality control marks that are required for detecting any nozzles that do not print. Normally, these marks are positioned automatically on the trailing edge of the sheet in the printable area. For certain cases, it may be necessary to manually customize the position of the PQC strip. You can do this in the "Height" and "Y" boxes.
Height
Height of the strip in mm (1).
Y
This value indicates the offset of the leading edge of the sheet to the lower edge of the strip (2).
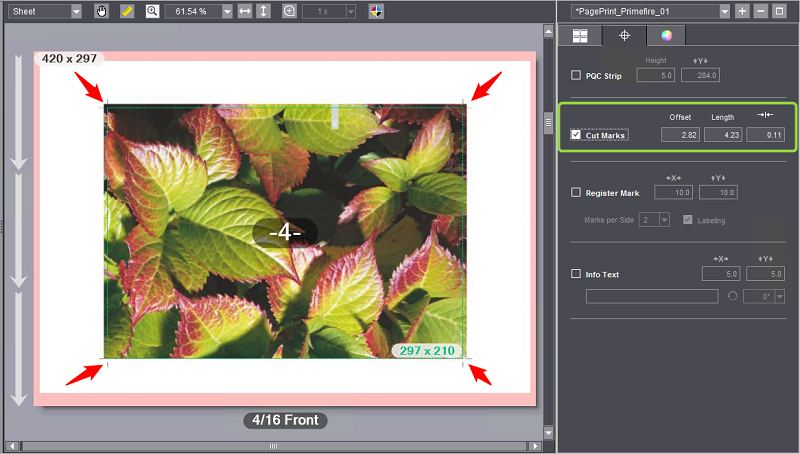
Enable this option to output cut marks. You can set up the cut marks as follows:
•Offset: The offset determines the distance of the mark lines from the related corner point of the trim box in horizontal and vertical direction.
•Length: Defines the length of the mark lines.
•->|<-: Defines the thickness of the mark lines.
"Register Mark" mark type
The register marks for Primefire presses are designed so that a color depicted as a cross on a black bounding circle is corrected. The marks are placed on the side of the subject, either one at the top left and one at the bottom right or two marks each on the left and right.
Position
Use the "X" and "Y" values to set the offset of the register marks to the subjects in horizontal and vertical direction.
In the "Marks per Side" box, you set the number of register marks on the left and on the right of the substrate. A maximum of two register marks per side can be output. In the example, two marks per side are enabled.
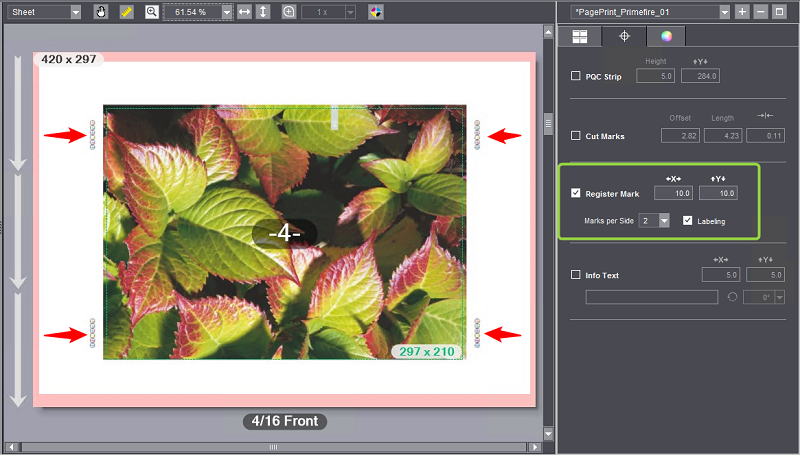
Labeling
If wanted, you can enable labeling of the marks.
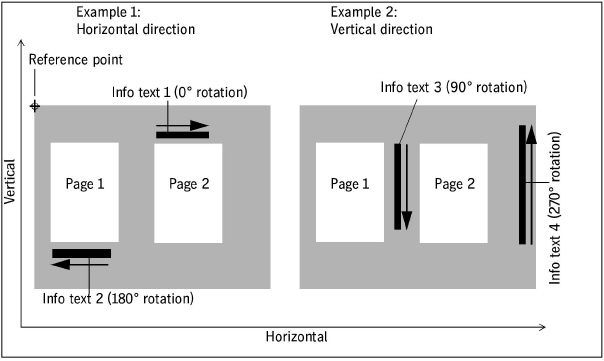
You can use this option to define special text marks by entering the appropriate text in the edit box. For example, you can enter information on specific output options, or comments on finishing.
In the "X" and "Y" boxes you define the position of the mark, starting from the reference point in the bottom left corner of the subject.
You define the orientation of the mark in the angle list box. The angles of rotation are measured in the clockwise direction. A rotation angle of 90° produces text running vertically upwards, that is read from top to bottom. A rotation angle of 270° produces text running vertically upwards, that is read from bottom to top.
Example 1 in the diagram below displays info text in the horizontal direction, example 2 shows it in the vertical direction.