Explanation of the Graphic Elements
When you open a job, you first see the page contents. You can hide the PDF page contents for a simplified, schematic view.
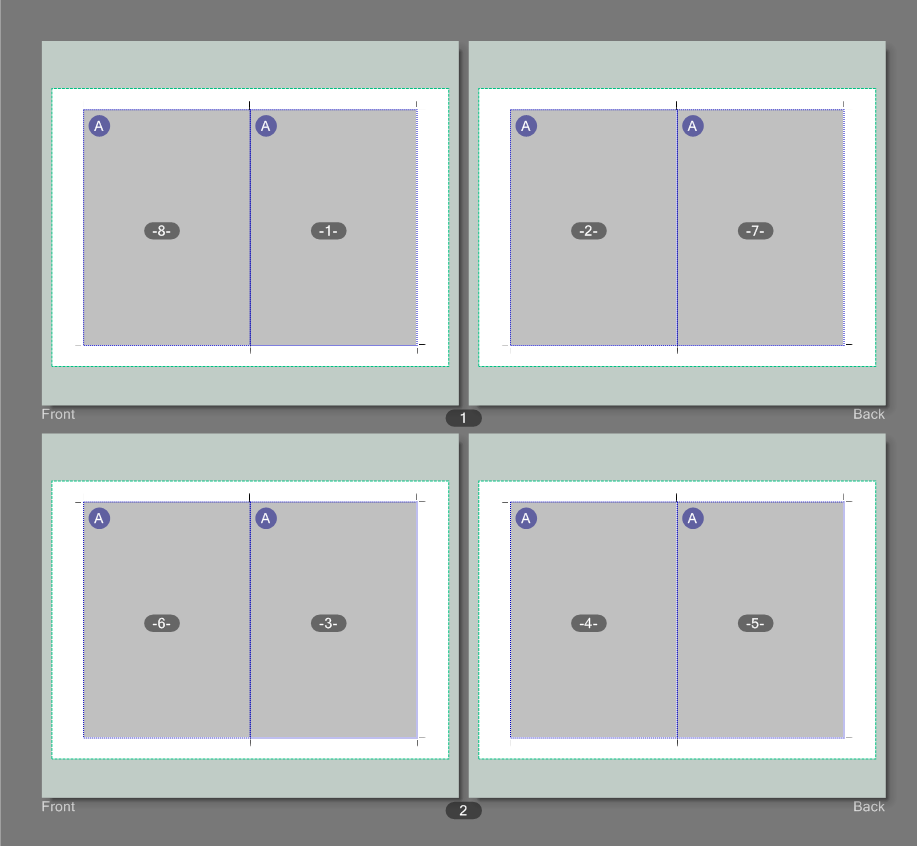
The graphic below shows you a view where the page contents are hidden so that the various graphic elements can be seen clearly.
•White area: The white area represents the printing material.
•Light gray area: (should be the same size as or bigger than the printing material) This is the imaging window. It contains all the imaged objects.
•Dark gray areas: Dark gray areas the size of the page portray hidden page contents.
•Purple circle with white "A" on the page: Marks a page orientation.
You will see the "A" if the page contents are hidden and shown as gray areas. This allows you to still recognize the orientation of a page.
•Blue dashed box (around a page): Trim box.
A bleed was defined for this display. You see the bleed as a border that goes beyond the trim box. See also Bleed.
The pages were centered in the trim box. See also Page Policies.
•Green dashed box: Folding sheet
The trim allowance was calculated automatically for this display. Otherwise the green box would encompass the trim boxes.
•White numbers on the page: Numbers for the page placeholders in the layout.
HD Privacy Statement | Imprint | Prinect Know How