Import of Additional Files to an Existing Project
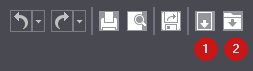
The top right toolbar has two buttons with which you can add more files to your project:
1.With "Import of an External File into a Current Project" you can import complete 1up drawings
2.With "Place in Current Drawing" you can add more elements to a 1up drawing.
Import of an External File into a Current Project
If you wish to make up a sheet layout out of a number of single cutting die files, you can add the additional cutting die data using the "Import external file into current project" button.
In addition to the standard import formats of Signa Station, you can also insert "NC files (HPGL)" of type *.hpg, PackDesign files of type *.m and *.evr files in Prinect Packaging Pro.
1.Open your existing project with Prinect Packaging Pro.
2.Click the button  . The "Import file" wizard with the two steps "First step: Import file" and "Second Step: Insert Drawing" opens.
3.In the first step you select the cutting die file you wish to add. A preview of the selected cutting die displays on the right of the dialog.

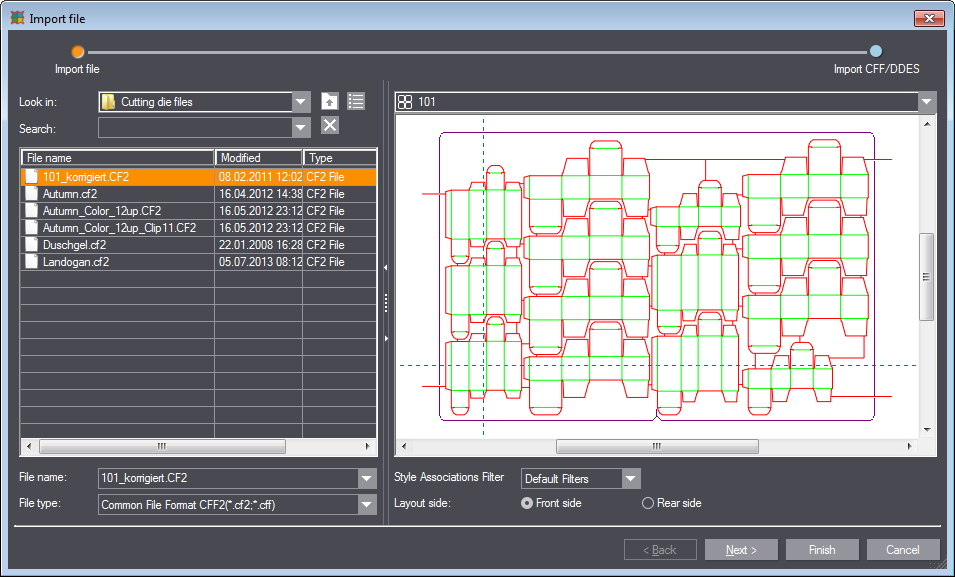

Note: The design and setup options in the second step of the Import wizard vary according to the format of the selected file (the second import step is skipped for some formats). The example shows the wizard in the case of a CF2 file.
|
Controls in the "Import file" wizard - First step |
|
|---|---|
|
Left side: |
|
|
Source |
This is where you specify where the files to import are stored. The table at the bottom displays the folder content. Make sure to select the correct format in the "File type" list or to select "All import formats". |
|
|
"Up One Level" Click this button to go up one folder level. |
|
|
"Toggle Flat Mode" Press this button to display all the files in the table that are contained in the current folder and its subfolders. The file representation in the table ignores the folder structure. |
|
Search |
Type part of the file name here to search for this file in the selected folder. |
|
|
"Clear Search Filter" Press this button to reset the search filter. |
|
Table |
The table lists the available files and their properties (modification date, type, and size). Select the file you want from the list. |
|
File name |
The name of the selected file is shown here. You can change it with the list box. |
|
File type |
This is where you select the file type by which the table view is filtered. To view all possible files, choose "All import formats". |
|
Right side: |
|
|
List box |
This is where you select which part of the file (various 1ups or the entire layout) is to be displayed on the canvas. |
|
Style associations filter |
Select the Style associations filter here. |
|
Layout side: |
This is where you choose which side of the draft drawing will be loaded: The print side (front, printed side) or the die side (back, view of cutting die). |
|
Back |
Inactive since this is the first step of the wizard. |
|
Next |
Clicking this button will lead you to the next step of the wizard if you have selected a file. |
|
Exit |
This button is only operable if you have selected a file beforehand. When you click this button, all 1ups and the entire layout (also as a 1up drawing) are added to the project. The wizard closes without executing the second step. |
|
Cancel |
Closes the wizard without importing the file. |
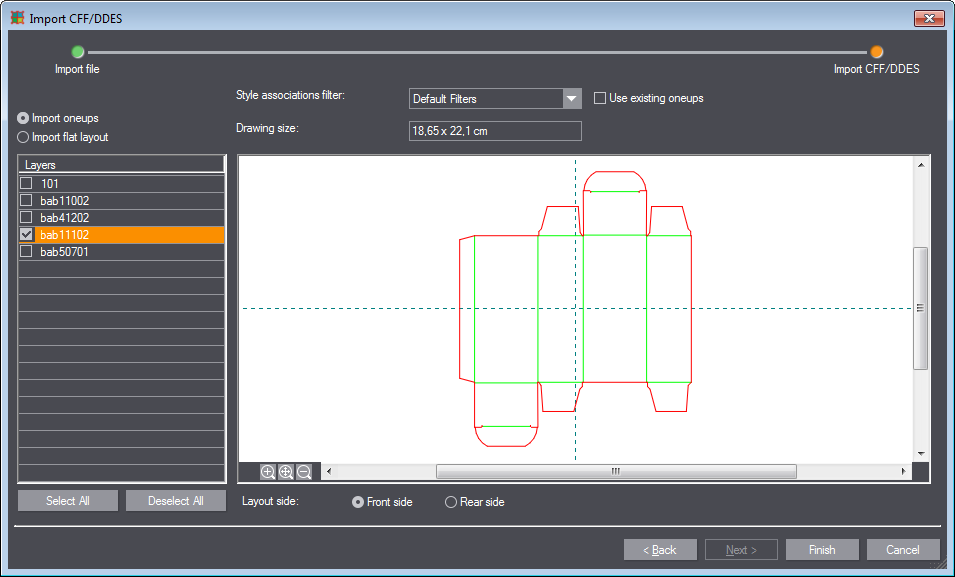
4.After you click "Next", in the second step select whether you wish to import a single 1up or the whole sheet layout. When "Import oneups" is set, you can select or deselect single 1ups for import in the list on the left.

|
Controls in the "Import file" wizard - Second step |
|
|---|---|
|
Left side |
|
|
Import oneups |
(Only cff, cf2, dds, dde, ds2, dd3, evd) Select this option if you wish to insert a specific 1up. |
|
Import flat layout |
(Only cff, cf2, dds, dde, ds2, dd3, evd) Select this option if you wish to import the entire sheet layout as a single 1up drawing. |
|
Import layers in one drawing |
(only dxf, dwg) The layers selected in the "Layers" group are imported into a drawing. A separate drawing is generated for each layer if the layers are not selected. |
|
Insert blocks as 1ups |
(only dxf, dwg) All available blocks are inserted as 1ups. Each block forms a different oneup drawing. |
|
Drawing |
(Only cff, cf2, dds, dde, ds2, dd3, evd) Lists the 1ups available in the file. |
|
Layers |
(only dxf, dwg) Lists the layers available in the file |
|
Pages |
(only pdf) Lists the pages available in the file. |
|
Select all |
Selects all the elements in the above table (1ups, layers or pages). |
|
Deselect all |
Deselects all the elements in the above table (1ups, layers or pages). |
|
Right side |
|
|
Style Association Filter |
Select the Style associations filter here. |
|
Manage filters |
(only dxf, dwg, pdf) Opens the Dialog "Style Associations Filter" where you can add, edit or delete filters. |
|
Use existing oneups |
(Only cff, cf2, dds, dde, ds2, dd3, n, m) This is where you can select if existing 1ups will be used. |
|
Import units |
(only dxf, dwg) Select the unit of measure in the list box in which the file will be imported. The "drawing size" changes accordingly. |
|
Edit filter |
(only dxf, dwg, pdf) Opens a dialog where you can edit the style association filter. See Dialog "Style Associations Filter". |
|
Drawing size |
Shows the size of the imported drawing in the unit of measure set in "Import units" (e.g. "mm" or "cm"). |
|
|
Scales up the zoom detail in the preview pane. |
|
|
Fits the drawing into the preview pane. |
|
|
Zooms out the drawing in the preview pane. |
|
Layout side: |
(Only cff, cf2, dds, dde, ds2, dd3, n, m) This is where you choose which side of the draft drawing will be loaded: The print side (front, printed side) or the die side (back, view of cutting die). |
|
Back |
Lets you go back to the previous step of the wizard |
|
Next |
Inactive since this is the last step of the wizard. |
|
Finish |
Imports the selected file into the currently selected project and closes the wizard. |
|
Cancel |
Closes the wizard without importing the file. |
Back to Import of an External File into a Current Project.
Back to Import of Additional Files to an Existing Project.


