
Submitting Shapes to CAM Machine (Label Pro)
Prerequisite: This function is contained in Prinect Label Pro.
|
|
"Generate NC file" |
With this function, you can simply export shapes and cutting die layouts.
1.Before exporting CAM files, you should set the used machine type and the storage path in the Prinect Signa Station Preferences. See Cutting Plotter Settings.
2.Make additional export settings. You can do this with "Options > CAM" in the context menu. See CAM properties.
This requires that the "Enabled" check box of the used machines is checked. See "CAM Machines" dialog
3.Open the shape or the layout and click the "Generate NC file" button. The "Set Default Template" dialog displays. Press the "Advanced" button to edit templates. See "New Template" dialog.
4.Select a template and click "OK". The CAM files are exported.
You can set the export parameters for cutting plotter files with the context menu.
Right-click on an empty space in the "Layout" or "1Up" tab.
Choose "Options > CAM". The following menu items are available:
·Machines. The "CAM Machines" dialog opens.
·Templates. The "CAM Templates" dialog opens.
·CAM Environment Export. See CAM Environment Export/Import.
·CAM Environment Import. See CAM Environment Export/Import.
To enable CAM machines, choose "Options > CAM > Machines" in the general context menu. The following dialog displays:
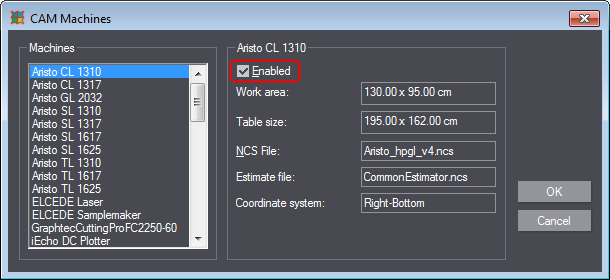
The list box on the left contains popular cutting plotters.
1.Select the cutting plotter you want.
2.Check the "Enabled" check box. The machine can be selected for export only then.
Below, more information about the cutting plotter is displayed.
3.Confirm with "OK".
To create or edit export templates for cutting plotter files, choose the following in the general context menu: "Options > CAM > Templates". The following dialog displays:
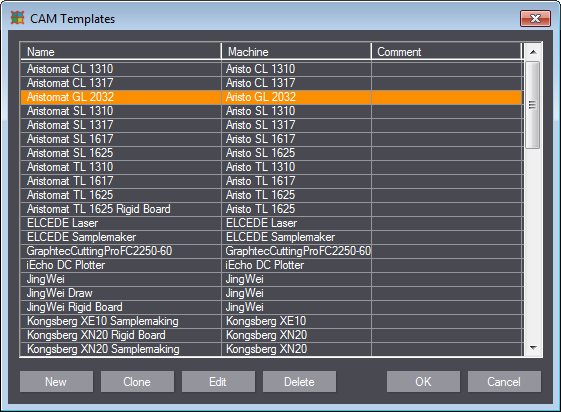
Click "New" to create a new template. See "New Template" dialog.
When done, confirm with "OK".
|
Controls in the "CAM Templates" dialog |
|
|---|---|
|
New |
This lets you create a new template. The "New Template" dialog opens. |
|
Clone |
Click this button to create a new template containing all the settings of the currently selected template. The "New Template" dialog opens. |
|
Edit |
Click this button to edit the selected template. The dialog "Edit Template" opens; it is almost identical with the "New Template" dialog. |
|
Delete |
Click this button to delete templates. |
Choose "Options > CAM > Templates > New" in the general context menu to create new export templates for CAM files. The "New Template" dialog displays.
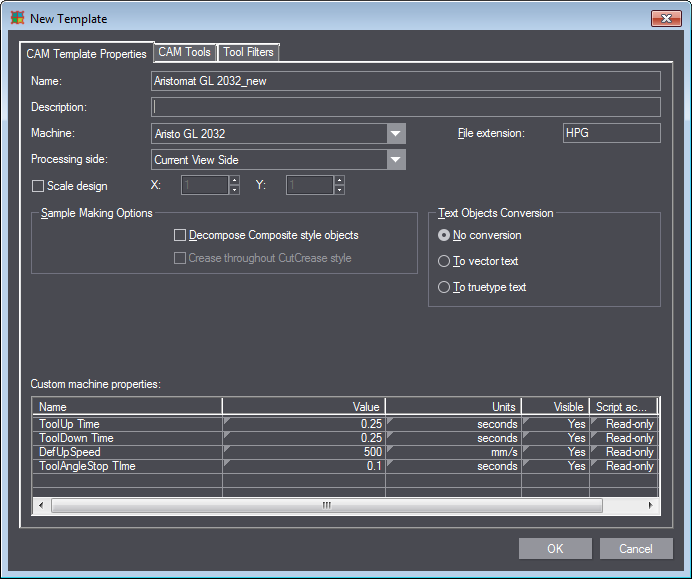
The dialog offers the three tabs "CAM Template Properties", "CAM Tools", and "Tool Filters" where you can make all settings relevant for cutting plotters.
Confirm with "OK".
Export
You can export the entire CAM environment if you want to back up or pass on the templates, scripts, and machines available in your system. To do so, choose "Options > CAM > CAM Environment Export" in the general context menu.
A dialog displays where you can select the elements you want to export. Confirm with "OK" and choose a storage location for the environment export file.
Import
To import an existing CAM environment file, choose "Options > CAM > CAM Environment Import" in the general context menu. A dialog displays where you can select the file you want. Confirm with "OK" to import the CAM environment.
Return to Tool Bar in the "Layout" tab.