Mode "Generate Bleed by Levels of Importance"

big_icon_generatebleed.png


"Generate Bleed by Levels of Importance"

If an image is printed on a cardboard box, a bleed should be defined for typographic reasons.

You can add a bleed line to a 1up in this mode. In this context, you define areas of different levels of importance to be able to solve clip path conflicts automatically when creating a layout.

1.Click the "Generate Bleed by Levels of Importance" button.

IconNote00074.png

Note: If conflict resolutions are applied to an already existing trim, this trim is locked. For this reason, a warning is issued saying that the previous trim is locked. You have the option of unlocking it.

2.The edit bar shown below appears:

beschnitt.png


3.Click the "Important area" button and select all areas of the 1up where images are to have pri­ority. These could be all panels visible from the outside, for example.


icon_defimpparts.png


"Important area"

4.Click the "Unimportant area" button and select the unimportant areas, e.g. flaps.


icon_defunimpparts.png


"Unimportant area"

5.Click the "No artwork area" button and select all the areas without image that for this reason do not require a bleed.


icon_defineparts.png


"No artwork area"


generatebleed.gif


6.Click the "Generate Bleed" button.


icon_bleedoffset.png


"Generate Bleed"

A dialog displays where you can select the width of the bleed.

BleedGenerationOptions.png


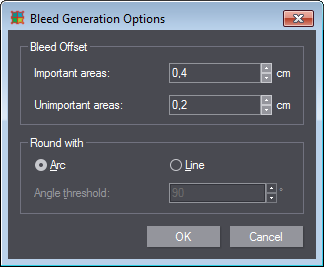
7.The bleed is generated after you click "OK".

bleed.gif


Controls in the Mode "Generate Bleed by Levels of Importance"

icon_allebereiche.png 

"Set All Regions"

Here you set the importance of all regions to a single value. Clicking the button opens a dialog where you can choose if all parts are to be assigned with "No artwork area", "Unimportant area" or "Important area".

icon_defineparts00075.png 

"No artwork area"

Click this button and then the area that will not contain any images.

icon_defunimpparts00076.png 

"Unimportant area"

Click this button and then the area to have a lower priority for bleed generation.

icon_defimpparts00077.png 

"Important area"

Click this button and then the area to have top priority for bleed generation.

icon_bleedoffset00078.png 

"Generate Bleed"

Click this button to generate the bleed after you have defined all areas. The dialog "Bleed Generation Options" opens:

Dialog "Bleed Generation Options"

Bleed Offset

You can define the offsets to important and unimportant areas here.

Round with

Here you define how the bleed is to be rounded at the corners.

Sheet

Here you define how the bleed is to be rounded with arcs.

Line

Here you define if the edges are to be closed with straight lines.

Angle threshold

If "Line" was selected, undesired long bleed lines result with small angles. To prevent this, all corner angles smaller than the specified value will be separated with an additional line.


Continue with Mode "Modify Bleed".

Back to Tool Bar in the "1up" Tab.