Shooter 2 WebUI can be invoked from any web browser within the local network. You can also "remote control" another Prinect Shooter by entering the address of another Shooter computer in the web browser and logging in to it.
Open the Shooter 2 WebUI by typing the following in the address line of your web browser: http://<ShooterComputer>:8080.
The following web browsers in the current version are recommended:
•Mozilla Firefox
•Google Chrome
•Apple Safari
When using other web browsers, there may be restrictions in the display. A message appears, pointing out that unexpected problems may occur.
Additional features of the Printmanager:
•You can manually sort jobs in the Printmanager by dragging-and-dropping them. This lets you define your output priority.
•The Printmanager also has a special Bitmap Viewer (Prinect ImageViewer) that lets you check the TIFF-B bitmaps of the print jobs on the screen before they are output. The Prinect ImageViewer includes a zoom function that you can use to scale up the view of the bitmaps to pixel size.
Virtual Printers and Data Transfer
Virtual printers are the "input channels" of Prinect Shooter. How the TIFF-B files are transferred from the workflow system to Prinect Shooter depends on the type of workflow system:
•Communication is through the JDF protocol if a Prinect Manager or another suitable workflow system is upstream. Real-time exchange of data is possible with this protocol. Information about the state of the rendered data prepared by the TIFF-B Engine Manager is updated constantly and sent to Prinect Shooter. In this configuration, it is normally not necessary to set up a special folder for filing the TIFF-B data. Setup is done automatically when an output sequence (ImpositionOutput) is defined. The TIFF-B folder is then located in the "PtJobs" section of the Prinect server. This is where the TIFF-B files are "retrieved" and processed by Prinect Shooter based on the data from the JDF protocol.
•The TIFF-B jobs are sent to Prinect Shooter via hotfolders if a third-party workflow system that cannot use the JDF protocol is upstream. In this case, you first create an output folder on the server PC of the workflow system and share it in the network. Then you map this folder as a mapped volume to the Prinect Shooter PC. After this, you configure a virtual printer on Prinect Shooter and assign it to the mapped volume. The mapped volume now becomes the "hotfolder". This means that Prinect Shooter checks whether TIFF-B data were transferred to this folder and processes them automatically.
Several virtual printers can be created, for example, to manage different plate sizes or punch settings separately.
You can use the drive monitor to monitor the capacity of the local hard disk drives of the Prinect Shooter PC. You can use this tool to prevent one of the hard disks of the Prinect Shooter PC from "overflowing" with data so that as a result the system may not be able to continue to work. If the data load on a monitored drive exceeds a preset limit, job processing in Prinect Shooter is stopped and you will be given the opportunity to free some space on the drive in question. See Drive Monitor.
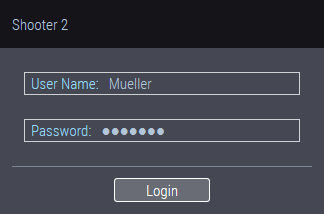
You must enter a user name and a password after the user interface starts. The default passwords are:
|
User Name: |
Password: |
|---|---|
|
Admin |
Admin |
|
Poweruser |
Poweruser |
|
User |
User |
|
Guest |
Guest |
Users have different permissions:
|
User Name: |
Permissions: |
|---|---|
|
Admin |
May change everything, incl. passwords |
|
Poweruser |
May edit jobs, change and delete priorities |
|
User |
May edit jobs and change priorities but not delete them |
|
Guest |
May only view data |
If you save the login data in the web browser, you can choose from the users stored in the web browser the next time you start the program, and the password is already entered.

Note: You can change the password in "Administration > Users" in the "General" tab. See "General" tab.
MDS User
It is also possible to log in to the Shooter 2 WebUI as an "MDS user" (a user set up in the "Master Data Store"). More details about MDS user administration can be found in the Online Help of the Prinect Manager.

Prerequisite: You must have first set up a connection to the Master Data Store via the Printmanager (Java UI).