
The "Contents" step with its two sections, "Contents" and "Document Inspector", imports PDF and PS files to the job currently open on the one hand and on the other assigns the pages found in the files. In addition, the key data of the imported file and the properties of the single pages are displayed.
Note: Remember that the "Contents" step is valid for the whole job. You can place PDF files, for example, on several product parts of the job.
You can import the data to one or more layers.
You start import of PDF and PS files in the "Contents" step using the context-sensitive menu in the "Contents" section. You will find a description of the "Document Inspector" section in Document Inspector .
You can drag-and-drop PDF files or pages from the "Contents" section to the graphic window. These are then automatically placed on plates, pages of the job currently open. You can find more details about drag-and-drop in Drag-and-Drop.
An alternative means of import is to use drag-and-drop from the operating system. See Drag-and-Drop for details.
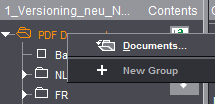
•You can import PDF and/or PS files to the job currently open in the "Contents" section. Display the context-sensitive menu, click "Documents" and select a PDF or PS file.

•Import of PDF files to a number of layers for positioning by dragging-and-dropping them to the "Contents" section.

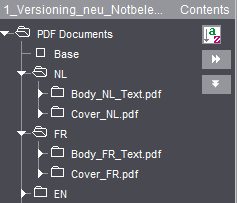
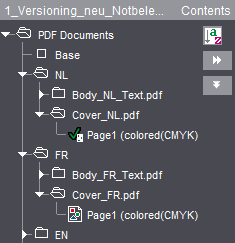
•After the import, you can assign the pages in the PDF file to the open job (with drag-and-drop, see Drag-and-Drop). The pages in the PDF file are shown as a list. In the screenshot below, you can see that the PDF file has an assigned page in the job. However, the PDF file in "FR" is not yet assigned to the job.

•A double click on imported pages opens the "Document" tab in the graphic window and their data display in the Document Inspector.
•The following functions are found in the context-sensitive menu when a PDF file or pages are selected:

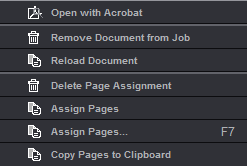
•"Open with Acrobat"
The whole PDF file is opened and displayed with Acrobat. See also Select External Executables.
•"Remove Document from Job"
The document you selected is deleted from the job.
•"Delete Page Assignment"
Deletes assignment of the selected page(s)/1up(s) in the job. The pages/1ups in the job no longer have any assigned content.
•"Assign Pages"
The selected pages are assigned to the job. The pages/1ups are assigned automatically to the next blank pages in the job.
The Assistant that helps you assign pages displays. The Assistant shows you the position and layer of the assigned PDF file and makes it easy for you to assign PDF files to the job. It also makes it easy to replace pages later, for example, from correction PDFs.
The Assistant for assigning pages is recommended mainly for extremely large jobs, jobs with several layers and/or for jobs with versions.
When a PDF document is selected, you can start the Assistant either using the context menu or with the F7 key. Invoking the Assistant with the F7 also works if the layer is selected.
In the case of jobs with several layers, you can toggle the open Assistant by marking a different layer in the tree structure of the "Contents" section. The Assistant for assigning pages stays open when you select a different document in the tree structure and it switches automatically to the layer or assignment table you selected. It is possible that the window may go to the background in this process. For that reason, we recommend placing the window of the Assistant beside the main window or on a second screen.
When you click "Apply", the assignment as set in the assignment table is applied and displays in the graphic view.
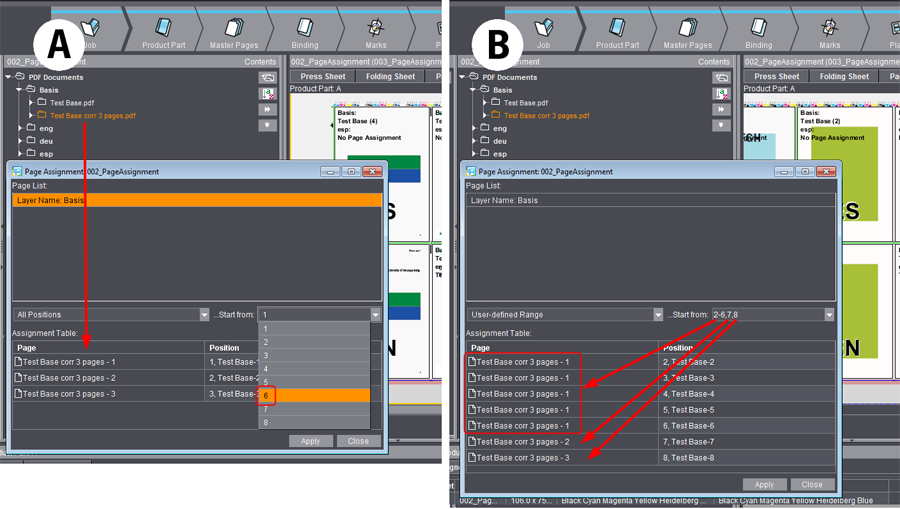
In this process, you can select in the list whether all positions will be assigned or, for example, only even or uneven ones. When you select "User-defined Range", you can define custom assignments in the "Start from" box by specifying position ranges, adding via commas or grouping in parentheses. Example: 1-6,7,(9,12).
Example: For an 8-page document with a base version and three language versions, you receive a PDF with three pages to be replaced in the base version, e.g. modified background graphics.
Procedure:
1.In "Contents", mark the base and add the PDF document.
2.Mark the document and press F7 to invoke the Assistant for assigning pages.
·The last three pages (= 6 thru 8) are to be replaced: Select "All Positions", "Start from: 6" (example A)
·Single pages are to be replaced, e.g. pages 4, 5 and 8. In this case, enter the numbers of the pages to be replaced, separated by commas, as the user-defined range: Select "User-defined Range", "Start from: 4,5,8"
·The first page from the correction PDF is to be used for all pages from 2 thru 6. The other two pages are to replace the last two pages: Select "User-defined Range", "Start from: 2-6,7,8" (example B)

•"Copy Pages to Clipboard"
The selected page/1up is copied to the clipboard and can be pasted at any place you want, for example, in the graphic window in the "Page List" tab. See also "Paste Pages from Clipboard".
You can find the Document Inspector in the "Contents" step. It displays by default, but you can also minimize it using the arrow on the border.
This provides you with general information about the document currently selected in the "Contents" section.
Properties
The properties of the selected PDF document are shown. The information comes from the layout application.

Note: Acrobat Distiller automatically starts if a PostScript document is to be processed with Prinect Signa Station and converts it to a PDF document. You don't have to remember any special settings in Acrobat Distiller because this is taken care of by the job options in Prinect Signa Station.
You must enable the following options for your setup in "Preferences > Adobe PDF Settings > Advanced" if Acrobat Distiller runs on a different computer for the conversion of a PostScript document to a PDF document:
•Process DSC Comments
•Preserve Document Information from DSC
The colors used in the entire document, including spot colors, are shown in this list.
If you are working with separated PDF, you can change the color names in the table by double-clicking the table item. The new name is then used in the job.
Only available if a PDF file with variable data is loaded in the job. You load a PDF-VT file in the usual way in the "Contents" step.
All the data sets of a PDF-VT document display in the Document Inspector.
For output of a PDF-VT file, see Press Sheets .
No. of Records
Shows the number of data records (pages) in the file.
Current Data Set
Text box indicating the data record in the graphic view.
This provides you with information about the PDF page you have currently selected. It is also possible for you to modify or move the trim box of the PDF page.
Area of application
This parameter lets you define where the changes will be applied if changes are made.
The default setting is "selected". The selected page and PDF file are shown in the caption bar of the window.
You can also select "even" where all even pages will be changed, "odd" for changes to all odd pages and "all" where all pages of the selected PDF file will be changed.
If you select "all", each change will be applied at once and without confirmation to all the pages/1ups in the PDF file. You can view the changes right away in the "Document" tab in the graphic window.
Selection
The list box shows the bounding boxes defined in the PDF file. Only different sized boxes are shown.
The trim box always forms the basis.
If you select a larger media box, for example, this is used as the basis for offsets. The selected media box becomes the trim box.
The list box changes to "user-defined" if you change the values below because changing them means that they are inevitably different to those of the trim box.
Rel. position X/Y
This option lets you move the trim box relative to the content of a PDF page. As a result, the motif can be in a different position in the trim box. The bottom left corner is the reference point.
This can be used in PDF page assignment if the following setting was selected for the master page in the "Master Pages" step > "Placement rule for assigned pages/1ups":
•"Automatic" mode or
•"By user (view options)" mode with "From trim box" offset.
A change in the size of the trim box ("Document" tab in the graphic window) does not affect positioning. Only the position of the bottom left corner is important.
You can use offset accurately, with direct visual control of X and Y direction in the graphic window, when you click the offset box with the mouse cursor and then use the arrow keys. Offset goes in the opposite direction if you hold down the Alt key at the same time.
You will find a description of the bounding boxes (e.g. trim box) in the "Glossary".
You can read how Prinect Signa Station evaluates the bounding boxes in the PDF file in the Placement rule for assigned pages.
Width/Height
The size data for the trim box is shown in these boxes.
Use the folder button to the right to access standard trim box sizes in the resources at any time.
Scale X/Y
The PDF page is scaled during placement but this is only advisable if the placement rule for assigned pages is set to "Automatic" in the master page.
Orientation
The PDF page is rotated during placement but this is only advisable if the placement rule for assigned pages is set to "Automatic" in the master page.

Note: Scaling and orientation of the contents are only applied to the document and not to the layout/scheme as in the Page/1up Inspector. The advantage of this, when working with the Prinect Prepress Manager, for example, is that, if you want to use a different scheme for the document, you only need to replace the scheme without having to enter your data again. You can assign the data described here to a PDF page in the Prinect Prepress Manager as well. Prinect Signa Station uses them and shows them in this inspector.
The colors used in the selected page, including spot colors, are shown in this list.